Loading ...
Loading ...
Loading ...
Large Unit Heater
19
Operating Instructions and Owner’s Manual
The target manifold gas supply pressure is indicated in Table 5
and Table 6 :
NOTICE: Manifold pressure of the heater is pre-set at the factory. No
adjustment should be necessary.
During the verification process, a tolerance of +/- 5% of the full scale is
acceptable due to varying atmospheric conditions.
If manifold pressure is outside of this tolerance, then an adjustment
may be necessary.
9. Set the adjustment screw until reach the pressure indicated in the
rating plate.
Removing pressure gauge from manifold port on gas valve:
10. Set thermostat or other control device to the lowest set point.
11. After heater has completed the post-purge cycle, turn off the
electrical power to the unit heater.
12. Turn off the shut-off gas valve.
13. Remove the pressure gauge tube and the manometer.
14. Close the screw inside the manifold pressure hose connector (see
Figure 13).
15. Turn on the shut-off gas valve.
16. Set thermostat or other control device to the highest set point.
17. Wait until the unit starts.
18. Leak check the manifold pressure hose connector using a soap
solution or equivalent method as described in ANSI Z223.1 (NFPA
54).
Prior to Leaving Job Site
Prior to leaving the job site, verify that:
• Service access door is properly secured to the unit.
• The heater is clear of any objects that would interfere with
the proper air circulation or that violate the listed clearance to
combustibles.
• Air directional louvers are adjusted for desired air flow and are
not shut or adjusted beyond 60º�from perpendicular to the face of
the unit.
• Manual gas shut off is ON.
• Electrical power is ON.
• Thermostat is set to desired temperature.
• Properly dispose of all packaging materials.
• Check to be sure you have all of your tools.
• Leave the Installation, Operation, Maintenance and Parts Manual
to the owner or end user.
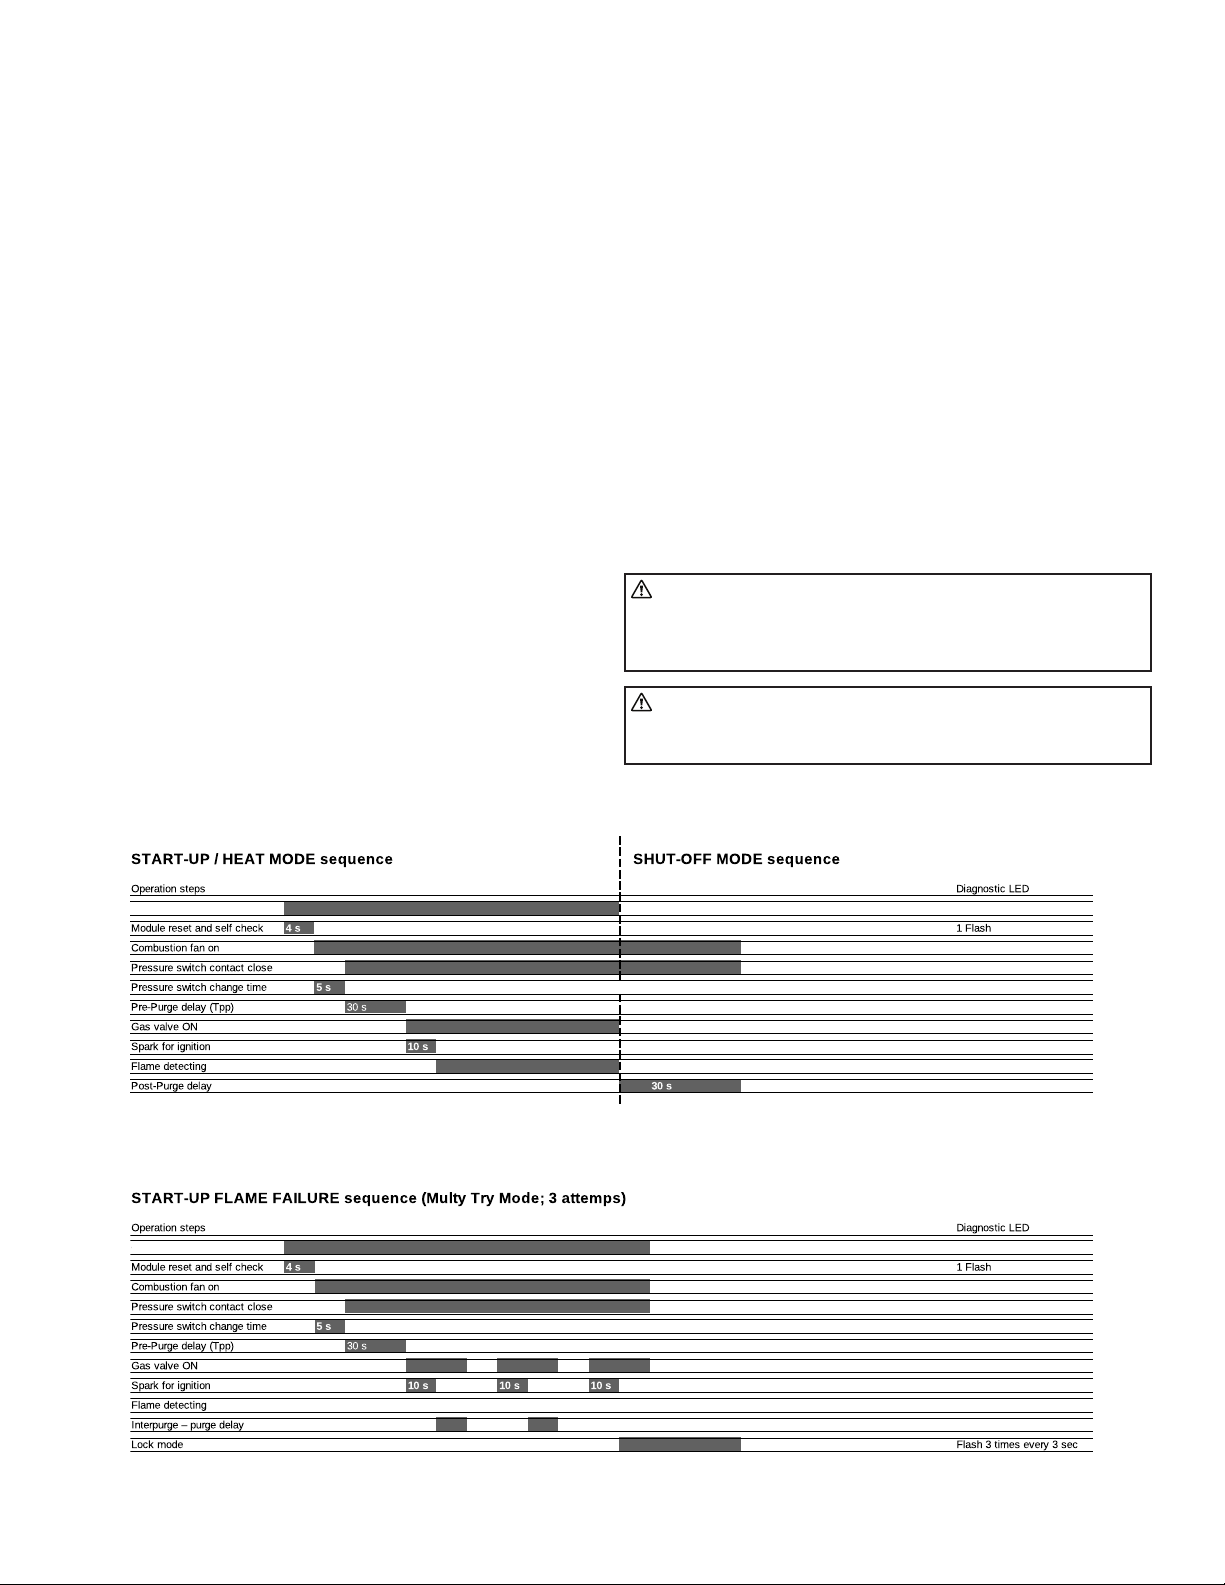
UNIT WORKING SEQUENCE
WARNING: FOR YOUR SAFETY READ BEFORE LIGHTING
BEFORE LIGHTING smell all around the appliance area for
gas. Be sure to smell next to the floor because some gas is
heavier than air and will settle on the floor.
WARNING: This appliance does not have a pilot ignition. It is
equipped with an ignition device which automatically lights
the burner. Do not attempt to light the system by hand.
Start-Up Sequence
Start-Up Flame Failure Sequence
Call for heat
Call for heat
Loading ...
Loading ...
Loading ...