Loading ...
Loading ...
Loading ...
27
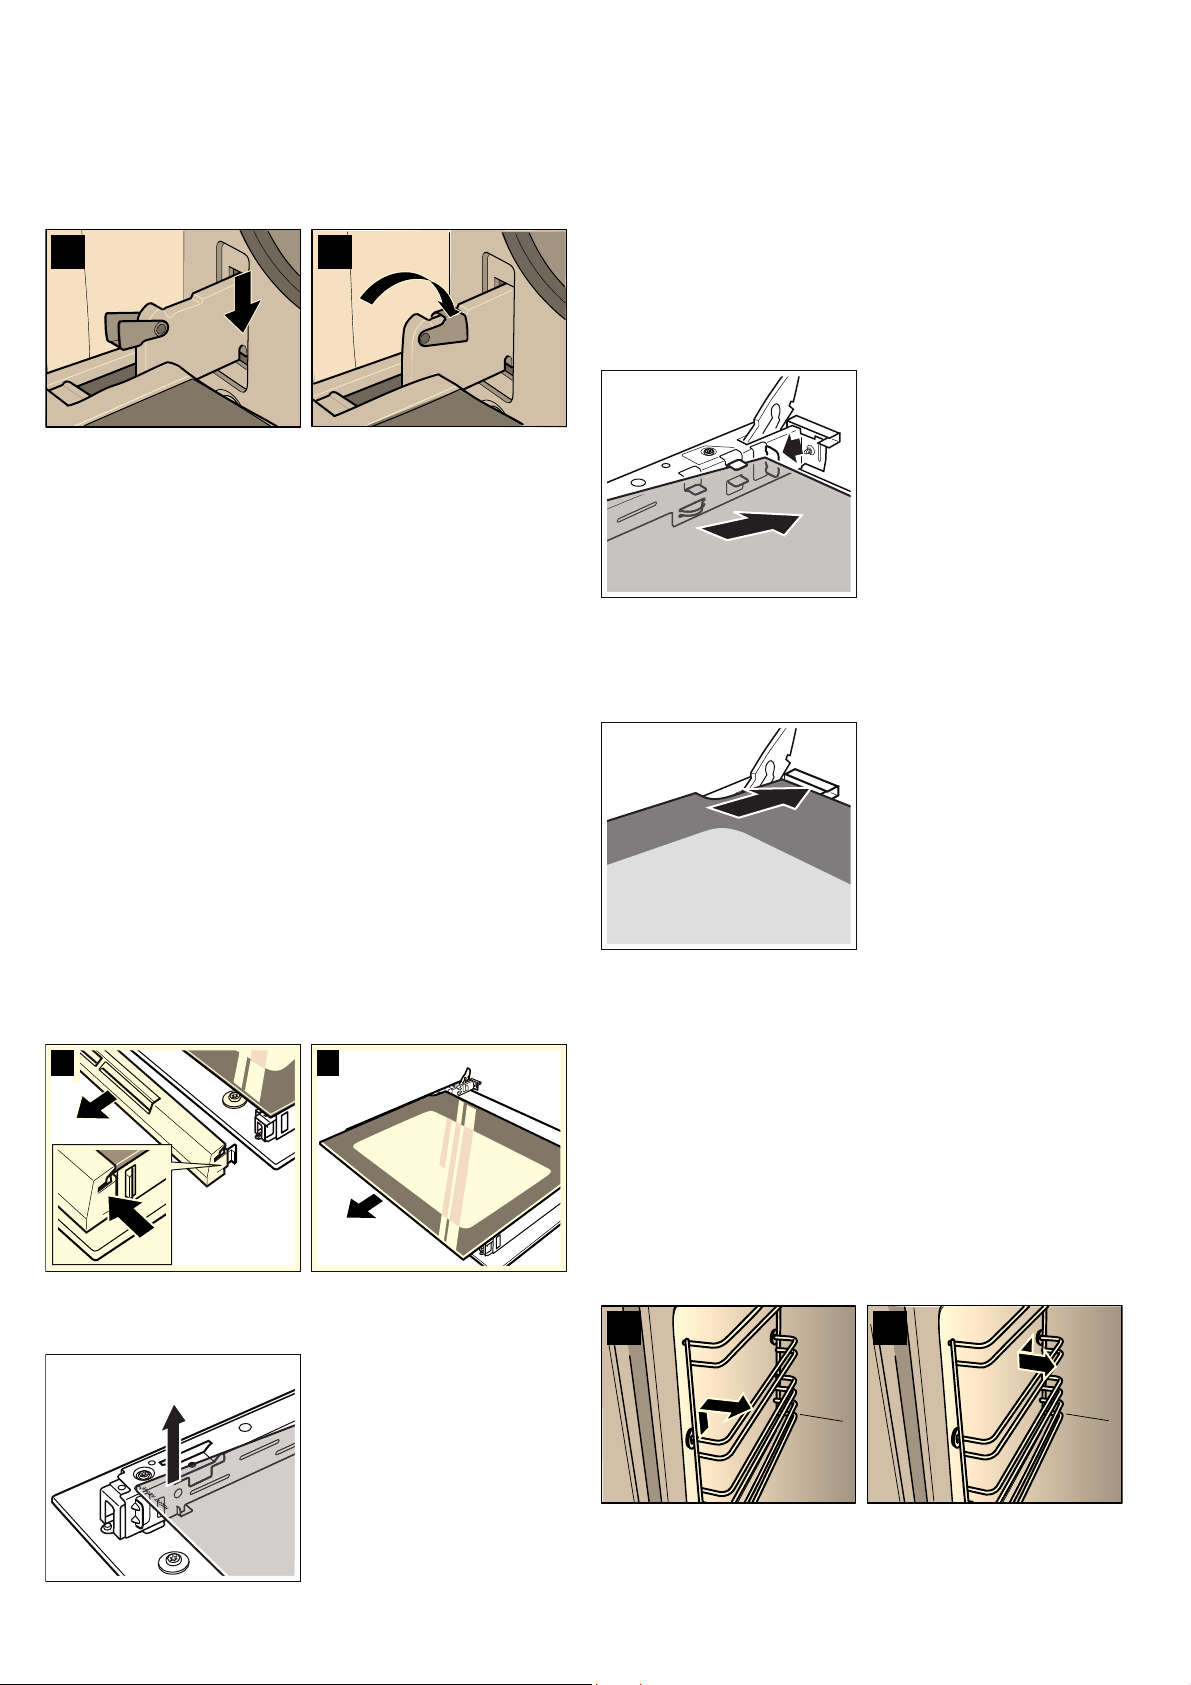
Fitting the appliance door
1. Insert the hinges in the left and right-hand holders (figure C).
The notch on both hinges must engage.
2. Open the appliance door fully.
3. Close the locking levers on the left and right-hand side fully
(figure D).
The appliance door is secured and can no longer be
removed.
4. Close the appliance door.
Cleaning the door panels
To facilitate cleaning, you can remove the inner door panels
from the appliance door.
: Risk of injury!
The components inside the appliance door may have sharp
edges. Take care not to cut yourself. Wear protective gloves.
: Risk of injury!
The appliance must not be used again until the door panels
and appliance door have been correctly fitted.
Removing the door panel
Note: Before removing, make a note of which way round the
door panel is fitted, so that it is not refitted the wrong way
round.
1. Unhook the appliance door and lay it on a soft, clean surface
with the front side facing downwards (see section: Removing
and installing the appliance door).
2. Pull off the cover at the top of the appliance door. Press in
the tabs on the left and right using your fingers (fig.A).
3. Lift the door panel slightly and pull it out (Fig. B).
Removing the intermediate panel
Lift the intermediate panel slightly and pull it out towards you.
Cleaning
Clean the door panel with glass cleaner and a soft cloth.
: Risk of injury!
Scratched glass in the appliance door may develop into a
crack. Do not use a glass scraper, sharp or abrasive cleaning
aids or detergents.
Fitting the intermediate panel
Note: During installation, make sure that the lettering "top right"
is upside down at the bottom left.
Insert the intermediate panel towards the back as far as it will
go.
Fitting the door panel
1. Insert the door panel at an angle towards the back into both
brackets as far as it will go. The smooth surface must face
outwards.
2. Put the cover back in place and press on it until it clicks in
place.
3. Refit the appliance door.
Cleaning the hook-in racks
You can remove the hook-in racks for easier cleaning.
: Risk of burning due to hot components in the cooking
compartment!
Wait until the cooking compartment has cooled down.
1. Push the hook-in rack upwards at the front and unhook to the
side (figure A).
2. Pull the hook-in rack forwards at the rear and unhook to the
side (figure B).
&
'
%$
$ %
Loading ...
Loading ...
Loading ...