Loading ...
Loading ...
Loading ...
42
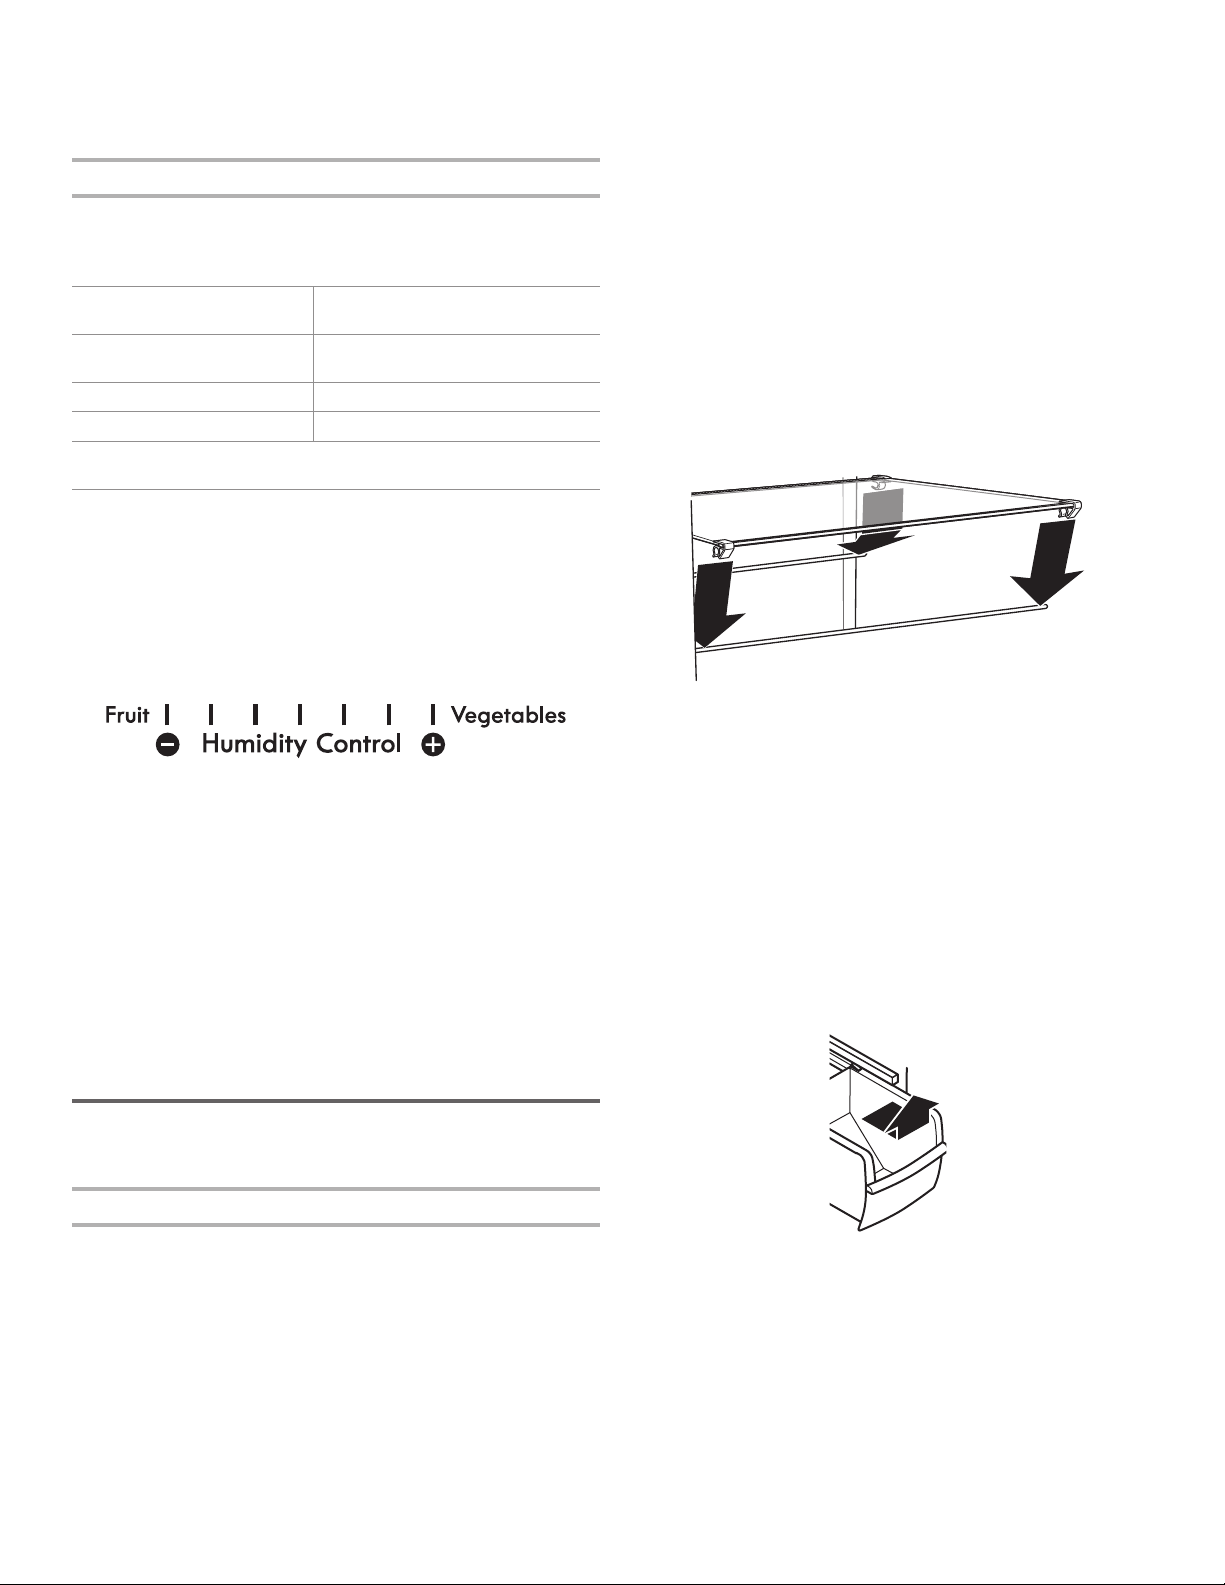
2. Replace the meat drawer cover in the supports or the tracks
located on the side walls of the refrigerator and slide the front
of the cover into place. Repeat these steps to replace the
vegetable drawer cover.
Meat storage guide
Store most meat in its original wrapping as long as it is airtight
and moisture-proof. Re-wrap if necessary. See the following chart
for storage times. To store meat longer than the times given,
freeze it.
Fresh sh or shellsh Use the same day as they were
purchased
Chicken, ground beef,
variety meats (liver, etc.)
1-2 days
Cold cuts, steaks/roasts 3-5 days
Cured meats 7-10 days
Leftovers - Cover leftovers with plastic wrapping, aluminum foil or
store them in plastic containers with airtight lids.
Foods or manufacturers have different storage times. Follow their
instructions.
CRISPER DRAWER HUMIDITY
CONTROL
(on some models)
You can control the amount of humidity in the moisture-sealed
crisper drawer. Adjust the control to any setting between Fruit
(left side) and Vegetables (right side).
Fruit (left side) (open position) lets moist air out of the crisper for
the best storage of fruits and vegetables with skins.
■ Fruit: Wash, allow to dry and store in the refrigerator in
plastic bag or in the crisper. Do not wash or hull berries
until they are ready to use. Sort and keep berries in their
original container in the crisper or store in a loosely-closed
paper bag on a refrigerator shelf.
■ Vegetables with skins: Place them in plastic bags or plastic
containers and store in the crisper.
Vegetables (right side) (closed) keeps the air in the crisper moist
for the best storage of fresh leafy vegetables.
■ Leafy vegetables: Wash in cold water, drain and trim or
remove bruised and discolored areas. Place them in a
plastic bag or plastic container and store in the crisper.
FREEZER FEATURES
Your model may have some or all of these features.
Frozen Food storage guide
Storage times will vary according to the quality and type of food,
the type of packaging or wrapping used (it should be airtight
and moisture-proof) and the storage temperature. Ice crystals
inside a sealed package are normal. This simply means that the
moisture and the air inside the package has condensed, creating
ice crystals.
Put no more unfrozen food into the freezer than it will freeze
within 24 hours (no more than 2 to 3 lbs of food per cubic foot
[907 to 1,350 g per 28 L] of freezer space). Leave enough space
in the freezer for air to circulate around packages. Leave enough
room to allow the freezer door to close tightly.
For more information on preparing food for freezing, check a
freezer guide or a reliable cookbook.
FREEZER SHELF
(the number of shelves will depend on the model)
To remove and replace the bottom shelf:
1. Lift the front and the rear part of the shelf up and remove
it from the cabinet. Make sure that you do not remove the
shelf’s attachment rods.
2. Replace the shelf by lining up the rods with the tracks in the
cabinet. Apply a little pressure to the shelf to secure the rods
into the tracks.
To remove and replace the middle and top shelf:
1. With your hand, push the bottom shelf upwards until it
disengages from the attachment rod. Pull on the shelf until it is
released from the rear rod. Remove the shelf from the cabinet.
2. To replace the shelf:
■ Insert the rods into the support holes. Push the rods
downwards until they click, which means that they have
engaged in the support hole.
■ Identify the front and the rear edges of the shelf
■ Place the rear edge of the shelf on the rear rod and push
the shelf until the rod clicks into the rear edge (hold the
front of the shelf up while you push).
■ Lower the front of the shelf until the front edge is above the
rod and push the shelf down until the rod clicks into the
rear edge.
NOTE: Make sure that both sides of the shelf are level, i.e.
aligned in the right support holes, and that the shelf is secure.
FREEZER COMPARTMENT
(on some models)
The freezer compartment can be used to store bags of frozen
fruit and vegetables that could fall off the freezer shelves.
To remove and replace the freezer compartment:
1. Remove the compartment by sliding it out as far as the stop.
Lift the front of the compartment and slide it right out.
2. Replace the compartment on its rails. Lift the front of the
compartment slightly while pushing it past the stops.
Loading ...
Loading ...
Loading ...