Loading ...
Loading ...
Loading ...
88 How to use the robot vacuum cleaner /
如何使用机器人吸尘器
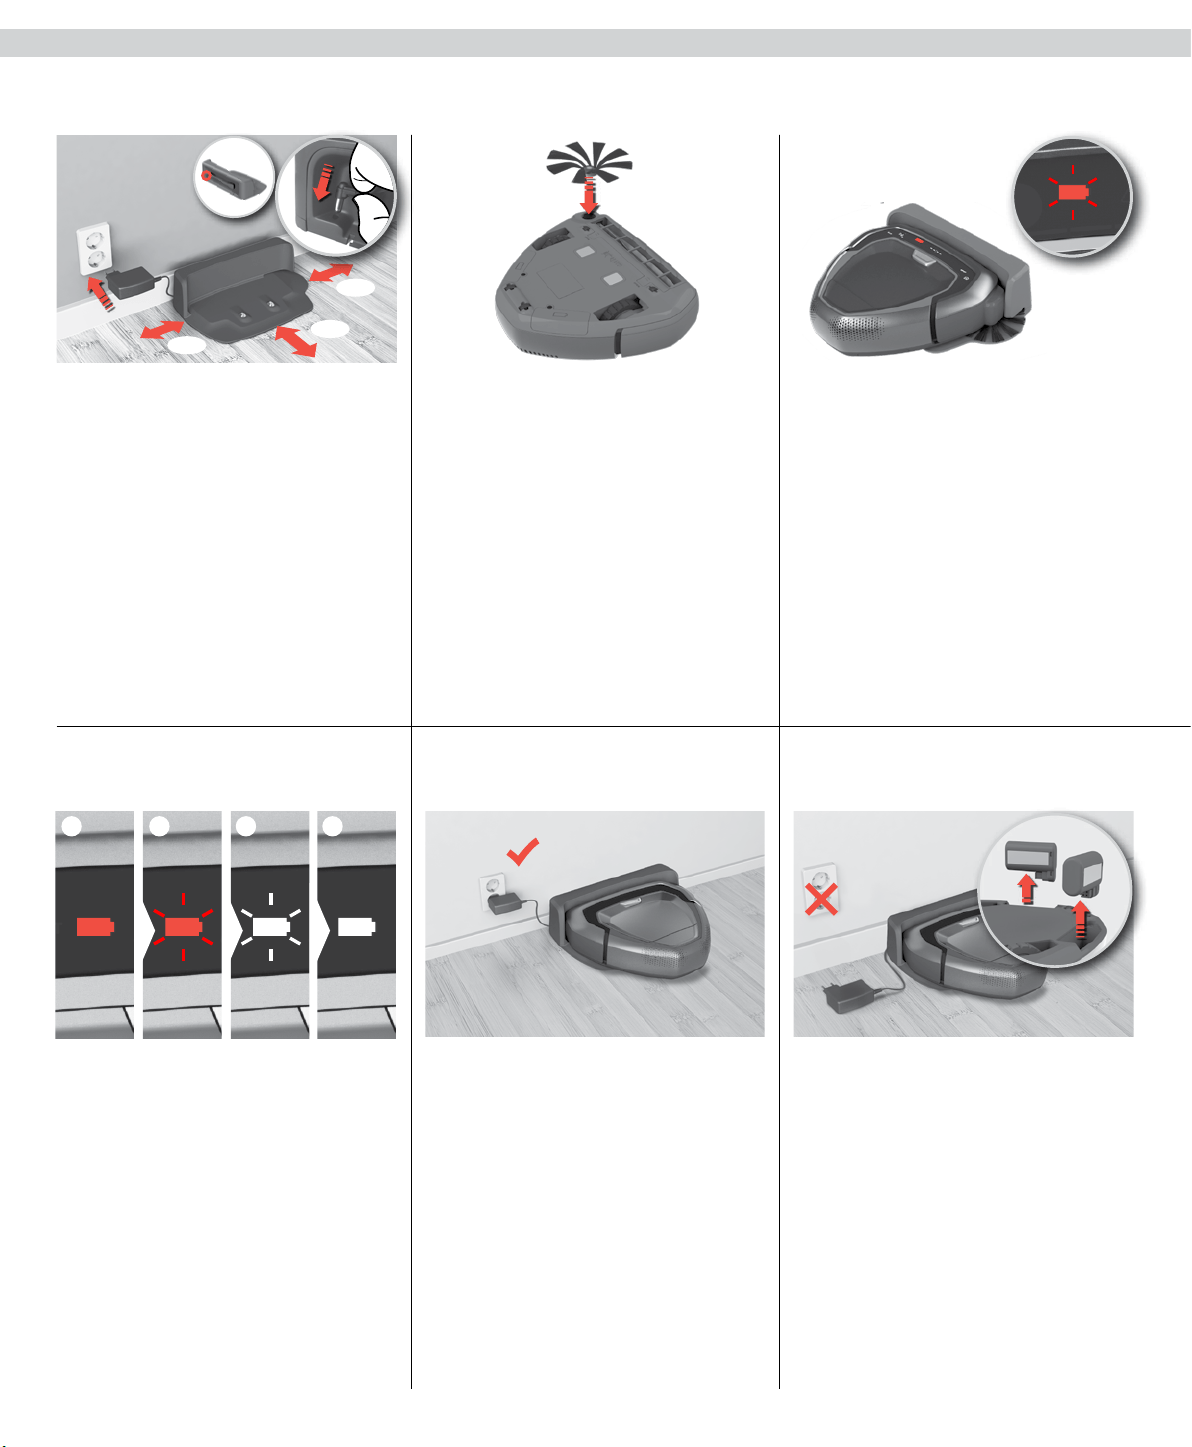
1. Place the Charging base on the floor against the wall.
Plug the adaptor to the power jack on the side of the base.
Connect the Power cord plug to the main socket. Wind up
excessive cord on the back of the base. Make sure there is
an empty area of 0.5 m on the sides and 1.5 m in front of
the Charging base.
WiFi model: Place the base in range of the WiFi router.
2. Place the side brush.
Note: If the robot is used to clean rooms with wall-to-wall
carpet, remove the side brush for best cleaning results.
3. Place the robot on the Charging base.
The Battery icon will pulse, to indicate that the robot is
recharging.
3.将机器人吸尘器放在充电基座上。
电池图标将闪烁,表示机器人吸尘器正在充
电。
Installation of the robot vacuum cleaner
安装机器人吸尘器
1.将充电基座放在地板上,靠在墙边。将适配器
插入底座侧面的电源插孔。将电源线插头连接
到主插座。收起基座背面过长的电源线。确保
充电基座两侧有05 m的空间,前面有15 m的
空间。
WiFi型号:将基座放在WiFi路由器的范围内。
2.安上侧毛刷。
注意:如果机器人吸尘器用于清洁完全覆盖地
毯的房间,请取下侧毛刷,以获得理想清洁效
果。
2. To preserve the battery life and performance:
- Always keep the robot charging when not in use.
- Charge it as soon as possible in the charging base after the
cleaning cycle. Waiting too long might affect the batteries.
2.为维持电池寿命和性能:
- 始终保持机器人吸尘器在不使用时充电。
- 在清洁周期后,在充电基座中尽快充电。等待
太久可能会影响电池。
3. Storage (not plugged): In case the robot is stored
without being charged for a longer period of time, remove
the batteries and store them separately. (Charge batteries
before removing them).
To remove the batteries see instruction page 15.
3.存放(未插入插座):如果机器人吸尘器需在
较长时间不充电的情况下存放,请取出电池并
单独存放。(在取出电池之前对其充电)。
如何取出电池,请参见第15页说明。
1. Red battery (A) indicates that the robot needs to get
charged.
Red light pulse (B): The robot is charging – Low
charging level.
White light pulse (C):The robot has charged enough to
be used. (Press Play/Pause button to clean.)
White light (D): The robot is ready for use.
Full charging time is ~
3 hours.
1.红色电池(A)图标表示机器人吸尘器需要充
电。
红灯闪烁(B):机器人吸尘器正在充电 – 电量
较低。
白灯闪烁(C):机器人吸尘器所充电量已足够
使用。(按运行/暂停按钮进行清理。)
白灯(D):机器人吸尘器准备就绪。
充满电约需 3 小时。
电池/充电状态
Battery/Charging status
A B C D
0.5
m
0.5
m
1.5
m
Loading ...
Loading ...
Loading ...