
Loading ...
Loading ...
Loading ...
Emergencies
Turn signals
1
Turning lights
2
6.
Place the bulb holder in
the headlight and ro-
tate to the right all the
way.
Place the bulb holder in
the headlight and pull
the wire clip upwards
until it clicks into place.
7.
Rotate the cover ››› Fig. 108 in the opposite direc-
tion to the arrow as far as it will go.
Always seek the help of a specialist when
chan
ging the Xenon dipped beam and main
beam headlamps ›››
in Introduction on
page 91
.
Note
The illustrations show the left hand head-
light. The s
tructure of the right hand side
headlight is symmetric.
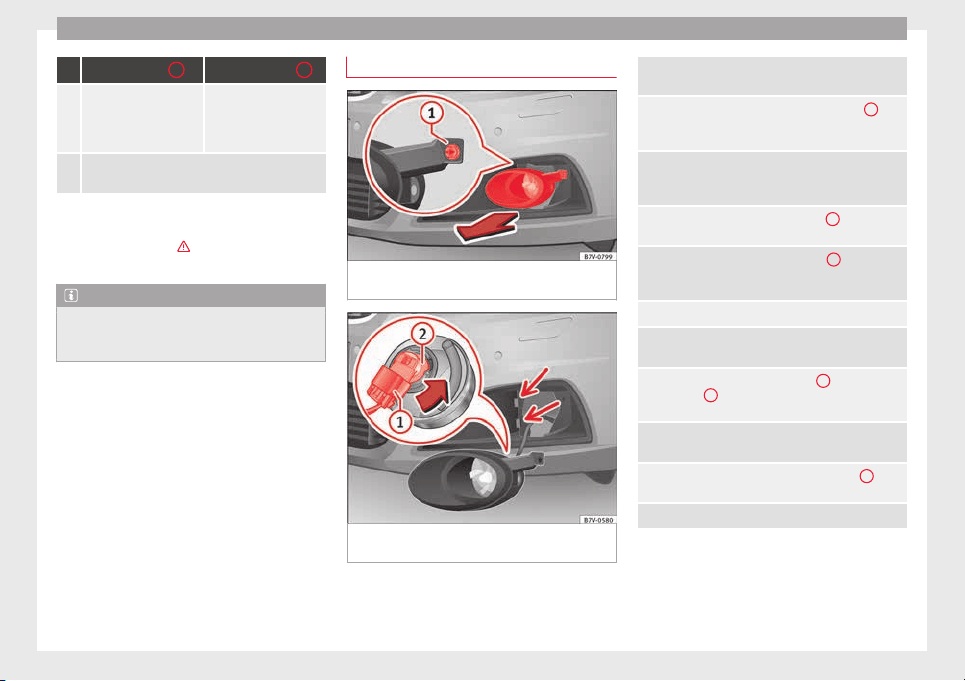
Replacing the front bumper bulbs
Fig. 110 On the right-hand side of the front
b
umper: r
emo
ving the headlights.
Fig. 111 Changing the bulbs in the head-
lights
Complete operations only in the sequence
giv
en:
1.
Pull the cover forwards, in the direction of the ar-
row ››› Fig. 110.
2.
Unscrew the attachment screw ››› Fig. 110
1
us-
ing the screwdriver from the vehicle tool kit
››› page 82.
3.
Tilt the headlight slightly forward and extract it
from its lateral attachments ››› Fig. 111 (small ar-
rows).
4.
Release the connector ››› Fig. 111
1
and remove
it.
5.
Rotate the bulb holder ››› Fig. 111
2
to the left all
the way, in the direction of the arrow, and pull it
out backwards together with the bulb.
6. Replace the faulty bulb with a new identical bulb.
7.
Place the bulb holder in the headlight and rotate
to the right all the way.
8.
Insert the connector ››› Fig. 111
1
on the bulb
holder
2
. The connector must audibly click into
place.
9.
Place the headlight into its position ››› Fig. 111
(small arrows) and tilt it backwards.
10.
Tighten the attachment screw ››› Fig. 110
1
us-
ing the screwdriver.
11. Replace the cover on the bumper ››› Fig. 110.
94
Loading ...
Loading ...
Loading ...