Loading ...
Loading ...
Loading ...
Operation
●
Lif
t
the shelf
off in direction of the arrow
››› Fig. 165
B
.
●
Insert the shelf into the right-hand support,
pr
e
s
sing down.
Removing the shelf
●
Release the shelf in the direction of the ar-
row ››› Fig. 165
B
and lift it in the direction
of
the arr
o
w
C
.
●
Remove the shelf from the right-hand side
s
up
por
t.
●
In addition, when removing the shelf be-
hind the third row of seats: cover the side lin-
ing supports with their covers.
●
Only with 5 places: support the released
shelf by placing it on the front section of the
boot floor ››› page 166.
WARNING
If the shelf is placed on one of the rear seats,
this c
ould cause serious injury in case of sud-
den braking or an accident.
●
Whenever it the third row seats are occu-
pied, the shelf should be put behind this row.
WARNING
Unsecured or incorrectly secured objects or
animal
s on the rear shelf could cause serious
injuries in case of a sudden manoeuvre or
braking or even an accident.
●
Do not le
ave hard, heavy or sharp objects
(loose or in bags) on the rear shelf.
●
Never transport animals on the rear shelf.
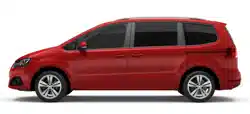
Net partition*
Fig. 167 Unfold the net partition
1
then fold
it
ag
ain
2
and
3
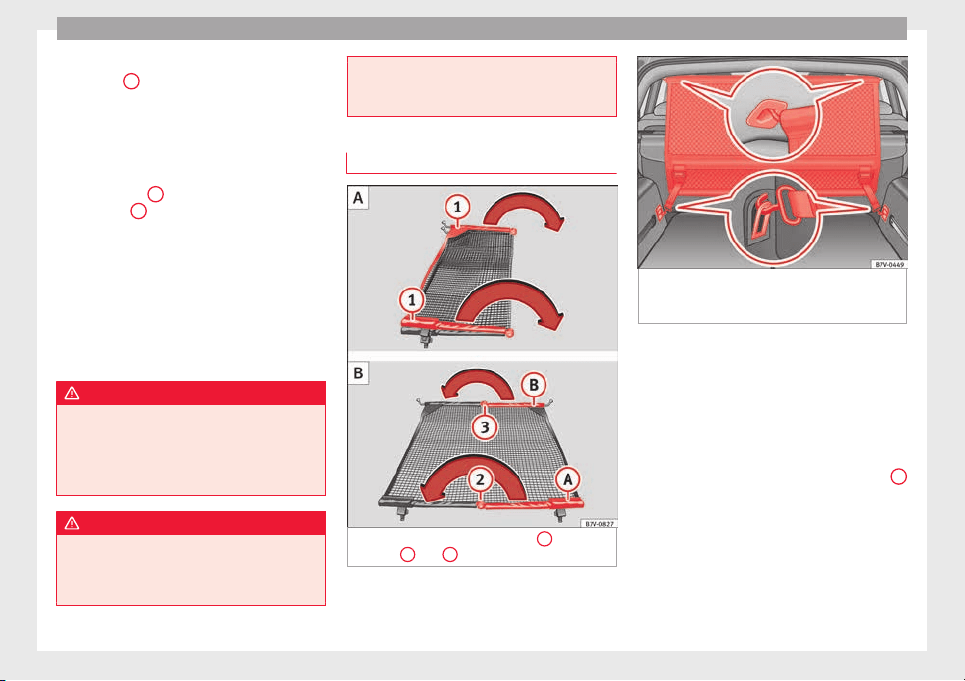
Fig. 168 In the luggage compartment: install
the net
p
ar
tition behind the second row of
seats.
The net partition can prevent objects in the
lug
g
ag
e compartment entering the vehicle
interior / the driver area.
First remove the net from its bag and unfold
it.
Fold out the net partition
Fold out the cross support rods ››› Fig. 167
1
for the net partition fully in the direction of
the arr
o
w u
ntil you hear a “click”.
Installing the net partition behind the sec-
ond row of seats
●
Hook in the net partition on the left-hand
side roof support ››› Fig. 168. To do this,
guide the rod from up to down.
158
Loading ...
Loading ...
Loading ...