Loading ...
Loading ...
Loading ...
8 English
Installation
Installation
Cabinet mount
If installing the oven in a built-in cabinet, the cabinet must have its plastic surfaces
and adhesive parts resistant to temperatures in accordance to EN 60335. Samsung
is not responsible for damage to furniture from the oven’s heat emission.
The oven must be properly ventilated. For ventilation, leave a gap of about 50 mm
between the lower shelf of the cabinet and the supporting wall. If you install the
oven under a cooktop, follow the cooktop’s installation instructions.
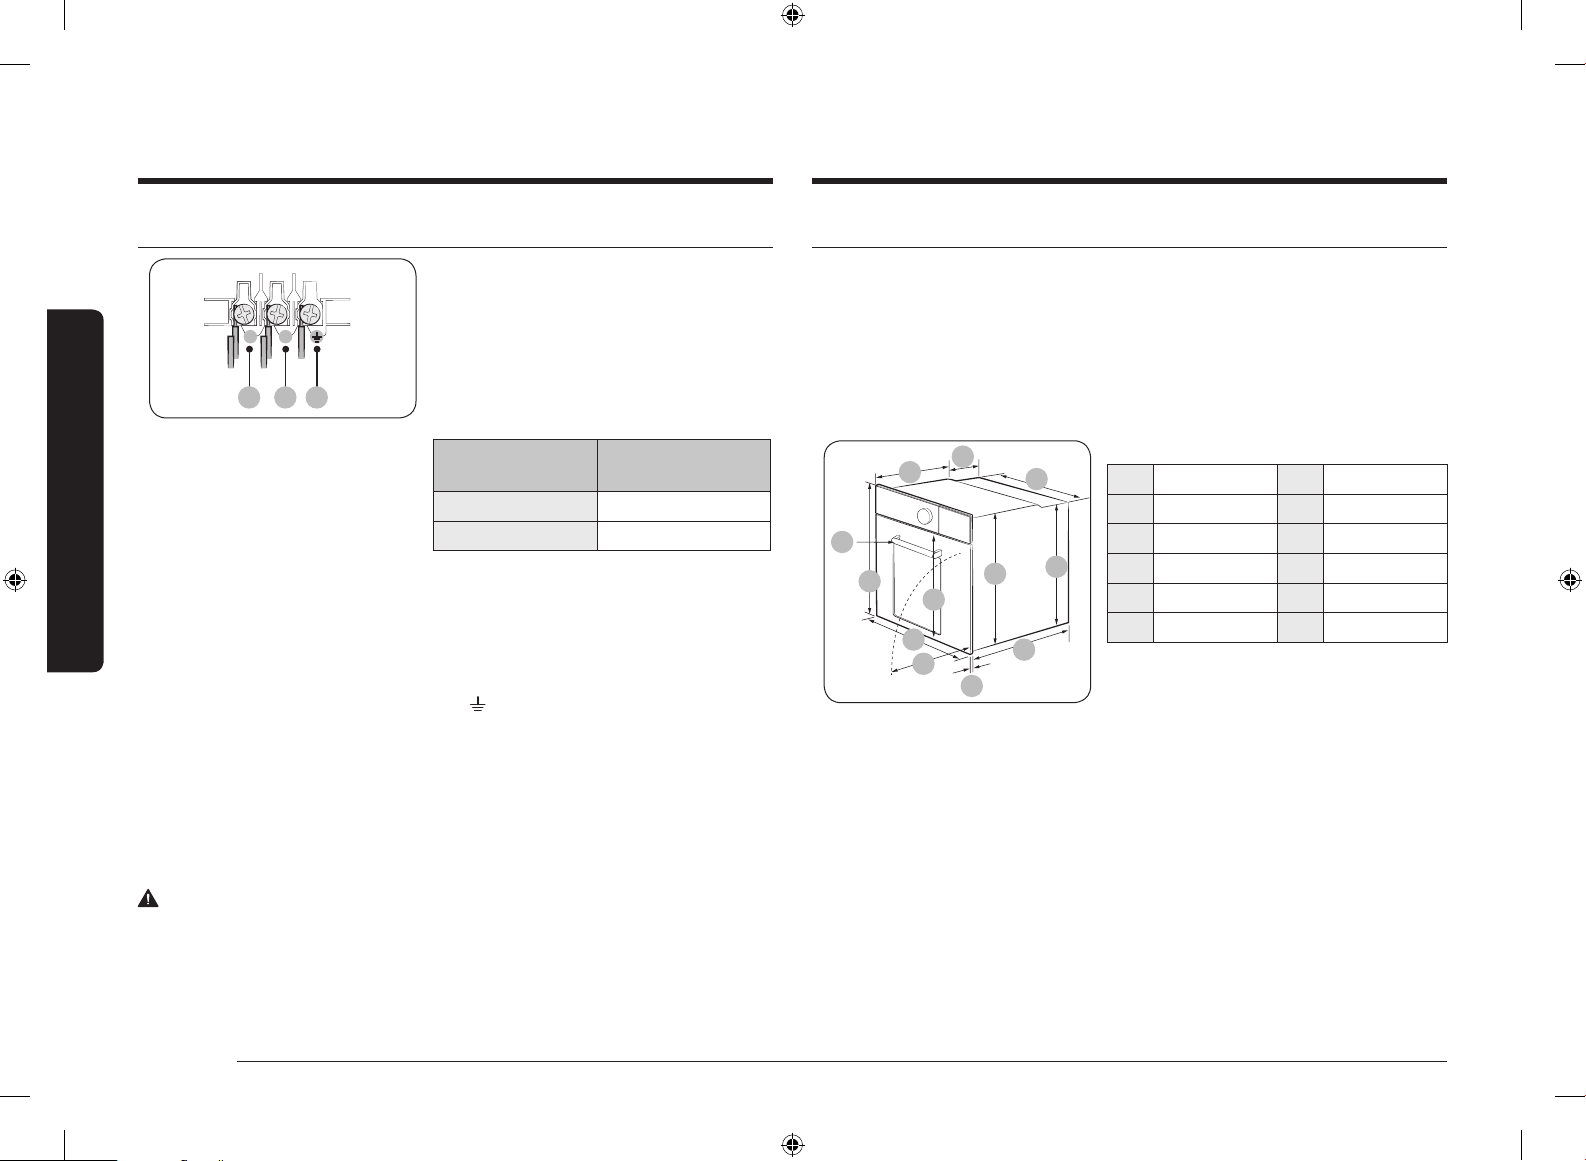
Required dimensions for installation
D
E
C
B
A
L
K
J
I
F
H
G
Oven (mm)
A 560 G Max. 507.5
B 177 H Max. 494
C 372 I 21
D Max. 50 J 549
E 596 K 579
F 595 L 559
Power connection
01 02 03
L N
01 BROWN or BLACK
02 BLUE or WHITE
03 YELLOW and GREEN
Plug the oven into an electrical socket. If
a plug-type socket is not available due to
allowable current limitations, use a multi-
pole isolator switch (with at least 3 mm
spacing in-between) in order to meet safety
regulations. Use a power cord of sufcient
length that supports the specication H05
RR-F or H05 VV-F, min. 1.5-2.5 mm².
Rated current (A) Minimum cross-
sectional area
10 < A ≤ 16 1.5 mm²
16 < A ≤ 25 2.5 mm²
Check the output specications on the label
attached to the oven.
Open the rear cover of the oven using a
screwdriver, and remove the screws on the
cord clamp. Then, connect the power lines to
the relevant connection terminals.
The ( )-terminal is designed for
earthgrounding. First connect the yellow
and green lines (earthgrounding), which
must be longer than the others. If you use
a plug-type socket, the plug must remain
accessible after the oven is installed.
Samsung is not responsible for accidents
caused by missing or faulty earthgrounding.
WARNING
Do not step on or twist the wires during installation, and keep them away from
heat-emitting parts of the oven.
NV75T8879RK_EU_DG68-01258C-00_EN.indd 8 2020-02-26 11:44:42
Loading ...
Loading ...
Loading ...