Loading ...
Loading ...
Loading ...
Remove the inner pot from the cooker base.
Before inserting the inner pot into the appliance,
wipe the outer surface of the inner pot and
heating element to confirm they are dry and free
of food debris. Failure to do so may damage the
cooker.
The curvature of the inner pot matches the
heating element. Always use an Instant Pot
®
authorized inner pot when cooking.
6
Remove & Clean the Inner Pot
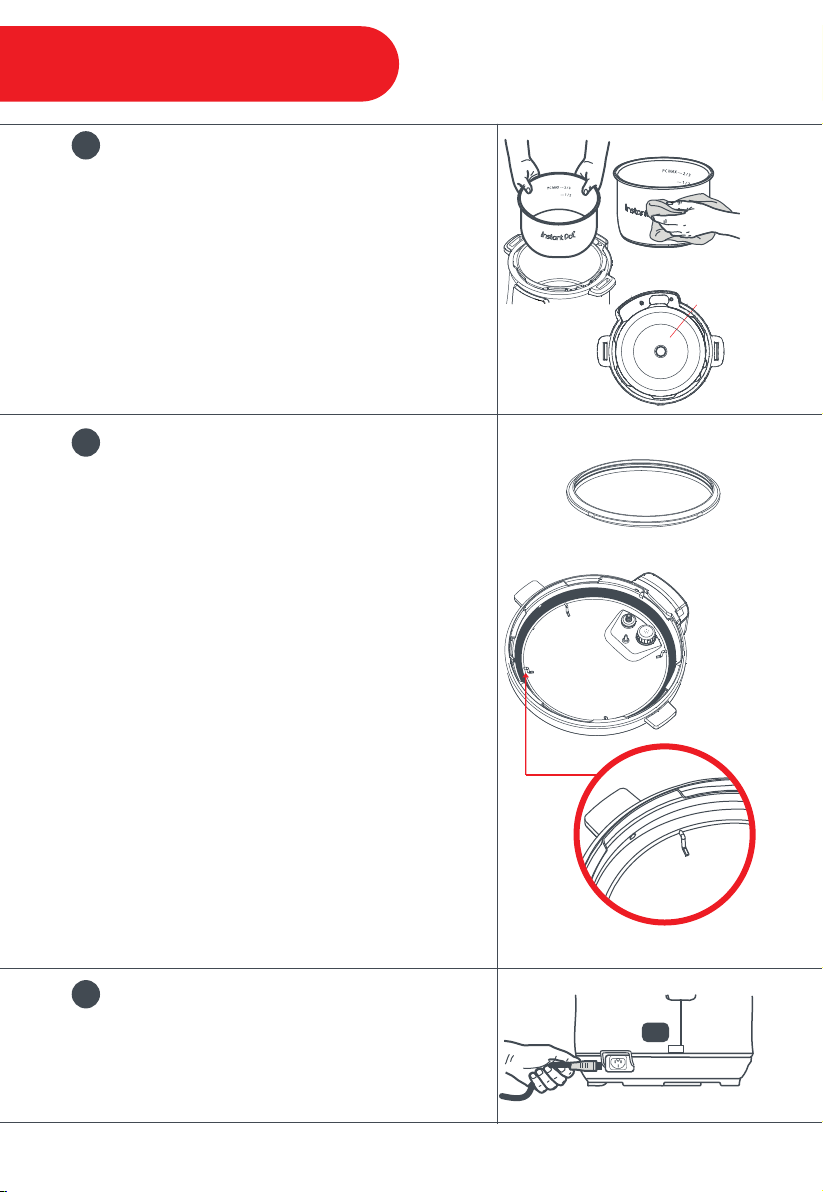
Ensure the sealing ring is sitting snuggly behind
the sealing ring rack. The sealing ring creates an
airtight seal between the lid and the cooker base.
The sealing ring must always be installed during
use.
Remove: Pull the sealing ring out from behind the
sealing ring rack, set it aside. Inspect the sealing
ring rack. It is centered in the lid and the same
height all the way around. Do not attempt to repair
a deformed ring rack.
Install: Place the sealing ring over the sealing ring
rack, and use your thumbs to press it into place.
Note: Always check for cracks, wear, or deformation in
your sealing ring prior to cooking.
Only use genuine Instant Pot
®
sealing rings.
Failure to do so will void the warranty.
7
Check the Sealing Ring &
Sealing Ring Rack
Secure the power cord into the base power socket
before connecting to a 120V power source. The
pressure cooker will remain in Standby mode
when plugged in but not in operation.
8
Secure the Power Cord
Heating
Element
Sealing Ring
Sealing
Ring Rack
9
Getting Started
7
Loading ...
Loading ...
Loading ...