Loading ...
Loading ...
Loading ...
36 37FREESTANDING INSTALLATIONFREESTANDING INSTALLATION
INSTALLATION OF THE APPLIANCE
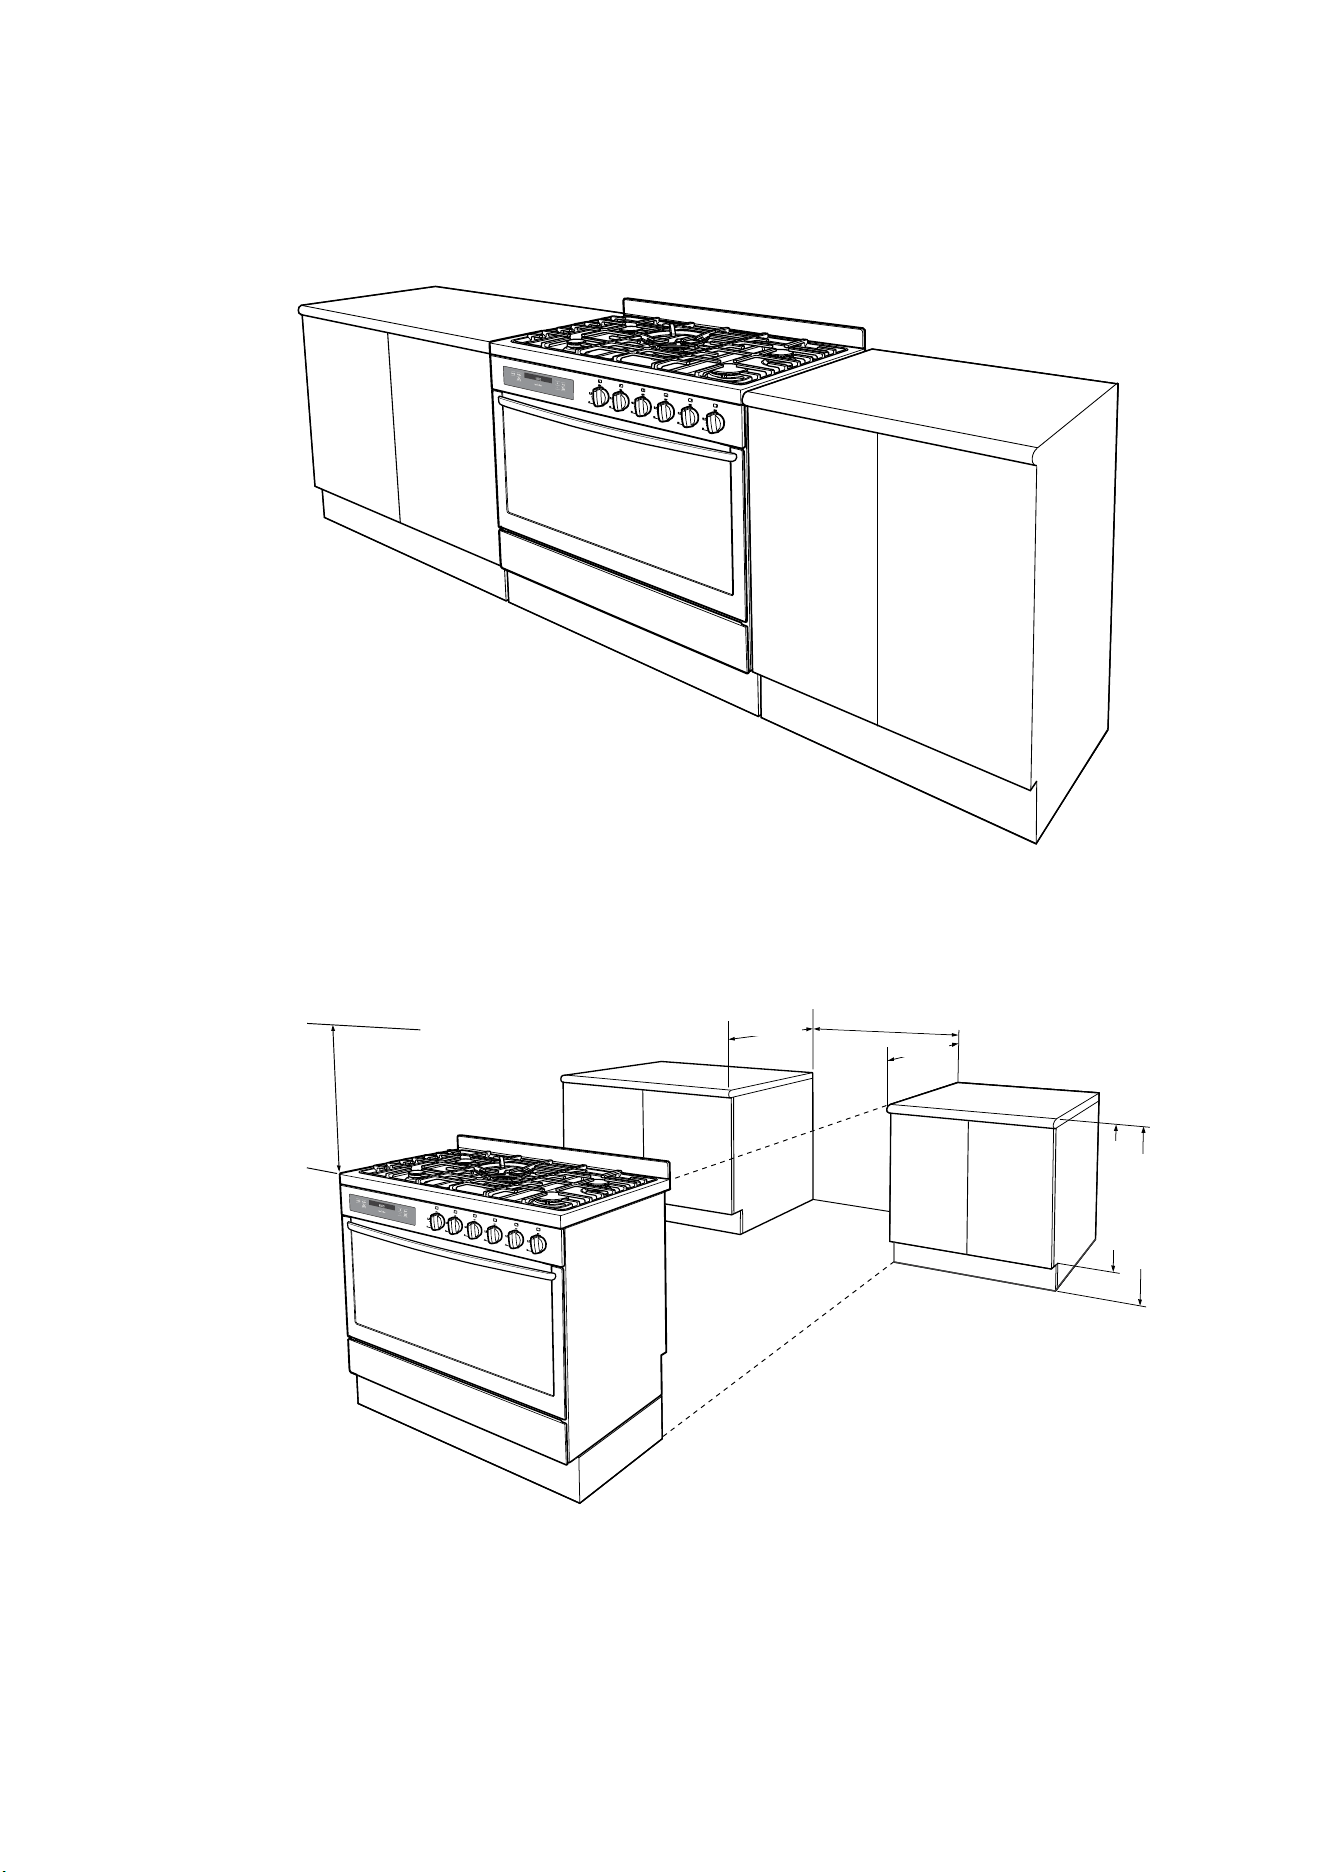
The freestanding type installation uses the appliance as
supplied, and can be fitted in between cabinets, with
cabinets on one side or without adjacent cabinets. There
is no clearance requirement to adjacent side cabinets.
To ensure cooker stability, the anti-tilt brackets must be
installed, and the end of chain attached to the appliance
must be placed onto hook attached to the rear wall.
755mm NOM
900mm NOM
Freestanding installation
600mm minimum
vertical clearance
from combustible
surfaces
600mm
600mm
900mm NOM
755mm NOM
900mm
minimum
Freestanding installation continued
Installation of anti-tilt brackets and hook
• The anti-tilt brackets must be secured to the floor at
rear of cavity with an appropriate fastener according
to dimensions in diagram.
• The hook is to be secured to the back wall in the
location shown above with an appropriate fastener
capable of withstanding a 10kg load (not supplied).
• Connect services to the appliance prior to placing
into cavity.
• To locate appliance, slide into cavity and ensuring
the rear left and right foot of appliance are captured
by the anti-tilt brackets.
• Before the appliance is fully pushed into position,
place the chain attached to the rear of appliance
onto the wall hook.
Appliance
Wall
Chain
installed
anti-tilt bracket
INSTALLATION OF THE APPLIANCE
Hook
Measurements are to be adjusted to account for the thickness of any skirting
board or tiles coming between the back of the appliance and the wall.
C
L
425
194
376
Hole location for
hook installation
425
840
376
Measurements are to be adjusted to account
for the thickness of any skirting board or tiles
coming between the back of the appliance and
the wall
194
Loading ...
Loading ...
Loading ...