Loading ...
Loading ...
Loading ...
10 11
INSTALLING YOUR COOKTOP ACCESSORIES
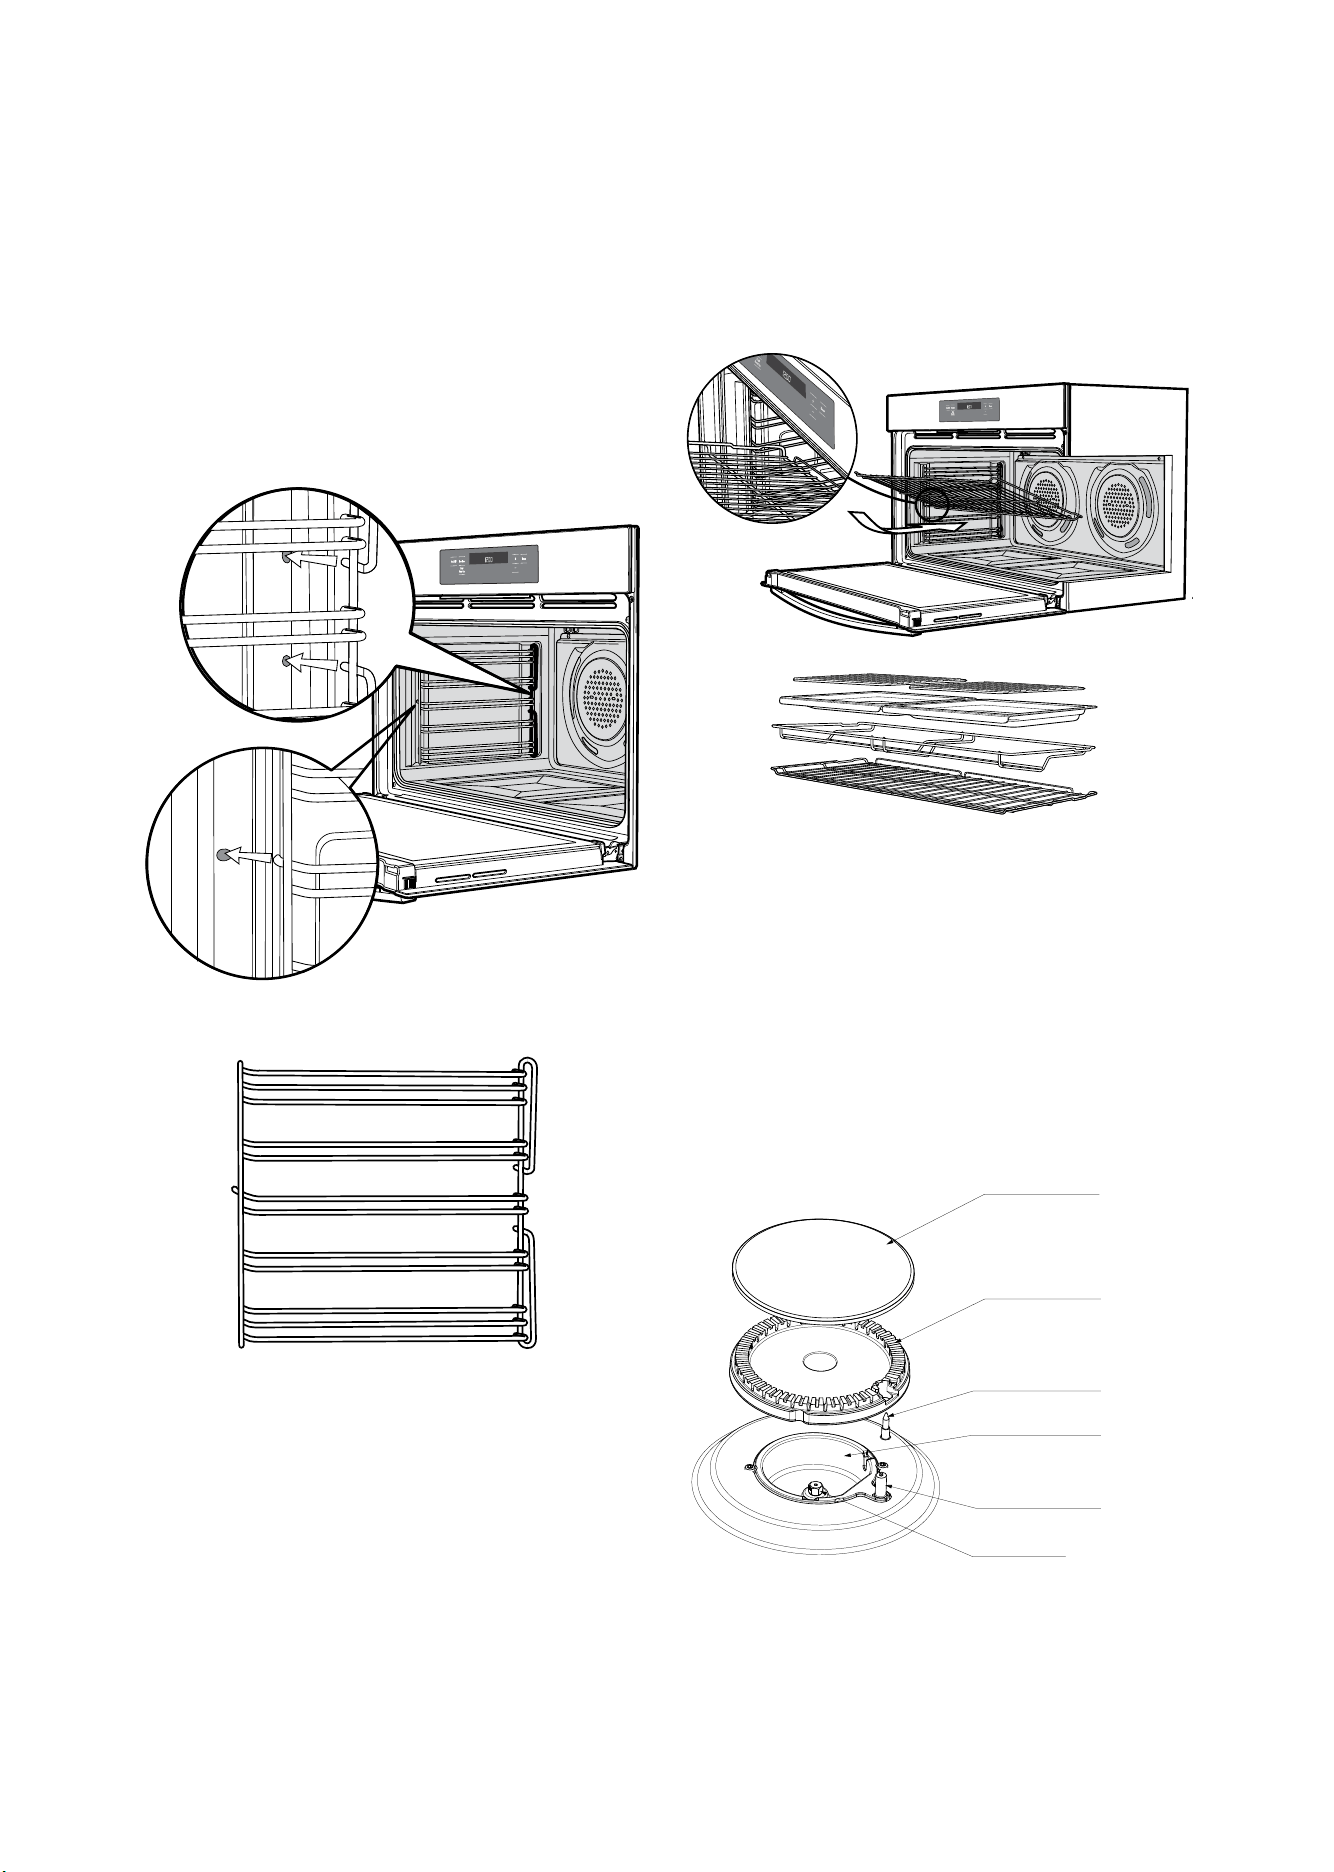
INSTALLING YOUR OVEN ACCESSORIES
INSTALLING YOUR OVEN
ACCESSORIES
• Once the indents have passed the front edge of the
side rack, the shelf can be pushed completely in.
• When fully inserted the shelf/tray should not interfere
with the closed door.
Installing burners
• The burner crown must be fitted correctly into the
burner cup or damage will occur during operation.
• To do this, ensure that the 2 ribs on either side of the
spark plug hole are positioned into the 2 slots on the
burner cup.
• The burner cap and burner crown must be clean and
located correctly for the burner to light.
NOTE: When the burner is correctly fitted it will sit level
on the hob.
Burner cap
Burner cup
Burner crown
Flame safeguard
sensor
Ignition
spark plug
Injector
Prior to installing accessories, remove all packaging and
remove plastic film from external panels.
Side racks
The side racks that come with your oven are fitted in the
following manner:
• Insert the 2 rear pegs into the holes provided.
• Locate the front peg into the front access hole and
push in firmly.
Shelves and trays
The shelves are designed so that they have maximum
travel but cannot be accidentally pulled right out. The trays
are designed in the same way and fit straight into the side
racks.
• Locate the rear edge of the shelf/tray in between 2
guide rails of the side rack – see diagram. Ensure the
same rail positions on both sides of the oven are
being engaged.
• With the front edge raised, begin to slide the shelf into
the oven.
Lighting the burners
Electronic ignition
These hobs are fitted with mains powered electronic
ignition. When the appliance has been connected and the
power is on, depressing any knob will release sparks to all
burners. To light a burner, depress the corresponding knob
and while continuing to depress knob turn anticlockwise
to ‘HI’ position. The knob may be released once the flame
is established, and turned further anticlockwise to reduce
the flame height as desired.
Flame safeguard models WFE914SB & WFEP915SB
Models with flame safeguard have the same ignition
procedure as electronic ignition, but require the knob to
continue to be depressed after flame is established for
approximately 5 seconds. If the flame goes out when the
knob is released, simply depress the knob again, this time
holding it down with slightly more force for the same
length of time.
WARNING
WARNING
• Keep hands clear of burners when lighting.
• If burner does not light within 5 seconds, turn knob to
‘Off’ position, allow gas to disperse, then try lighting
again.
• Burners MUST be operated between ‘HIGH’ and ‘LOW’
settings only.
ENVIRONMENTAL TIPS
ENVIRONMENT
To conserve gas, place the pan centrally over the burner
and adjust the flame so that it does not go past the edge
of the cookware.
NOTE: In the absence of electrical power, carry out the
ignition directly to the burner with a hand held ignition
source.
INSTALLING BURNERS
AND TRIVETS
INSTALLING YOUR COOKTOP
ACCESSORIES
Installing trivets
• The rubber feet on the trivets locate into the
contours
of the hob
• Take care when placing the trivets as dropping them
may damage the hob or trivet
• The wok trivet sits on top of the trivet above the wok
burner
Wok trivet
Trivets
Burner cap
Burner crown
Wok burner
Using your gas hotplates
NOTE: Gas controls turn anticlockwise from ‘Off’ and
have limited movement.
Loading ...
Loading ...
Loading ...