Loading ...
Loading ...
Loading ...
20 21USING YOUR OVENUSING YOUR OVEN
Pyro Clean (WVEP916SB & WFEP915SB
models only)
Function 12
The “Pyrolytic cleaning” function is used for cleaning
the main oven. It cleans by burning off the spatters and
temperature. This process produces ash which can be
wiped out of the oven cavity.
Fast Heat Up
Function 13
“Fast Heat Up” can be selected in the initial heat up
phase of any cooking function. During “Fast Heat Up” the
heat comes from the elements surrounding the fans as
well as the smaller element above the food. This allows
you to preheat your oven 30% quicker than on standard
“Bake/Pizza”. See Using your programmable controller to
operate the oven instructions for more information.
Cooling/Venting fan
Your built-in appliance is fitted with a cooling fan.
This prevents your kitchen cabinet from overheating and
reduces the condensation inside the oven. It will operate
whenever you are using your oven or grill and will blow
warm air across the top of the oven door. In some
appliances the cooling fan may continue to operate after
the appliance is turned off. It will switch off by itself once
oven is cool
Condensation
Excess condensation may fog the oven door. This may
happen when you are cooking large quantities of food
from a cold start. You can minimise condensation by:
• Keeping the amount of water used whilst cooking
to a minimum.
• Making sure that the oven door is firmly closed.
• Baking custard in a baking dish that is slightly
smaller than the water container.
• Cooking casseroles with the lid on.
NOTE: If you are using water in cooking, this will turn
to steam and may condense outside your appliance.
This is not a problem or fault with your oven.
Operating your oven temperature and function
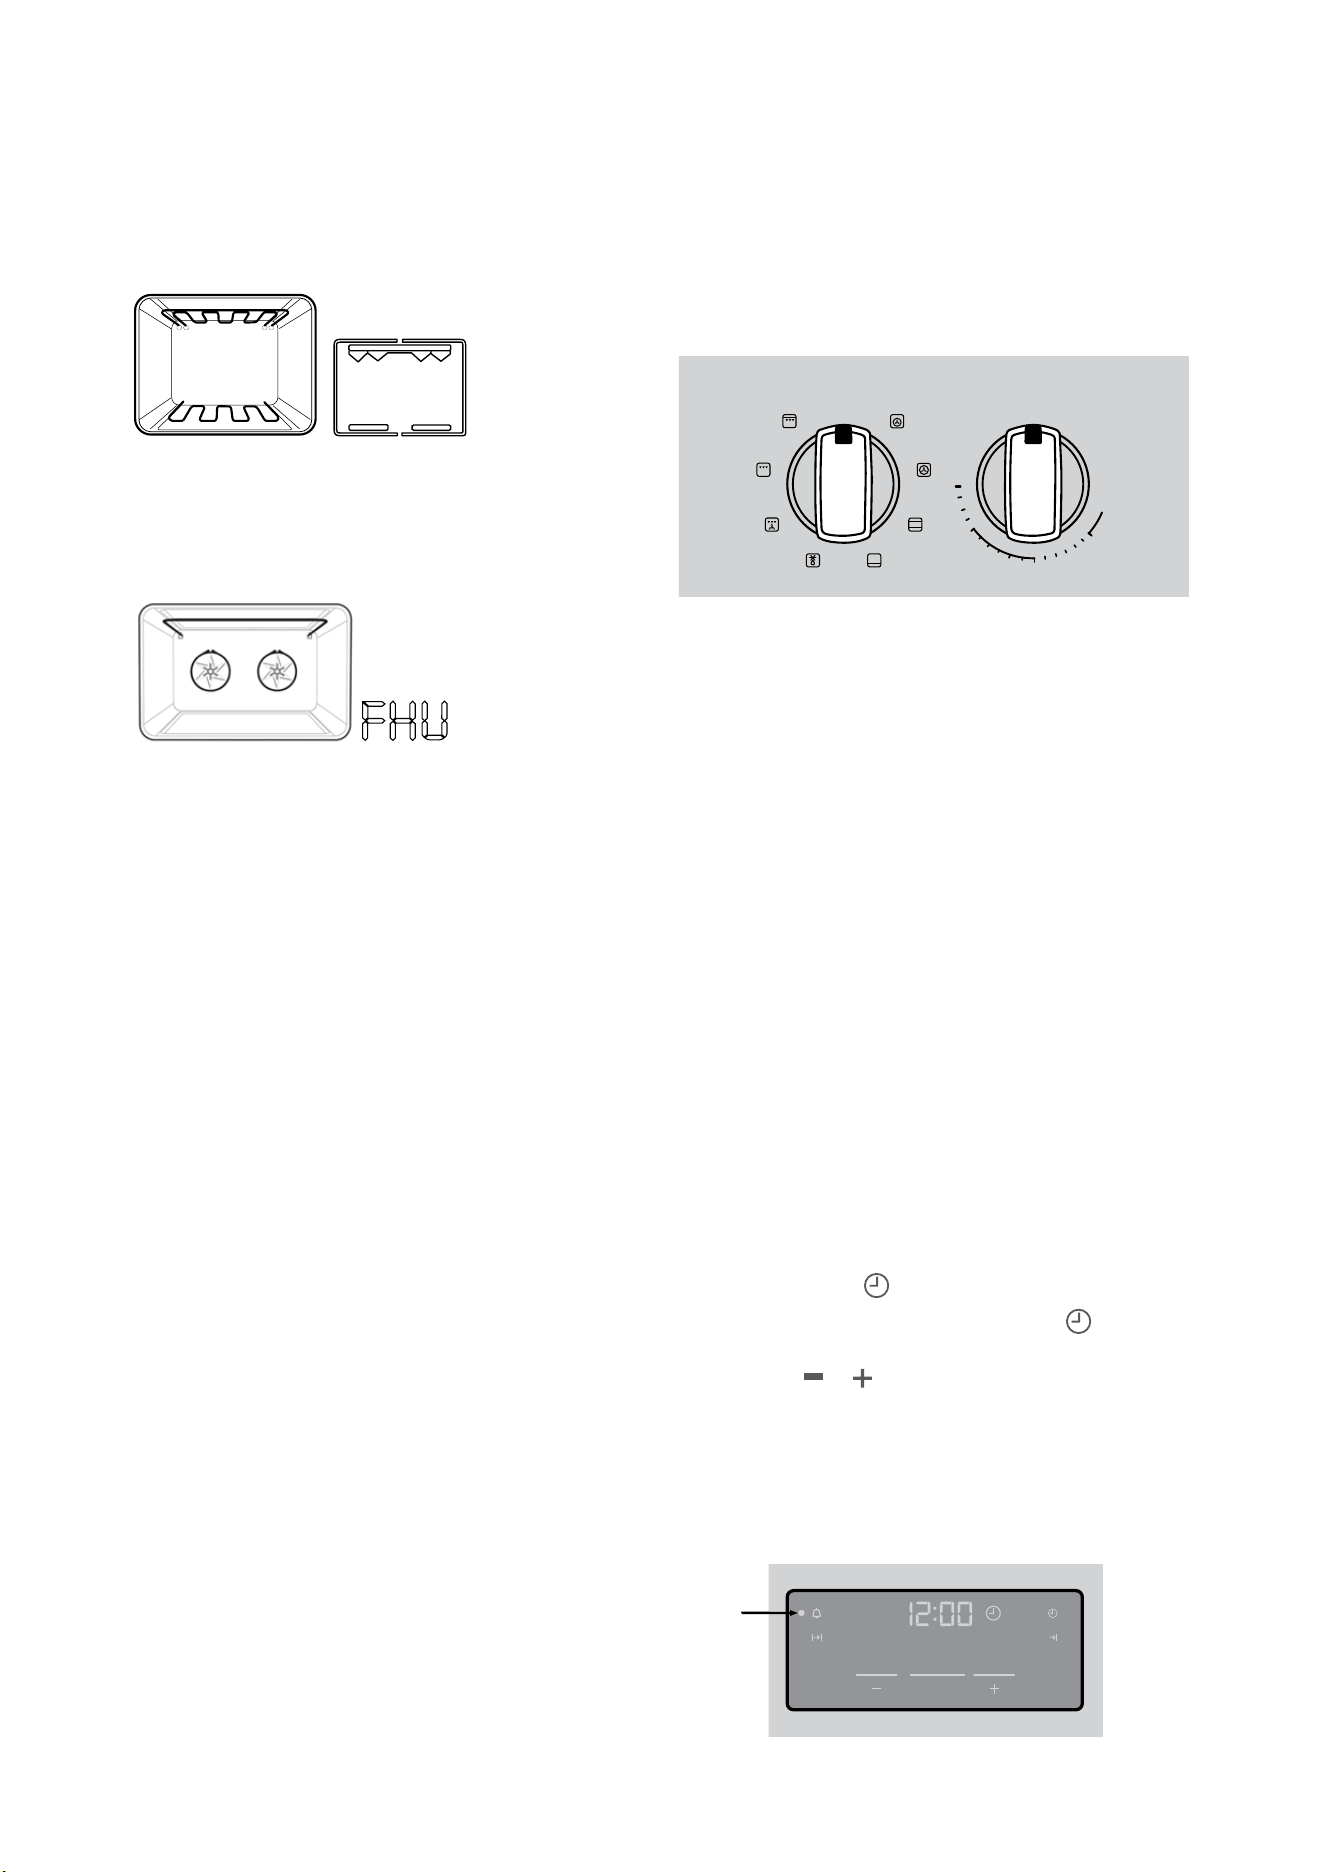
selectors model WFE914SB & WVE914SB
To set the oven, turn the function selector to the desired
cooking function and then turn the temperature selector
to the desired temperature. An indicator light above the
temperature selector will come on. When the temperature
is reached the heating source switches itself off and the
indicator light goes out. When the oven temperature falls
below the desired setting, the heating source switches on
and the indicator light comes on again.
Once the food is cooked, turn the temperature selector
off in an anticlockwise direction. Do not force it right
round in a clockwise direction as this will result in
damage to the thermostat. Turn the multifunction
selector off.
Function
Off
Oven/Grill
Off
Maxi
Grill
Fan
Grill
Grill
Defrost
Base
Heat
Bake/
Pizza
Fan
Bake
260
220
200
180
100
Keep
Warm
Timer
Cook Time
Mode
Clock
End Time
Rapid
Heat
High
Off
Low
High
Off
Low
High
Off
Low
High
Off
Low
High
Off
Low
Preheating your oven with “Rapid Heat”
To preheat your oven select the “Rapid Heat” function.
This function allows your oven to reach the preset
temperature quicker than any other cooking function.
1. Turn the function selector to “Rapid Heat”.
2. Set the desired preheat temperature, by rotating your
oven temperature selector. When the indicator light
above the temperature selector goes out, the oven
has reached the desired temperature. Select the oven
function you require for cooking or baking and place
the food in the oven.
On completion of cooking
• The heat source will turn off, the timer will beep and
the end time and/or cook time ‘indicators’ will flash.
• Even though the heating element turns off the oven
will still retain substantial heat. This will continue to
cook the food until it is removed or the oven cools
down. If you do not plan on being present when the
oven turns off, you should take this extra heating
time into account.
• Turn the function and temperature controls to the
off position.
• Press any button to stop the timer beeping.
Adjusting the clock
• Press the MODE button until the clock ‘indicator’
begins flashing.
• Press the
or buttons to change the time of day.
5 seconds after the last change, the clock ‘indicator’
will disappear, confirming the time has been
adjusted
Operating the touch control clock models WFE914SB
and WVE914SB
Function
Off
Oven/Grill
Off
Maxi
Grill
Fan
Grill
Grill
Defrost
Base
Heat
Bake/
Pizza
Fan
Bake
260
220
200
180
100
Keep
Warm
Timer
Cook Time
Mode
Clock
End Time
Rapid
Heat
High
Off
Low
High
Off
Low
High
Off
Low
High
Off
Low
High
Off
Low
Oven
indicator
H
L
O
I
O
F
F
O
F
F
H
L
O
I
O
F
F
H
L
O
I
O
F
F
H
L
O
I
O
F
F
H
L
O
I
General features
Your touch control clock has the following features:
• Timer – allows you to set a countdown time that will
beep when the set time has elapsed.
• Cooking duration – You can set a cooking duration. A
timer will count down the preset cooking time, beep
when the time has elapsed and turn the oven off.
• End cooking time – you can set a cooking finish
time. A timer will count down the preset cooking
time, beep when the finish time has been reached
and turn the oven off.
• Delayed start cooking time – You can combine the
cooking time and stop cooking time to switch the
oven on and off at a specific time during the day.
NOTE: Your touch control clock only operates with
your main oven.
Setting the time of day
You must set the time of day before you can operate your
appliance. When power is supplied to your oven “12.00“
will be displayed and the “clock” indicator I will flash.
1. To set the time of day in hours and minutes, press – or
+.5 seconds after the last change, the “clock” indicator
I will disappear, confirming the time has been set.
NOTE: The clock has a 24-hour display.
Change the time of day (Daylight saving)
1. Press “mode” until the “clock” indicator I begins flashing.
2. Press – or + to change the time. 5 seconds after the
last change, the “clock” indicator I will disappear,
confirming the time has been set.
Setting the timer
1. Press “mode“ until the “timer” indicator I begins
flashing.
2. Set the countdown time you want by using – and +.
5 seconds after the last change the “timer” indicator I
will stop flashing, confirming the timer has been set.
3. To stop the beeper, press –, + or “mode”.
Setting the cooking duration
1. Check the clock displays the correct time of day.
2. Select the desired oven function and temperature.
The oven indicator light will glow and the heating
source will come on.
3. Press “mode“ until the “cook time” indicator I
begins flashing.
4. Set the cooking duration you want by using – or +.
5 seconds after the last change, the “cook time”
indicator I will stop flashing, and the time of day will
be displayed.
NOTE: Do not forget to add preheating time if necessary.
Setting the cooking end time
1. Check the clock displays the correct time of day.
2. Select the desired oven function and temperature.
The oven indicator light will glow and the heating
source will come on.
3. Press “mode“ until the “end time” indicator I
begins flashing.
4. Enter the time of day you want to finish cooking
by pressing – or +. 5 seconds after the last change,
the “end time” indicator I will stop flashing and the
current time of day will be displayed.
Setting the delayed start cooking time
1. Program the “cook time“ and “end time“ as
described in the relevant sections. Once both the
“cook time“ and “end time“ have been set, the “cook
time“ and “end time” indicators will stop flashing and
the current time of day will be displayed.
To check or cancel settings
1. To check your settings, press “mode” until the
setting you want is displayed. A red light will flash
next to the mode (cook time, end time etc) that is
currently on display.
2. To cancel “delayed start” press “mode” until a light
flashes next to “cook time”. Press and hold “–” until
the clock no longer reverses (“0:00” and you will
hear a beep). If you have left the temperature and
function knobs at a setting the oven will start once
the “end time” light stops flashing.
3. To cancel “auto off” press “mode” until a light flashes
next to “cook time”. Press and hold “–” until the
clock no longer reverses (“0:00” and you will hear
a beep). This automatically cancels “delayed start”.
If you have left the temperature and function knobs
at a setting, the oven will start once the “cook time”
light stops flashing. Because you have cancelled
“auto off” the oven will continue to heat until you
manually turn it off.
On completion of cooking
The oven will turn off, the timer will beep and the “end
time” and/or “cook time” indicators will flash.
1. Turn the function and temperature controls to the
off position.
2. Press “+” or “–” or “mode” to stop the timer from
beeping.
Switching the clock display ON and OFF
1. Press together “+” and “–” for 2 seconds to switch
’off’ the display.
2. Press together “+” and “–” for 2 seconds to switch
the clock display ’on’ again.
NOTE: If a timer mode is set, then it is not possible to
switch the display off.
USING YOUR OVEN USING YOUR OVEN
Loading ...
Loading ...
Loading ...