Loading ...
Loading ...
Loading ...
WARNING – SERVICING TO BE CARRIED OUT ONLY BY AN AUTHORISED PERSON
Disconnect from electricity and gas before servicing. Check appliance is safe when you have nished.
38
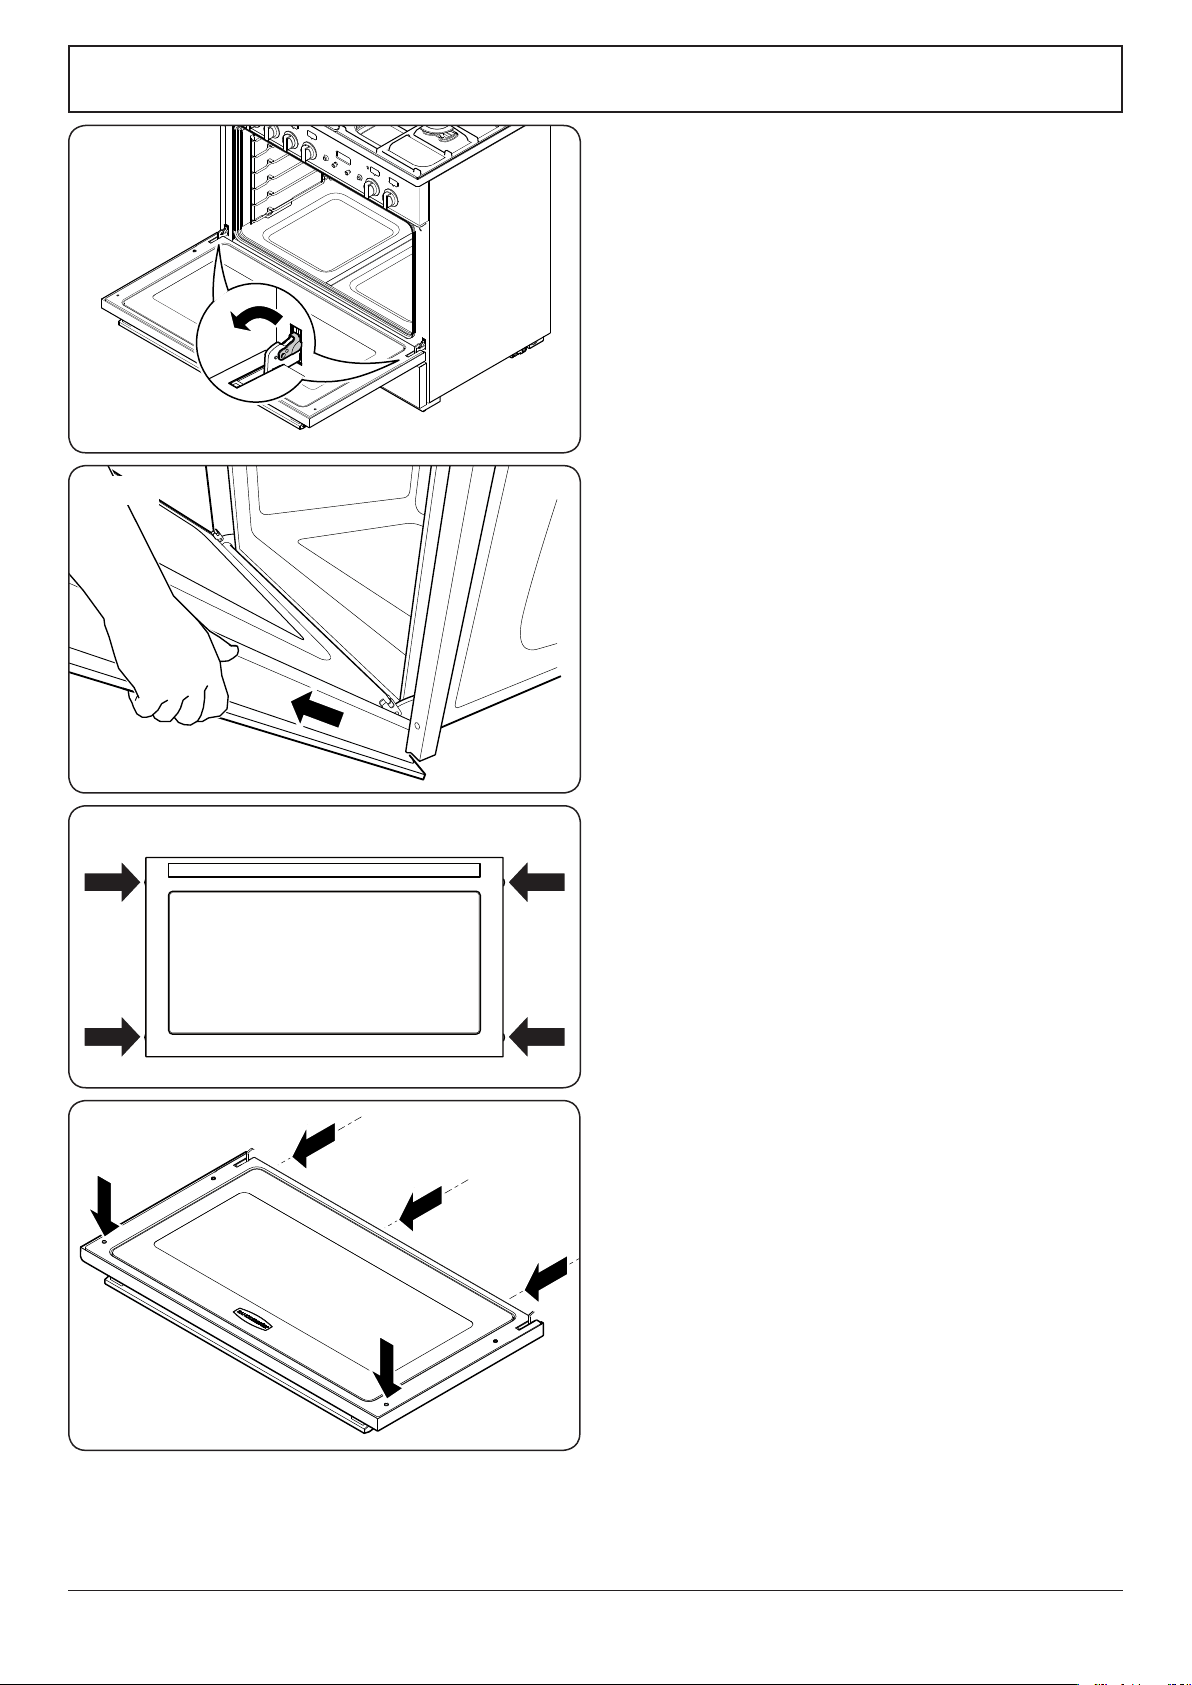
5. Oven Door
5.1 Removing the oven door
CAUTION!
The door is very heavy. Take care when removing.
To remove the door, open the door fully.
Swivel the locking ‘U’ clips forward to the locking
position (Fig.9-17). Grip the sides of the door, lift
upwards and then slide the door forwards (Fig.9-18)
and remove.
5.2 Replacing the door outer panel
Undo the 4 screws (2 each side) in the door (Fig.9-19).
Open the door slightly and, using the handle, lift the
door outer away.
To ret the door, rst close the door inner. Lift the door
outer panel onto the door inner, – make sure the top of
the door outer panel ts over the locking mechanism
before locating the sides. Secure in position.
5.3 Replacing the door inner panel
Remove the door (see 5.1).
Carefully place the door, outer side up, on a clean level
surface. Remove the 2 screws from the inside face and
the 3 screws on the bottom edge (Fig.9-20).
Remove the corner brackets, and then lift o the inner
door panel. Take care not to damage the inner glass.
Reassemble in the reverse order.
ArtNo.270-0033 - 90 Prof+ FX - Removing the oven inner door panel
ArtNo.272-0015 - 90DF - Pro+ - Removing the outer door panel
Fig.9-19
Fig.9-20
ArtNo.062-0001 - 90 Prof+ FX - Removing the door
ArtNo.325-0002 - BI oven removing the door
Fig.9-17
Fig.9-18
Loading ...
Loading ...
Loading ...