Loading ...
Loading ...
Loading ...
8
Operating the Oven
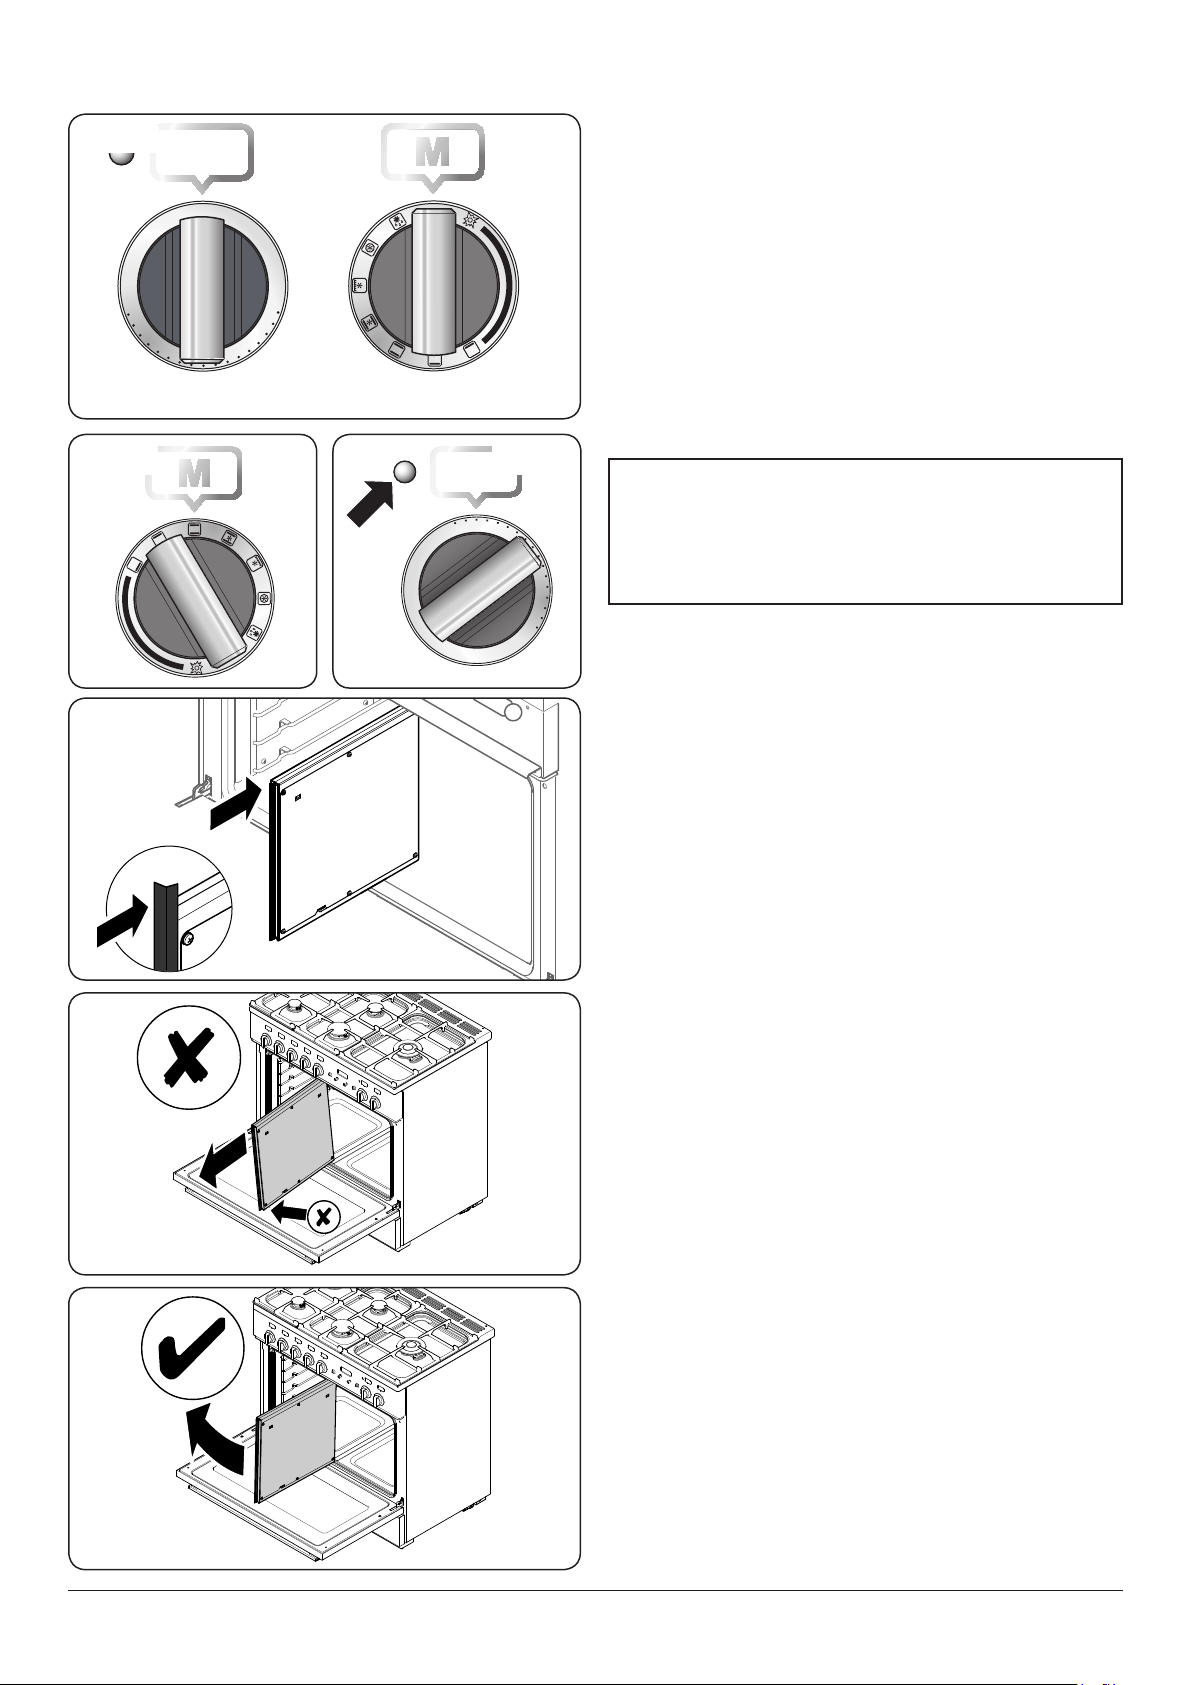
The multi-function oven has two controls: a function selector
and a temperature setting knob (Fig.2-14).
Turn the function selector control to a cooking function.
Fig.2-15 shows the control set for convectional oven cooking.
Turn the oven temperature knob to the temperature you
need. The oven heating light will glow until the oven has
reached the temperature you selected. It will then cycle on
and o during cooking as the oven maintains the selected
temperature (Fig.2-16).
Energy Saving Feature
The oven has a divider feature (Fig.2-17). With this in place
only one half of the oven is heated and only the right-hand
side elements are used. This saves energy and is ideal for
cooking most foods. When using the divider, condensation
may appear in the left-hand oven – this is normal.
For very large loads, or large dishes for special occasions then
the divider can be removed. This brings into use the elements
on the left-hand side as well as those on the right when a
function is selected.
All oven functions (except self cleaning) are available in full
and divided forms. Shelves are provided for use in both forms.
Most dinnerware can be warmed in the oven or in the left-hand
side when the ESP is in place. Make sure dinnerware is oven safe
and always use oven mitts to remove items.
Removing the Divider
Make sure the cooker is cool before attempting to
remove the divider.
Fully open the door and remove the oven shelves. When
removing the divider, tilt it slightly upwards and grip the
underside to prevent the metal base making contact with the
door glass (Fig.2-18 and Fig.2-19).
We recommend that you place a tea towel or similar on the
door glass before removing the divider. This should prevent
the door inner from scratching.
DO NOT place or slide metallic objects, including
cookware, on the door glass as this may cause
scratching and subsequent failure to occur.
DO NOT drop or rest objects on the door glass.
Although the glass is very strong, a sharp blow or a
falling object might cause the glass surface to crack
or break
ArtNo.062-0005 - Removing the divider (wrong)
Fig.2-18
ArtNo.062-0004 - Removing the divider (right)
Fig.2-19
ArtNo.281-0150 - Oven Divider
Fig.2-17
ArtNo.270-0030
Pro+ FXP oven
set to conventional
OFF
Fig.2-15
ArtNo.270-0029
Pro+ FXP MF oven controls
OFF
140
100
180
220
0
Fig.2-14
ArtNo.270-0028
Proplus MF temp control
indicator light
140
100
180
220
0
Fig.2-16
Temperature selector Function selector
WARNING!
Take great care when removing the divider NOT to
scratch the inner glass door surface. Scratches in the
glass can cause stress and may cause the door to fail.
Loading ...
Loading ...
Loading ...