Loading ...
Loading ...
Loading ...
11
Accessories
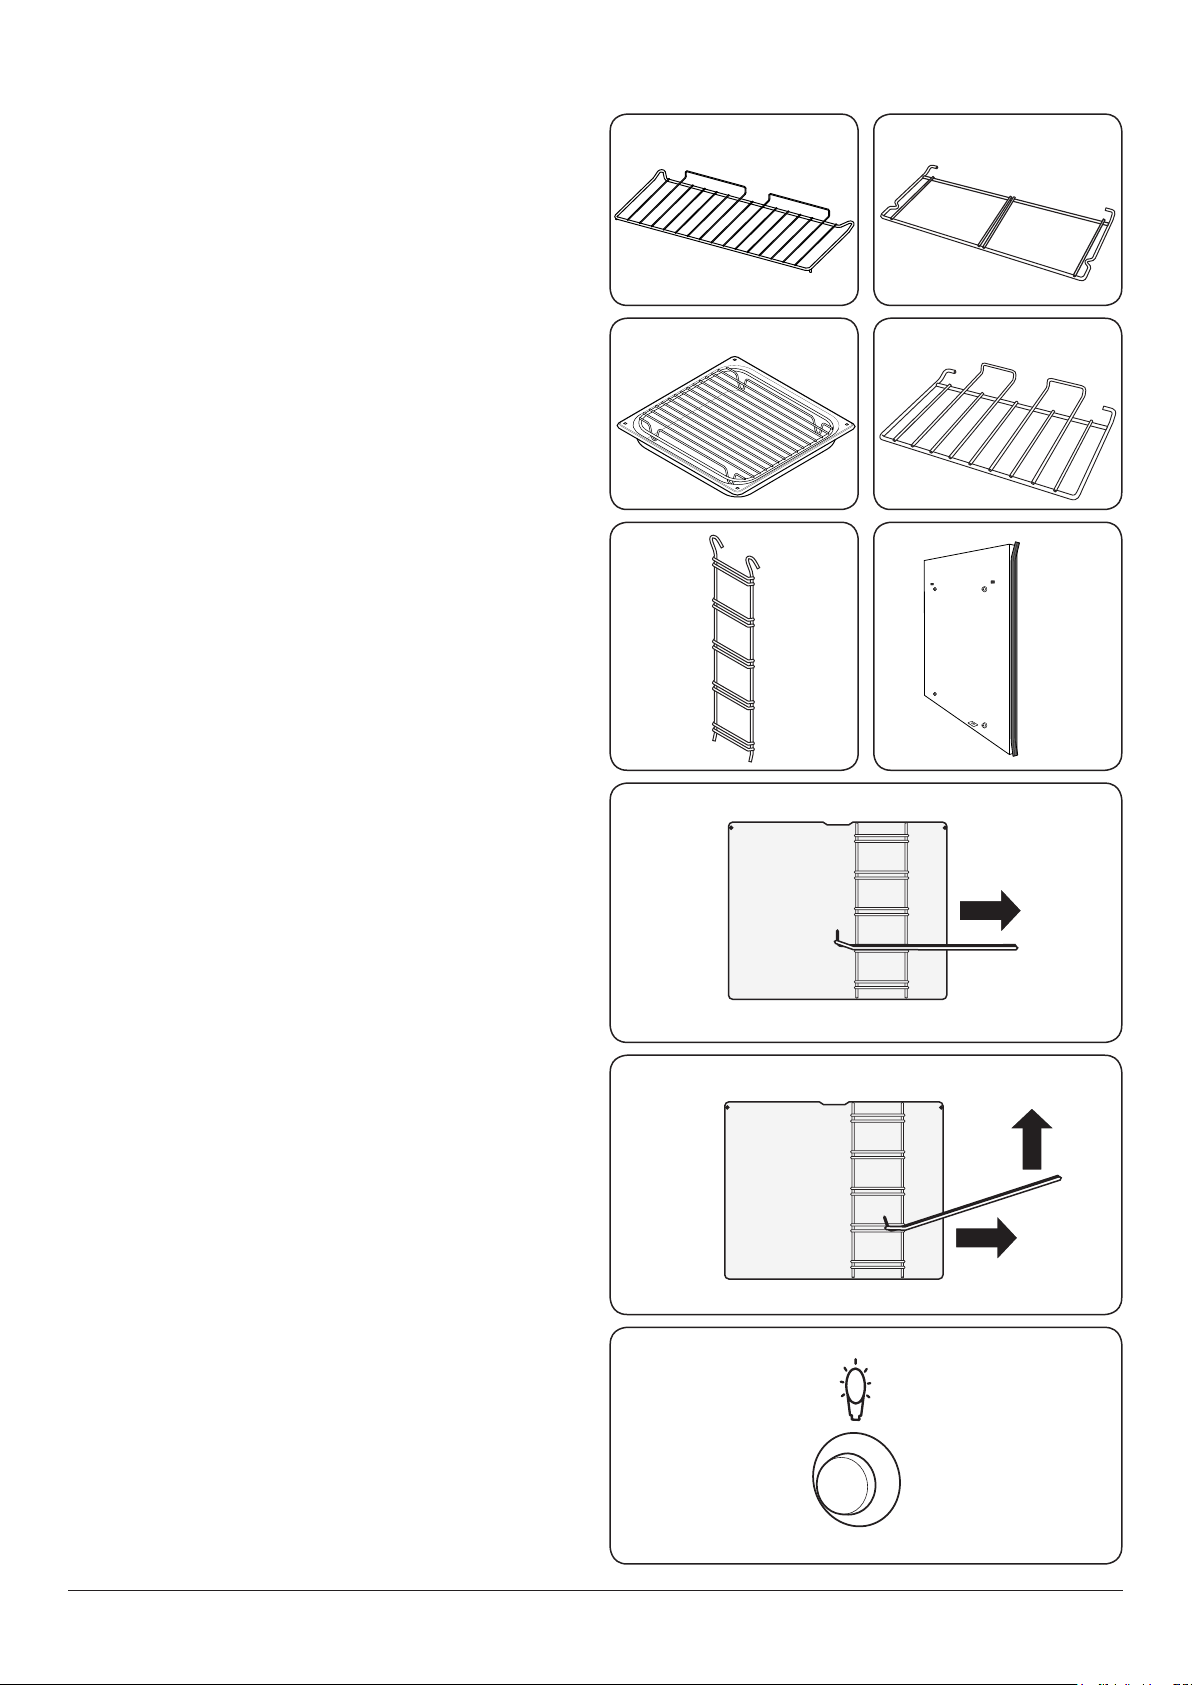
Oven racks
Each oven is supplied with:
Two full capacity shelves (Fig.2-35)
Grill pan tray support (Fig.2-36)
Two grill pans with trivets (Fig.2-37)
Three energy saving shelves (Fig.2-38)
Four ladder shelf supports (Fig.2-39)
And one divider (Fig.2-40)
Any shelf can be tted in any of the positions. The oven
shelves are retained when pulled forward but can be easily
removed and retted.
To remove and ret the ladder shelf supports
Lift the ladder support hooks out of the two locating holes in
the oven side (or divider) before lifting the support clear of
the bottom ladder restraint.
Ret by inserting the bottom of the ladder into the restraint
before tting the hooks through the locating holes.
To remove and ret the shelves
Pull the shelf forwards until the back of the shelf is stopped
by the shelf support (Fig.2-41). Lift up the front of the shelf
so the back of the shelf will pass between the supports and
then pull the shelf forward (Fig.2-42).
Ret in the reverse order, making sure to push it fully back.
Oven Light
Press the button to turn on the oven lights (Fig.2-43).
If one of the oven lights fail, turn o the cooker circuit breaker
before you change the bulb. See the ‘Troubleshooting’ section
for details on how to change an oven light bulb.
ArtNo.326-0013 - Full capacity shelf
(Falcon)
Fig.2-35
ArtNo.326-0004 - Cradle shelf
Fig.2-36
ArtNo.331-0008 - 90SC
grill pan & trivet
Fig.2-37
ArtNo.326-0002 - Energy saving shelf
Fig.2-38
ArtNo.320-0030
90SC ladder support
Fig.2-39
ArtNo.281-0028 - Albertine divider
Fig.2-40
ArtNo.320-0017
Main oven light
ArtNo.320-0031 90SC
removing the shelf 1
Fig.2-41
ArtNo.320-0032 90SC
removing the shelf 2
Fig.2-42
Fig.2-43
Loading ...
Loading ...
Loading ...