Loading ...
Loading ...
Loading ...
WARNING – SERVICING TO BE CARRIED OUT ONLY BY AN AUTHORISED PERSON
Disconnect from electricity and gas before servicing. Check appliance is safe when you have nished.
35
Catalytic lter cover
Bracket
Phial retaining
clamp
Protection & primary phials
Pyrolytic phial
4. Oven
4.1 Replacing the oven light bulb
Disconnect the cooker from the electricity supply.
Make sure the oven is cool. Open the oven door and
remove the oven racks.
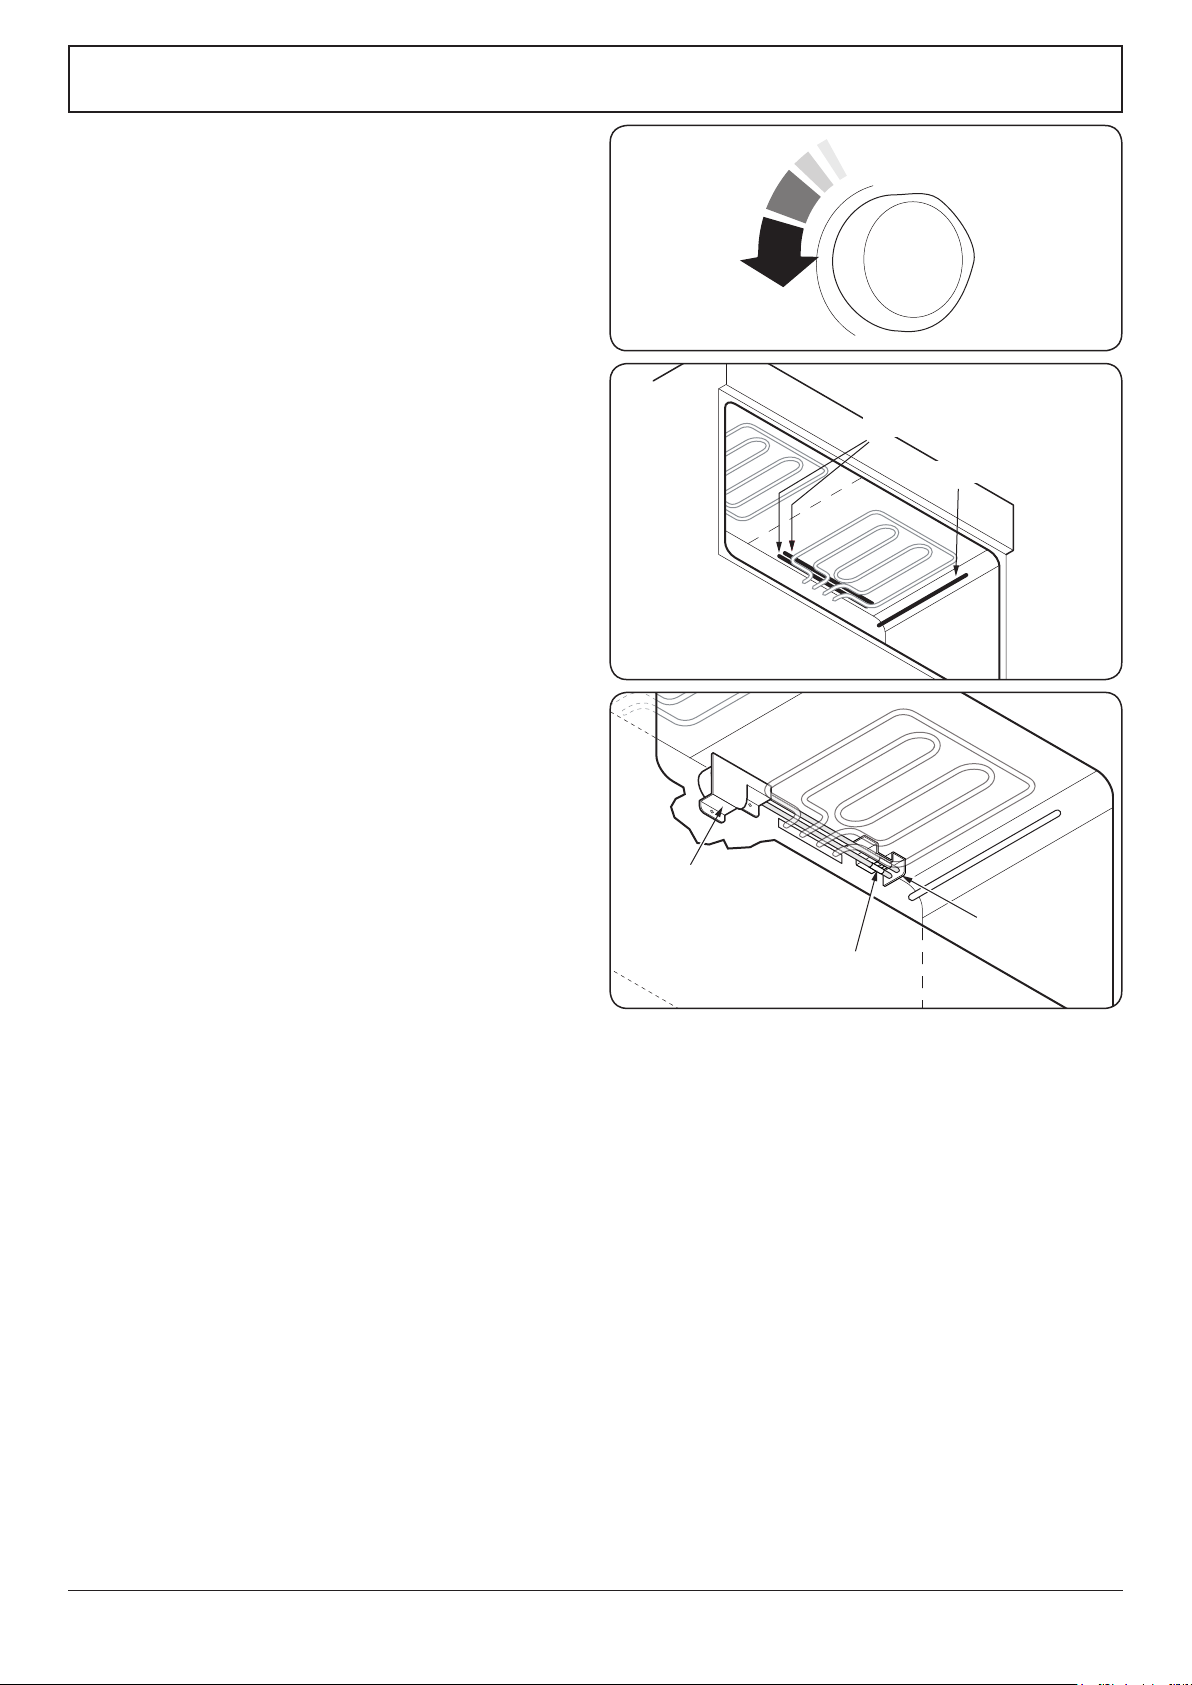
Unscrew the bulb cover by turning counter clockwise.
It may be very sti (Fig.9-5).
Taking care to protect your ngers in case the bulb
should shatter, unscrew the old bulb.
Screw in the new bulb and then screw the bulb cover
back on. Turn on the circuit breaker and check that the
bulb now lights.
Replacement bulb must be 15W 240V lamp, FOR
OVENS, heat resistant to 300°C.
4.2 Replacing the oven thermostats
Disconnect the cooker from the electricity supply.
Situated at the back of the oven, behind the right-
hand upper elements, are the primary and protection
thermostats phials. One the right-hand side of the
same element is the pyrolytic phial (Fig.9-6).
To change the primary thermostat
Remove the control panel (see 1.1) and hotplate (see
1.2).
Remove the oven racks, rack supports and divider.
Undo the cooker rear cover screws and remove the
covers.
Undo the screw holding the phial retaining clamp to
the bracket. Undo the 2screws securing the catalytic
lter cover (Fig.9-7).
Track the route of the thermostat capillary from the
rear of the control on the fascia to where it disappears
into the oven. By moving the capillary it will become
obvious which of the two phials in the oven it is
connected to. The phial can then be removed.
Feed the thermostat capillary out and clear of the
oven, noting the routing.
Remove the two screws xing the thermostat to the
inner control panel and disconnect the wiring from the
thermostat.
Fit the replacement in reverse order.
To change the protection thermostat
Follow the same procedure as above except that the
control is situated on the rear cover.
Fit the replacement in reverse order.
To change the pyrolytic thermostat
Remove the control panel (see 1.1) and hotplate (see
1.2).
Remove the oven racks, rack supports and divider.
Undo the cooker rear cover screws and remove the
covers.
ArtNo.324-0007 Unscrewing the bulb cover
Fig.9-5
Fig.9-7
Fig.9-6
Loading ...
Loading ...
Loading ...