Loading ...
Loading ...
Loading ...
127
Menu Description
Advanced Guide Menu Description
Network settings
Network Connection Overview
Connecting the projector to a network enables you to control the projector from a
computer and receive notification of projector errors via email.
Depending on the method of network connection, preparation on the computer side
may be necessary. The following is an explanation of preparation on the computer
side.
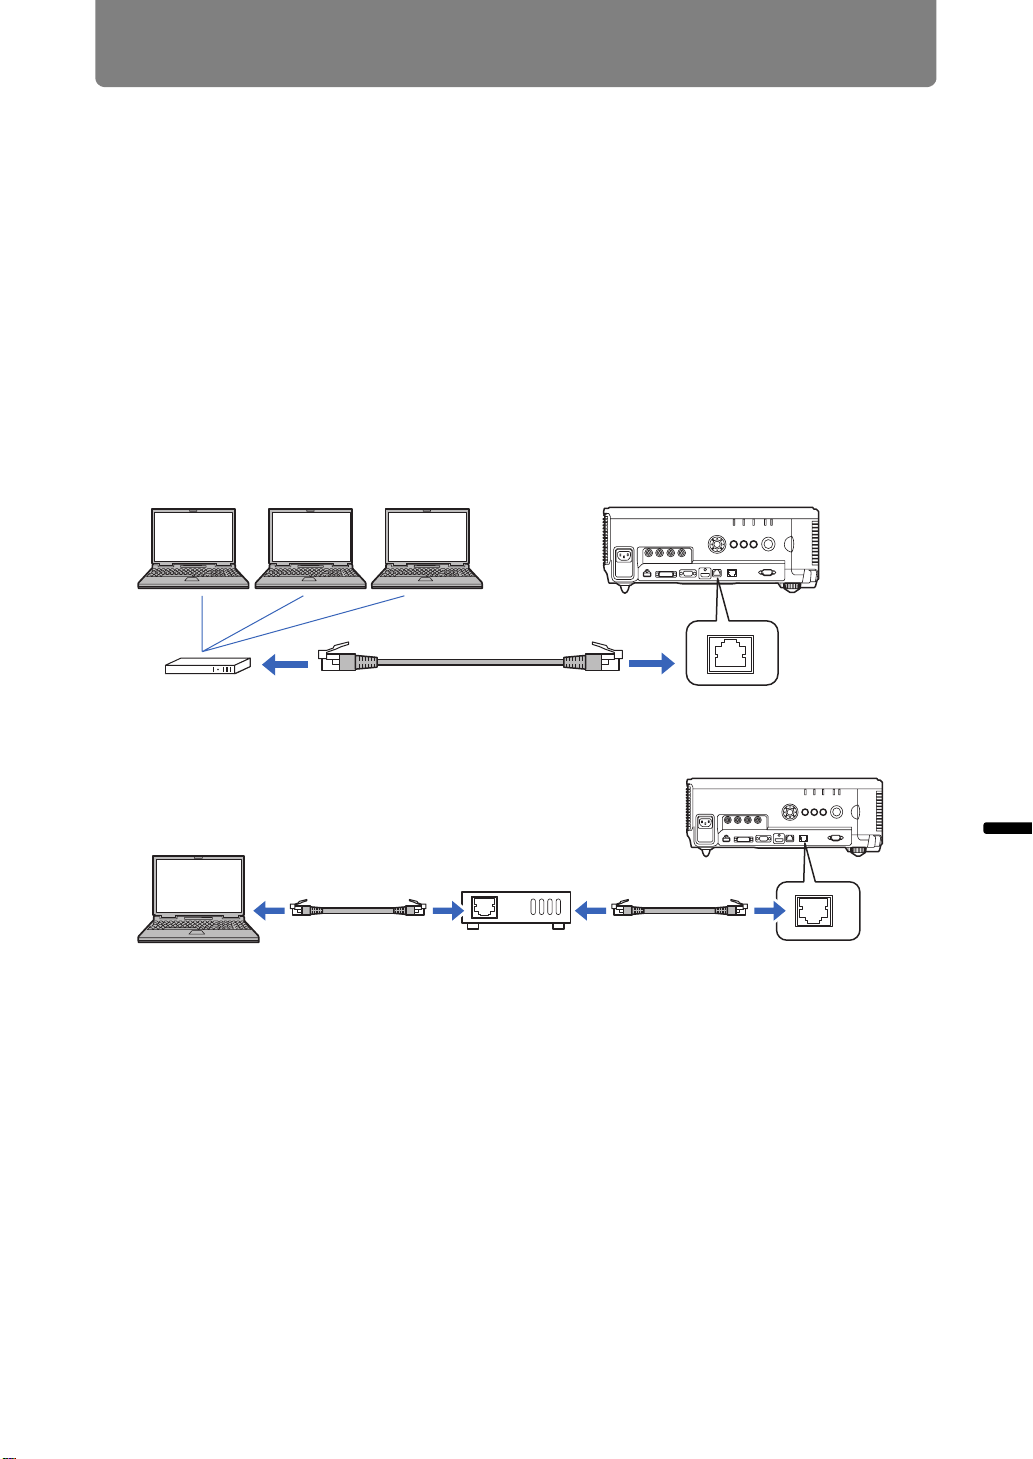
Connection Methods
To connect the projector to a computer network, use a LAN cable. The LAN cable
can be connected to either the LAN port or HDBaseT port.
When using the LAN port, connect the projector as follows.
When using the HDBaseT port, connect the projector as follows.
• The LAN port and HDBaseT port cannot be used at the same time for a network
connection.
• Network connectivity provided by the HDBaseT port and LAN port is identical,
except that the HDBaseT provides a maximum transfer speed of 100 Mbps.
• When the [Network function] setting of the projector is set to [Off] (Network
Connections is disabled), switch it to [On] to enable it. (P131)
• Select which port to use in [Communication settings] > [Wired network] (P120).
• Referring to “Checking Projector Information” (P156), confirm that the projector’s
IP address is not the same as that of other computers on the network. To set a
projector IP address, follow the instructions in “Controlling the Projector from a
Computer” (P154) and use the web screen, or use projector TCP/IP settings.
(P132)
LAN cable (shielded twisted pair;
not included)
Hub or router, etc.
LAN terminal
LAN cable
(CAT5e or better,
shielded-compatible;
sold separately)
LAN cable
(CAT5e or better,
shielded-compatible;
sold separately)
HDBaseT
port
HDBaseT
transmitter
Loading ...
Loading ...
Loading ...