Loading ...
Loading ...
Loading ...
MOBILITY AT A GLANCECONTROLSDRIVING TIPSENTERTAINMENT
189
NAVIGATIONREFERENCE
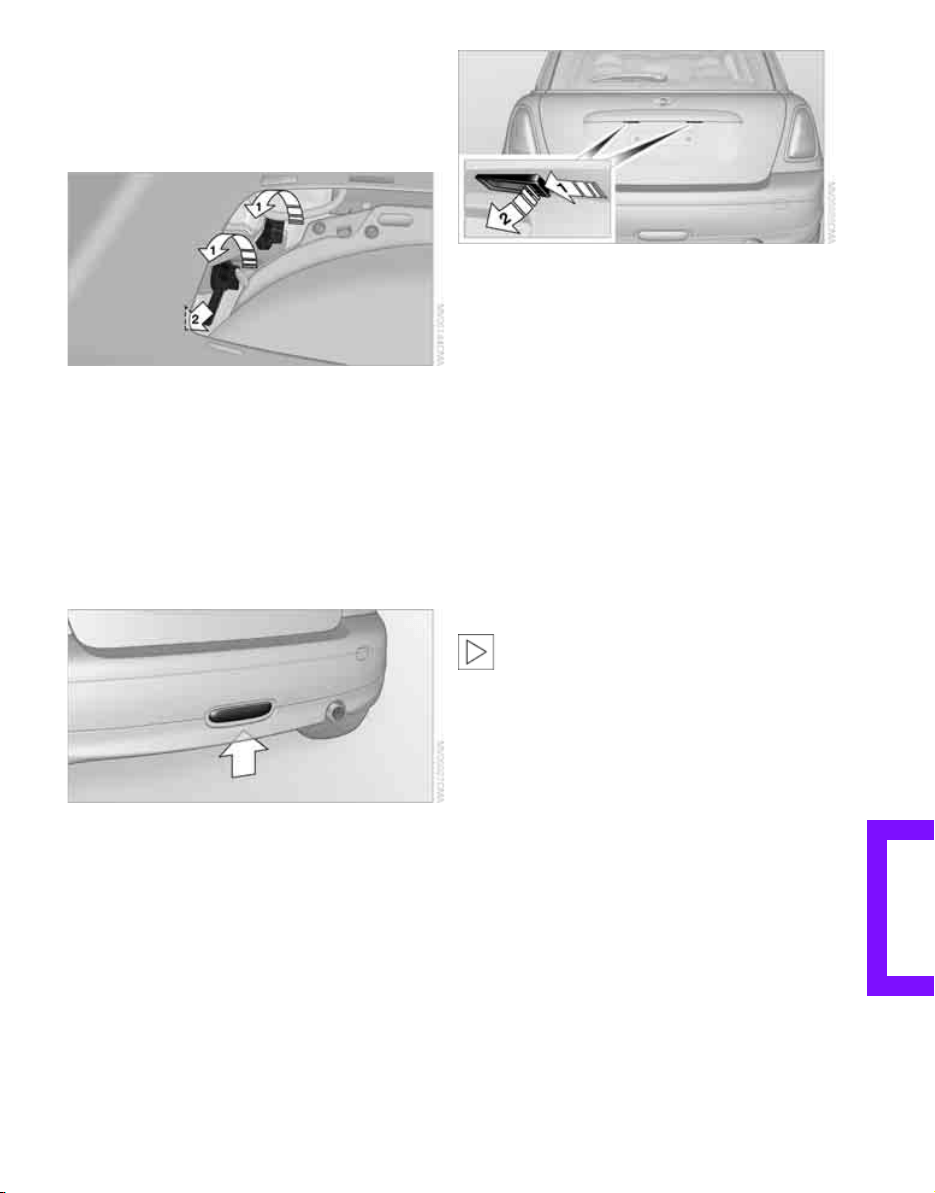
Changing
1. Screw out the desired bulb counterclock-
wise, arrows 1.
Additional bulbs are located behind the
sidewall of the cargo bay, arrow 2.
2. To insert the new bulb and replace the
cover, proceed in reverse order.
Rear fog lamp*
21 watt bulb, P 21 W
Access to the lamp via the back or underside of
the bumper.
The illustration shows the fog lamp in the
bumper of the MINI Cooper.
1. Screw out the bulb holder counterclockwise.
2. Screw out and replace the bulb.
3. To insert the new bulb and bulb holder, pro-
ceed in reverse order.
License plate lamps
5 watt bulb, C 5 W
1. Using a screwdriver, push the lamp to the
left in the tab of the lamp housing, arrow 1.
2. Remove the lamp, arrow 2.
3. Replace the bulb.
4. Insert the lamp.
Center brake lamp
This lamp uses LED technology for operation. In
the event of a malfunction, contact your MINI
dealer or a workshop that has specially trained
personnel working in accordance with the spec-
ifications of your MINI manufacturer.
Repairing a flat tire
Safety measures in the event of a break-
down:
Park the vehicle as far as possible from moving
traffic and switch on the hazard warning flash-
ers.
Turn the steering wheel until the front wheels
are in the straight-ahead position and engage
the steering wheel lock. Engage the parking
brake and shift into 1st or reverse gear or place
the selector lever in position P.
All passengers should be outside the vehicle and
in a safe place, e.g. behind a guardrail.
Erect a warning triangle or warning flasher at the
appropriate distance if necessary. Comply with
all safety guidelines and regulations.<
In the event of a flat tire, different procedures
should be followed depending on the equip-
ment included in your vehicle:
Online Edition for Part no. 01 41 2 604 501 - © 02/10 BMW AG
Loading ...
Loading ...
Loading ...