Loading ...
Loading ...
Loading ...
48
Memo
• In “Direct Cut” mode, the optional 12" × 24"
(305 mm × 610 mm) mat and scanning mat
cannot be used.
• Before attaching the material to the mat, use a
corner of the adhesive side of the mat to test
attaching it.
d While holding the mat level and lightly
inserting it under the feed rollers on the left and
right sides of the feed slot, press in the
operation panel.
• For details, see “Loading the Mat” on page 20.
X The “Start/Stop” button in the operation panel
lights up.
e Press the “Start/Stop” button to start scanning.
X When scanning is finished, the scanned image
appears in the screen.
f Check the scanned image, and then touch the
“OK” key.
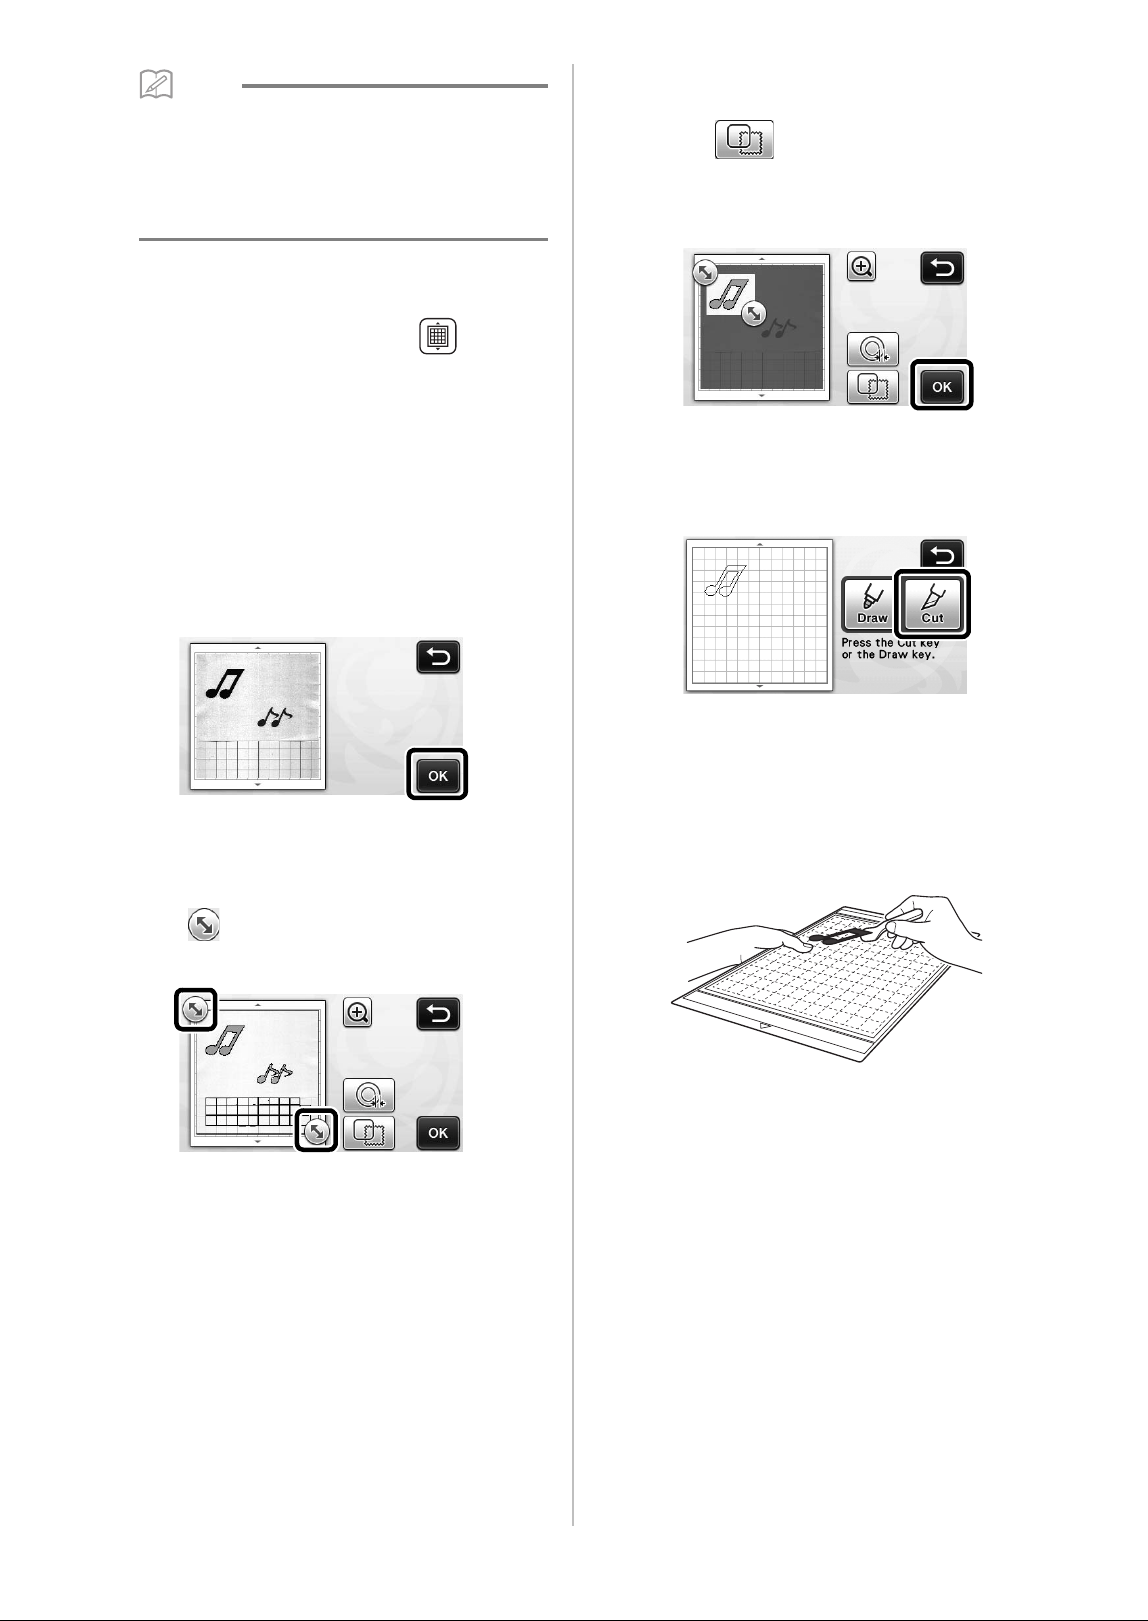
■ Editing Cutting Lines
a In the image trim screen, use the touch pen to
touch and drag it around the screen to trim
the image.
b To cut around the image for the pattern, touch
the “OK” key.
• Touch to cut any of a variety of shapes as a
frame around the scanned image. For details on
selecting a frame, see “Advanced Cutting
Functions” on page 49.
■ Cutting
a Touch the “Cut” key.
X The “Cut” key is highlighted, and the “Start/Stop”
button in the operation panel lights up.
b Press the “Start/Stop” button to start cutting.
• For details on unloading the mat after cutting,
follow the procedure under “Unloading the Mat”
on page 21.
Loading ...
Loading ...
Loading ...