Loading ...
Loading ...
Loading ...
35
3
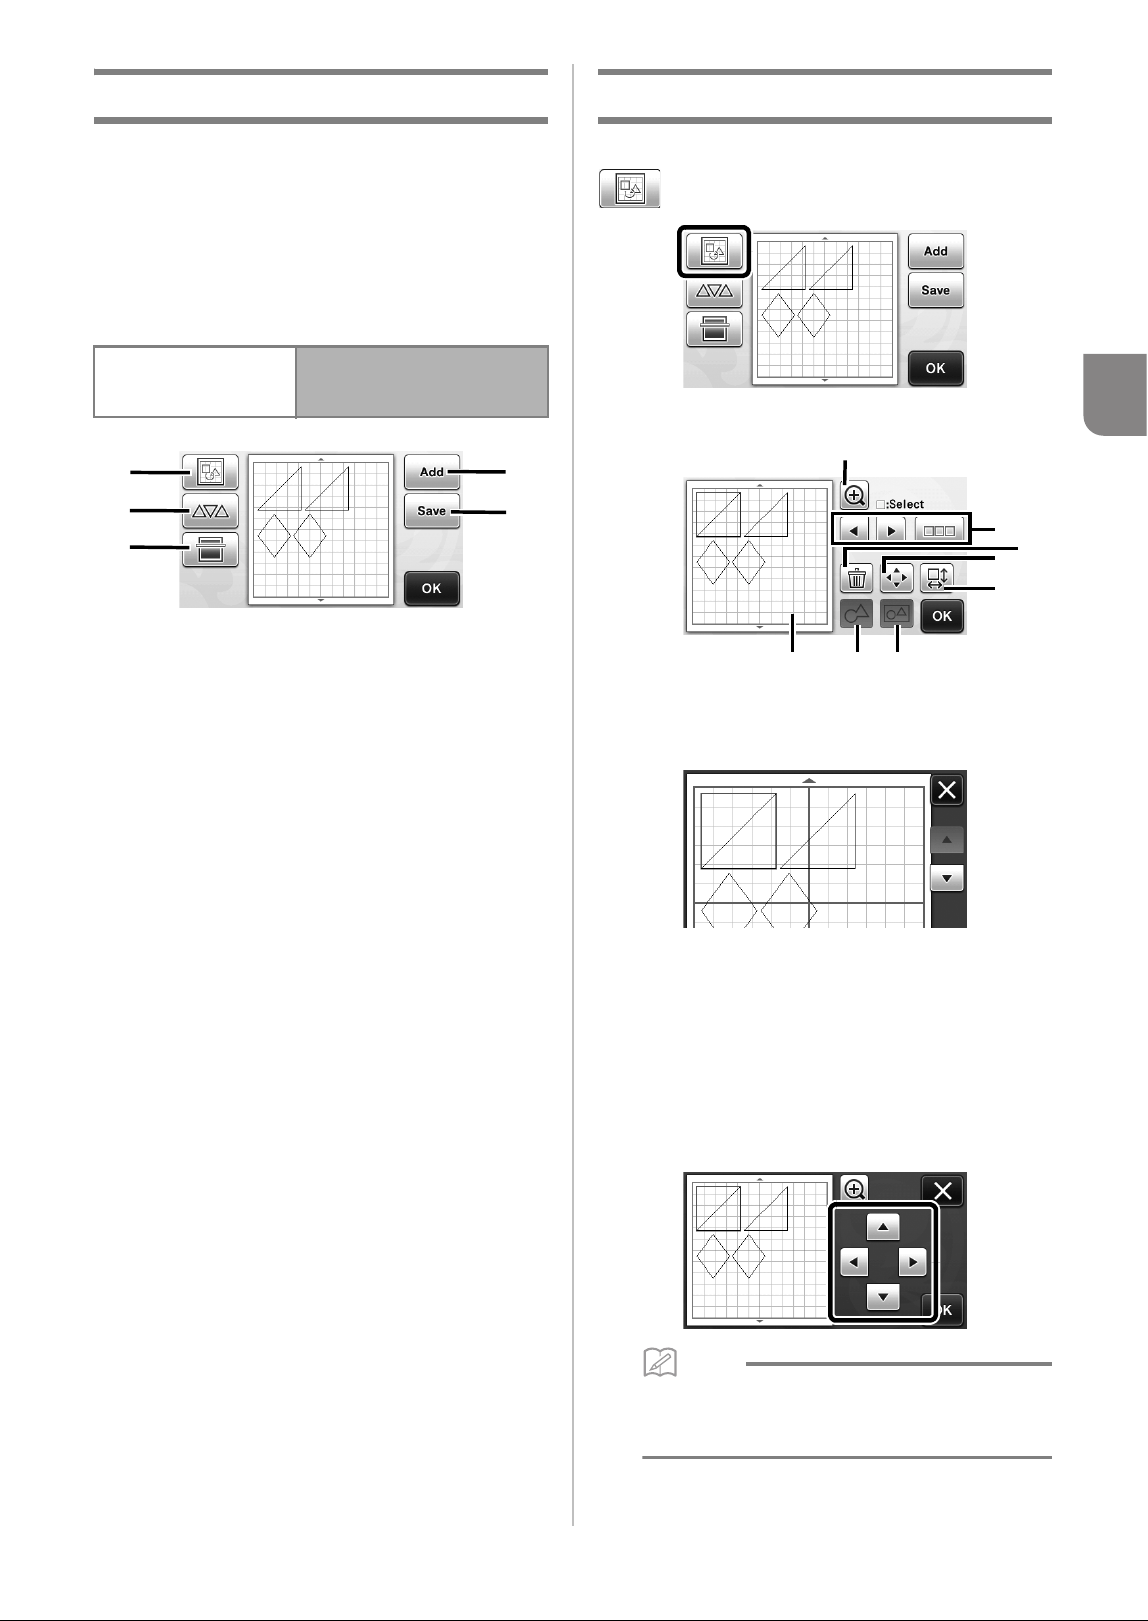
Pattern Layout Screen
The arrangement of the patterns can be edited. The
cutting/drawing area specified with the “Cut Area”
setting (page 23) in the settings screen is displayed in
the preview screen. Edit the pattern arrangement so
that the patterns fit within the specified area.
Available in the following screen
a Adding Patterns
Add a pattern to the layout.
X Touching this key displays the pattern category
selection screen. From that screen, select the
pattern to be added.
b Saving
Save the pattern arrangement as data. For details, see
“Saving” on page 41.
c Editing
The patterns in the layout can be edited, moved or
deleted. For details, see “Layout Editing Functions”
on page 35.
d Auto Layout
Automatically arrange the patterns to reduce their
spacing. For details, see “Auto Layout Functions” on
page 38.
e Background Scanning
Scan the material for cutting/drawing to be displayed
in the background of the pattern layout screen.
You can use specific areas of the material to cut out/
draw patterns, or display the material that has already
been cut in order to reuse it. For details, see
“Scanning a Background Image” on page 38.
Layout Editing Functions
The layout editing functions are available when
is touched in the pattern layout screen.
X The layout editing screen appears.
a Magnifying
Display the patterns enlarged. To scroll through the
screen, touch the arrow keys.
b Selecting Patterns
Select an individual pattern or multiple patterns to be
edited. For details, see “PATTERN SELECTION” on
page 31.
c Deleting
Delete the selected patterns.
d Moving
Incrementally move the selected patterns. Touch the
arrow keys to adjust the position of the patterns.
Memo
• The pattern can also be moved by touching it
displayed in the layout editing screen and
dragging it in the screen.
Pattern layout screen
→
Tutorial 1; Step
e
(page 26)
in “Selecting and Editing the
Second Pattern”
b
a
c
d
e
b
a
c
d
e
g fh
Loading ...
Loading ...
Loading ...