Loading ...
Loading ...
Loading ...
46
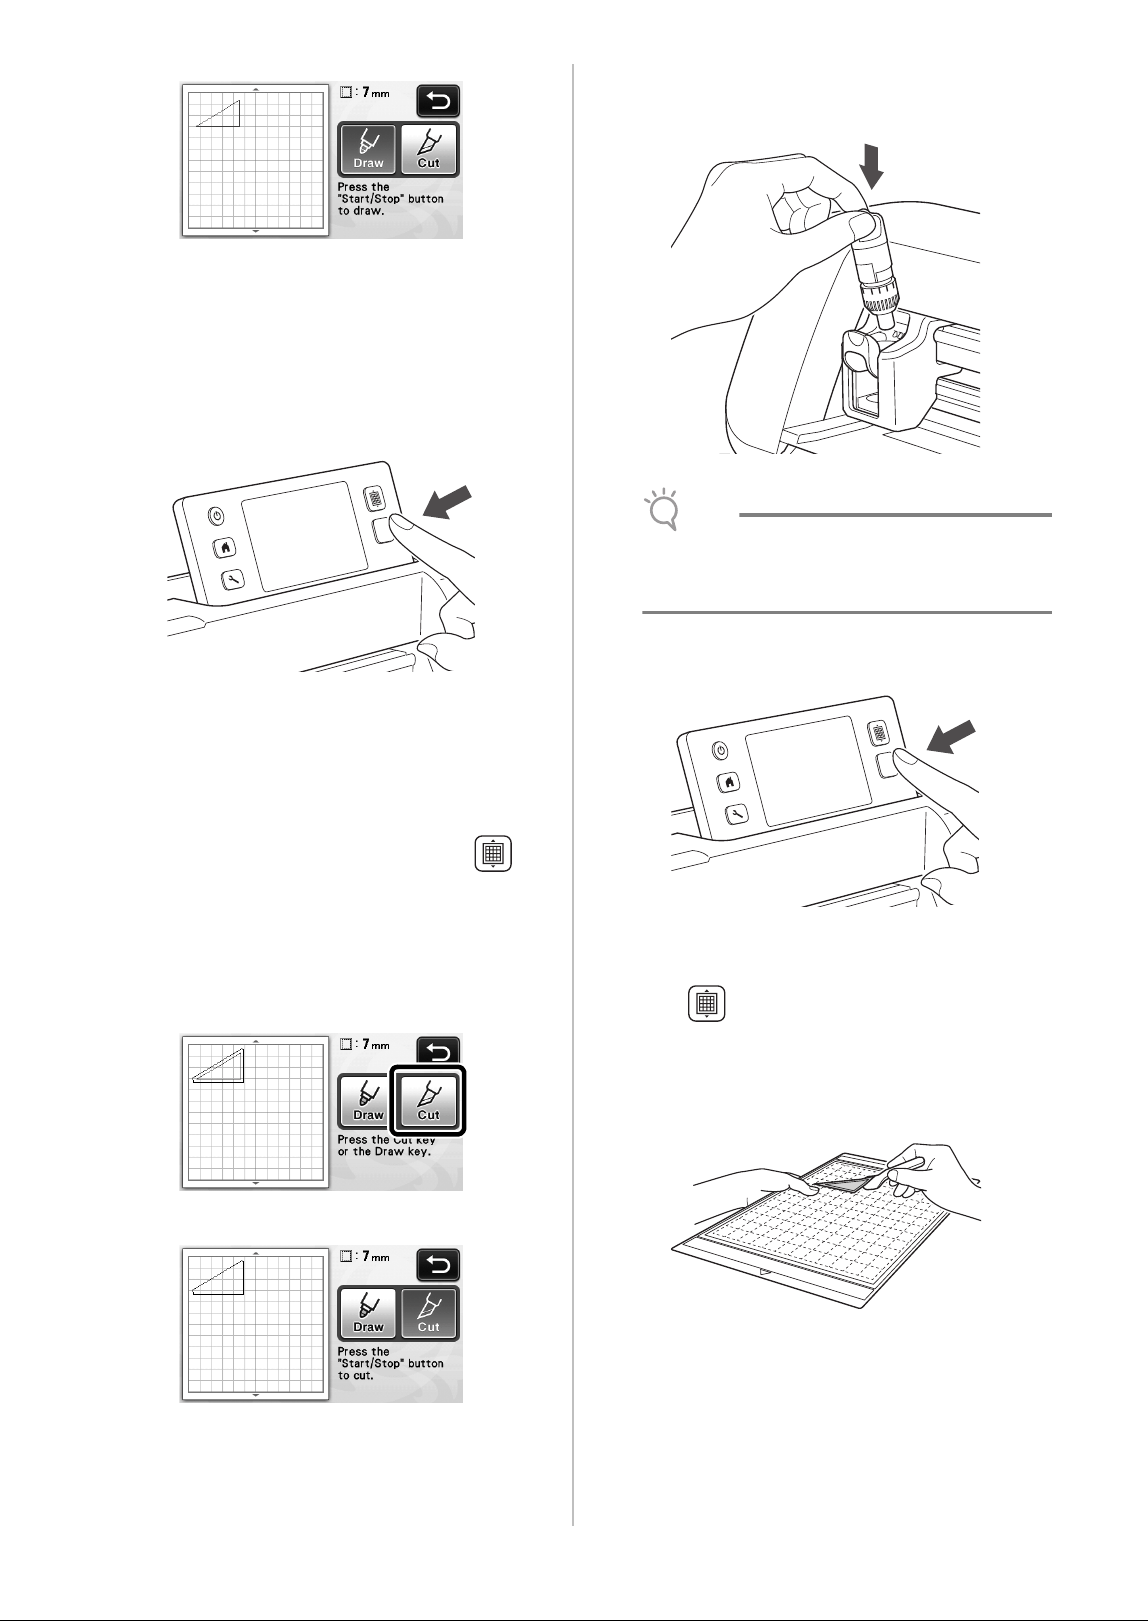
X The “Start/Stop” button in the operation panel
lights up.
b Adjust the pen pressure.
For details on adjusting the drawing pressure, see step
e (page 44) in “Drawing”.
c Press the “Start/Stop” button to start drawing.
X When drawing is finished, the message appears
in the screen. After you touch the “OK” key, the
draw/cut selection screen appears.
• To perform trial drawing operations to adjust
the drawing pressure, repeat steps
a through
c in this section.
• To cut around the drawn patterns, keep the mat
inserted into the slot without pressing ,
and continue with the following cutting
procedure.
■ Cutting
a Touch the “Cut” key.
X A preview of the line to be cut appears.
X The “Start/Stop” button in the operation panel
lights up.
b Remove the pen holder, and then install the
blade holder.
Note
• After use, remove the pen from the pen holder,
and then attach the cap to the pen before
storing it.
c Press the “Start/Stop” button to start cutting.
X When cutting is finished, the draw/cut selection
screen appears.
d Press in the operation panel to feed out
the mat.
e Peel the patterns off the mat.
• For details, see “Unloading the Mat” on page 21.
Loading ...
Loading ...
Loading ...