Loading ...
Loading ...
Loading ...
9
1
Chapter 1
GETTING STARTED
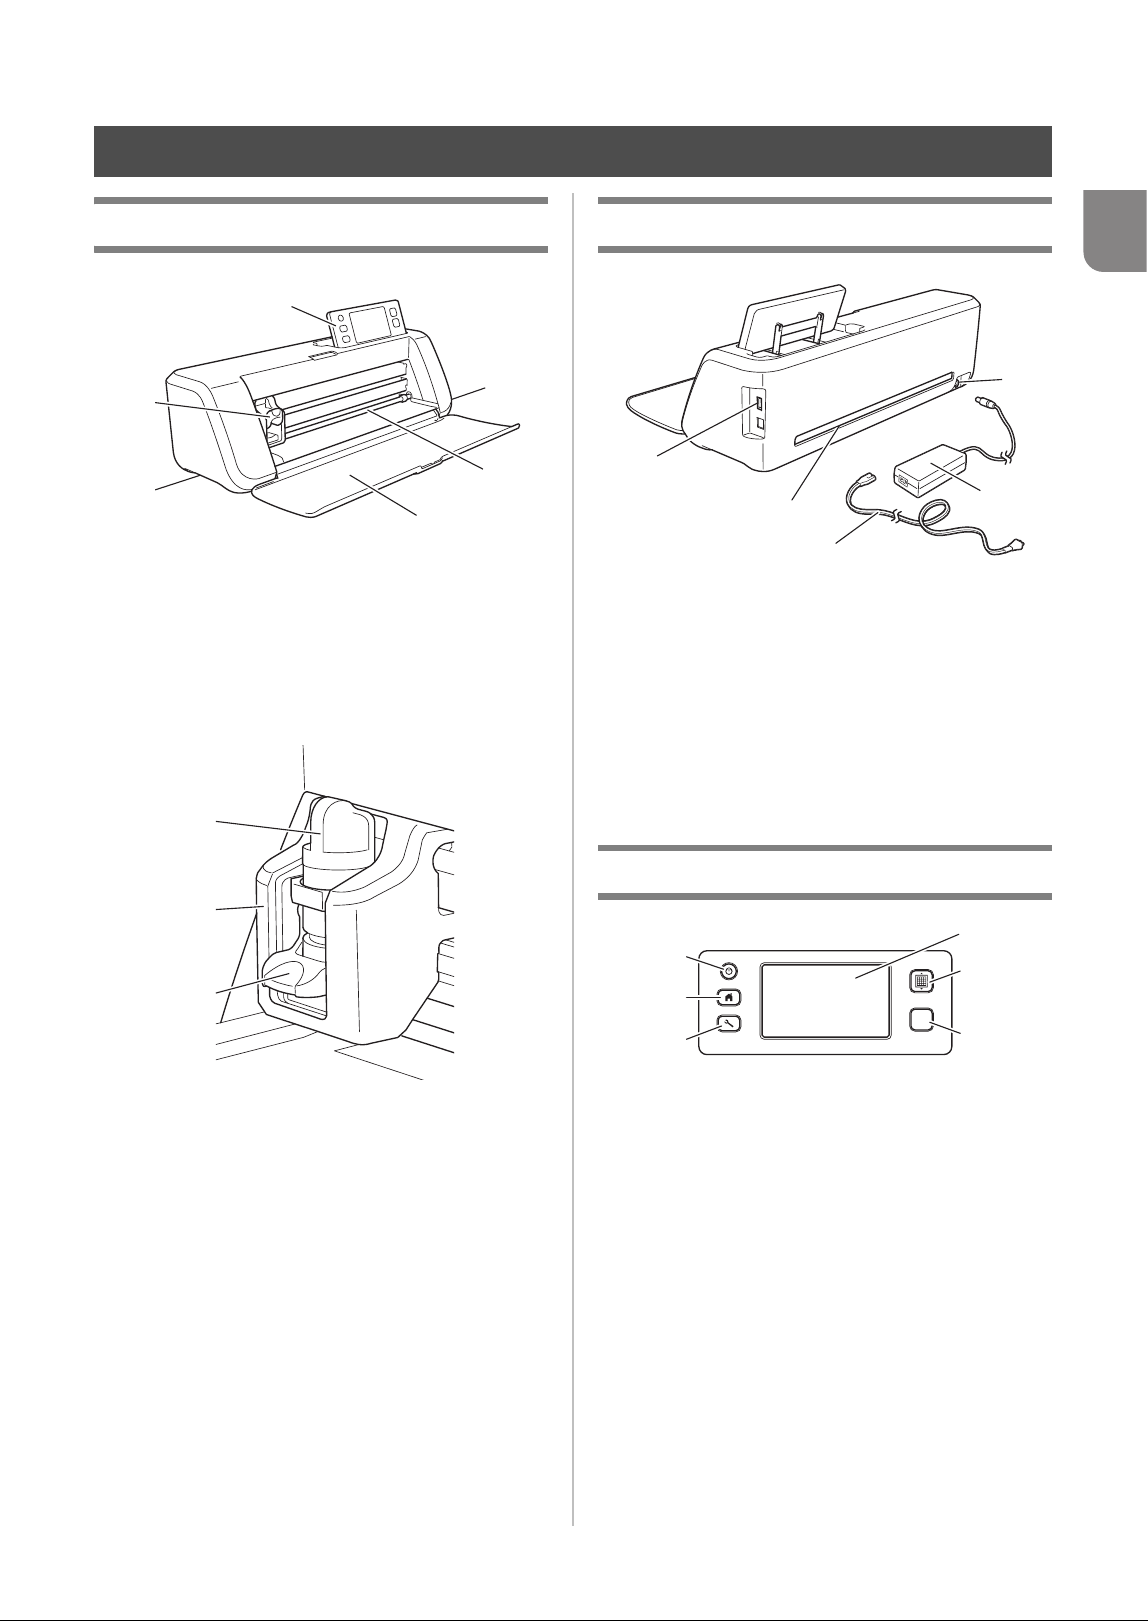
Unit Descriptions - Front
a Operation Panel
Allows you to control the unit and specify settings with
the LCD panel and operating buttons. The angle of the
operation panel can be adjusted to one of three levels.
For details, see “Adjusting the Angle of the Operation
Panel” on page 10.
b Carriage
Moves the installed holder for cutting or drawing.
1 Holder
Installs in the carriage to cut or draw on craft paper
or fabric. Use the holder designed specifically for
cutting or drawing.
2 Holder Guide
The guide secures the holder.
3 Holder Lock Lever
Releases the holder when the lever is raised. Locks
the holder when the lever is lowered.
c Handles
Grasped when moving the machine.
d Feed Slot
Feeds in or out a cutting/scanning mat. The mat is fed
by the feed rollers on both sides.
e Front Tray Cover
Protects the feed rollers, carriage and holder. Open
the cover while the machine is operating.
Unit Descriptions - Rear
a USB Port
Allows a USB flash drive to be connected for saving
and recalling data.
b Slot
Allows a mat to be fed back and forth during an
operation. Do not place any objects near the slot that
would prevent the mat from being fed out.
c DC Power Jack
d AC Adapter
e AC Power Cord
Unit Descriptions - Operation Panel
a Power Button
Turns the machine on/off.
b Home Button
Displays the home screen (starting screen for
operating this machine).
c Settings Button
Displays the settings screen for specifying various
settings. For details, see “Settings Screen” on
page 23.
d LCD Panel
Displays operation screens, preview images of
patterns and error messages.
e Feed Button
Feeds the loaded mat in to or out from the feed slot.
Be sure to press this button to feed the mat when
loading or unloading it.
f Start/Stop Button
Starts or stops cutting, drawing or scanning. When
the button function is available, it lights up in green.
PARTS AND FUNCTIONS
d
e
a
b
c
c
a
b
c
a
b
c
d
e
a
b
c
d
e
f
Loading ...
Loading ...
Loading ...