Loading ...
Loading ...
Loading ...
27
2
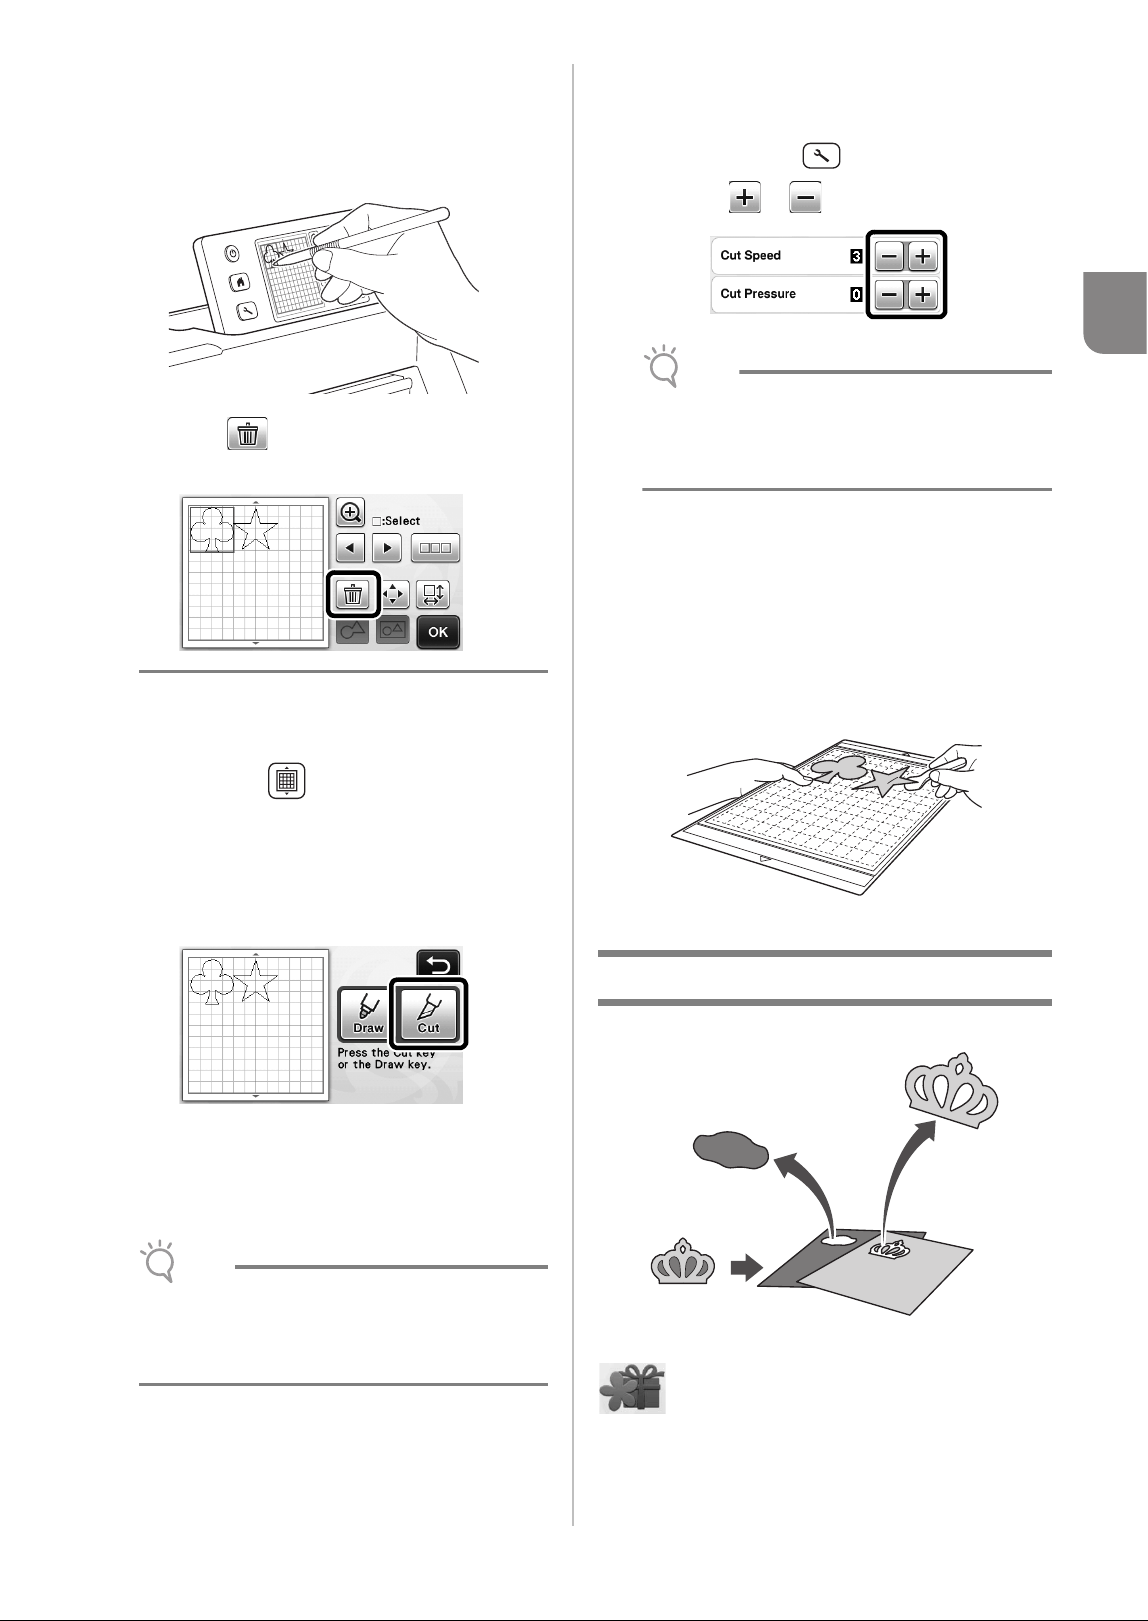
X Touch the pattern to be deleted in the screen.
To delete multiple patterns, use the function for
selecting multiple patterns. For details, see
“Selecting Multiple Patterns” on page 31.
X Touch in the layout editing screen to
delete the selected pattern(s).
■ Loading the Mat
While holding the mat level and lightly inserting it into
the feed slot, press in the operation panel.
• For details, see “Loading the Mat” on page 20.
■ Cutting
a Select “Cut” in the draw/cut selection screen.
X The “Start/Stop” button in the operation panel
lights up.
• Before cutting your project, adjust the blade
extension appropriately. For details, see
“Adjusting the Blade Extension” on page 18.
Note
• Before continuing operation, make sure that
patterns that will be cut out are arranged in the
cutting area corresponding to the size of the
material to be used.
b Adjust the cutting speed and pressure.
Before cutting the pattern, adjust the cutting speed and
pressure. These adjustments can be made from the
settings screen. Press in the operation panel.
X Touch or to change the settings.
Note
• Depending on the fabric being used, it may not
be cut cleanly if the cutting pressure is not
correctly adjusted. For the appropriate cutting
pressure, see “Cutting Settings” on page 18.
c Press the “Start/Stop” button to start cutting.
X When cutting is finished, the draw/cut selection
screen appears again.
■ Unloading the Mat
Feed out the mat, and then use the included spatula to
peel off the patterns.
For details, see “Unloading the Mat” on page 21.
Tutorial 2 - Cutting Advanced Patterns
In this tutorial, we will cut a built-in pattern in the
category.
Loading ...
Loading ...
Loading ...