Loading ...
Loading ...
Loading ...
11
4. Drill two ¹⁄8" (3 mm) holes that correspond to the bracket
holes of the determined mounting method. See the following
illustrations.
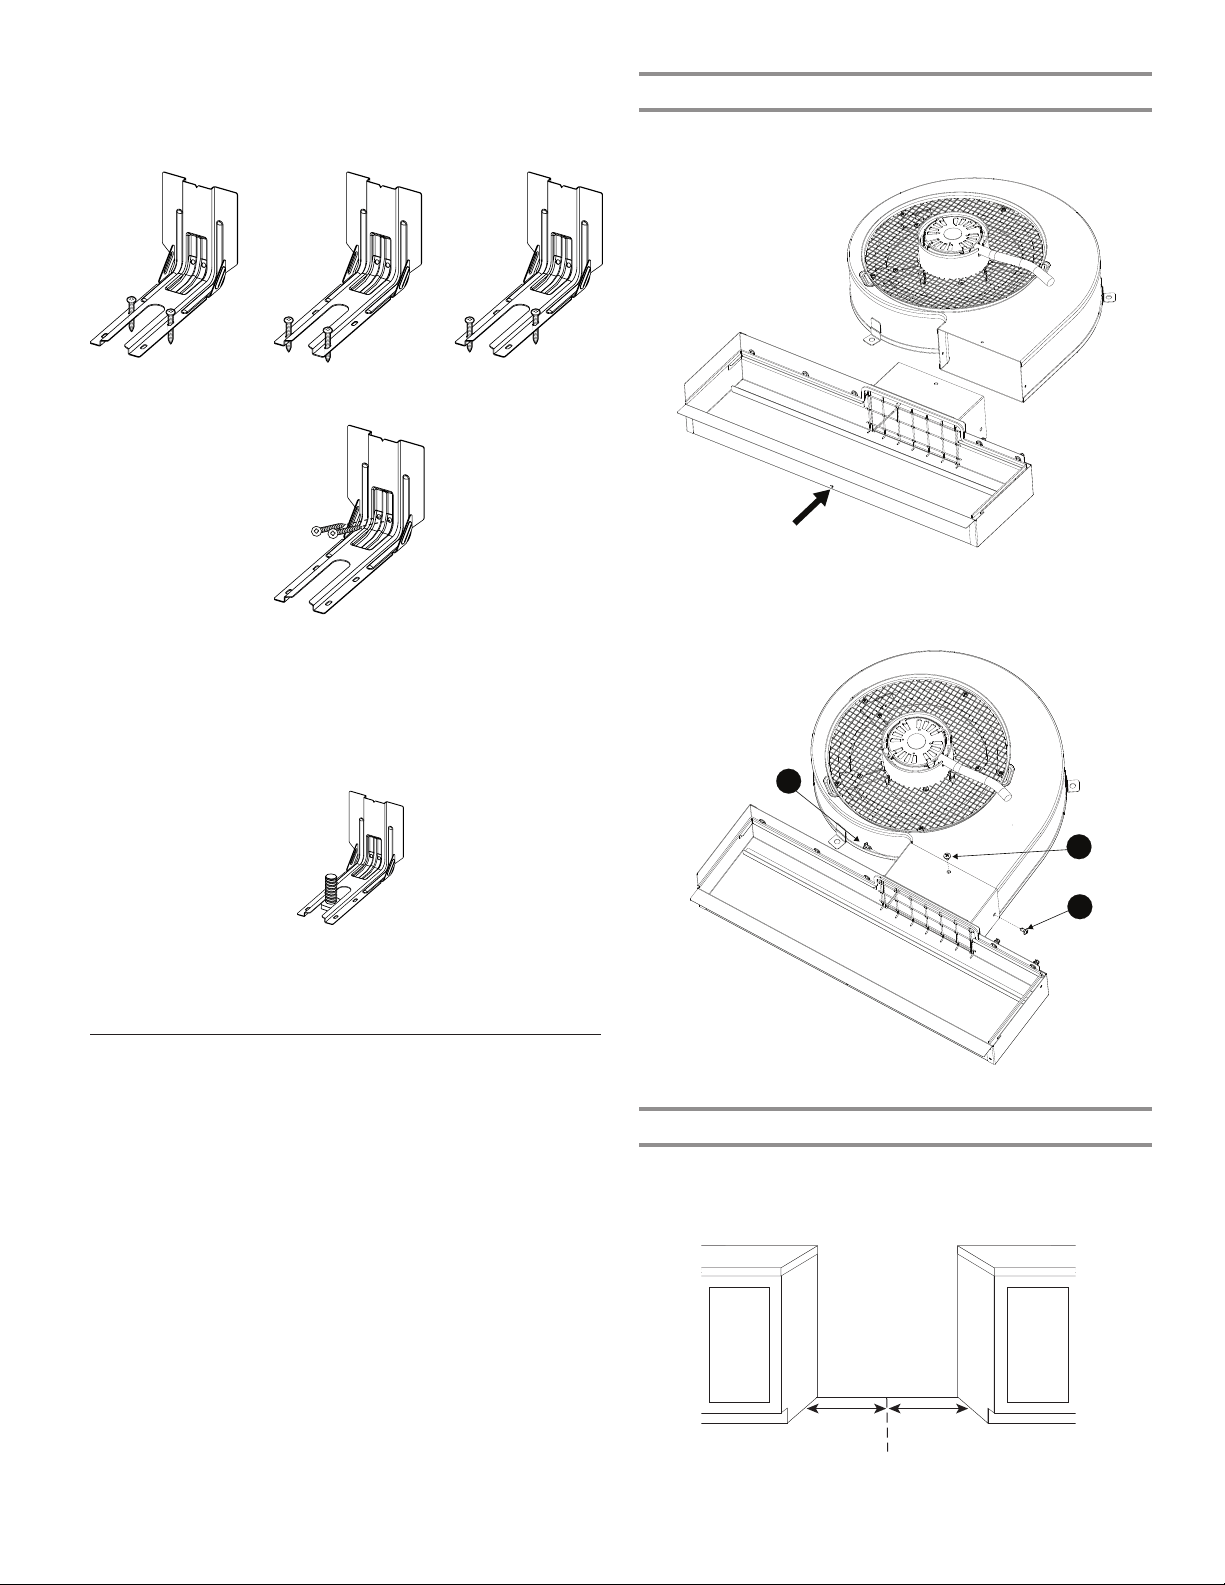
Rear position Front position Diagonal (2 options)
5. Using the two #10 x 1
5
⁄8" (4.1 cm) Phillips-head screws
provided, mount anti-tip bracket to the wall or oor.
6. Move range close enough to opening to allow for nal
electrical connections. Remove shipping base, cardboard
or hardboard from under range.
7. Move range into its nal location, making sure rear leveling
leg slides into anti-tip bracket.
8. Move range forward onto shipping base, cardboard
or hardboard to continue installing the range, using
the following installation instructions.
Install Recirculation Blower Assembly
Items Needed:
■ Blower Assembly (located under range)
■ Lower Filter Enclosure
■ (3) Felt Pads
■ (3) #10 x 1" screws
■ Aluminum tape
The anti-tip bracket must be installed. To install the anti-tip
bracket shipped with the range, see “Install Anti-Tip Bracket”
section.
Floor Mounting
Wall Mounting
Assemble Recirculation Housing
1. Slide the Lower Filter Enclosure over the blower assembly
outlet.
2. Secure the Lower Filter Enclosure to the blower motor with
the three (3) #8 – 3/8" screws provided. Seal connection with
aluminum tape.
Position the Blower
1. Determine and mark the center line on the oor of the
cabinet opening.
1
2
3
A
A. Center line
Loading ...
Loading ...
Loading ...