Loading ...
Loading ...
Loading ...
31
SERVICE AND MAINTENANCE
Parking Brake Adjustment
WARNING
Never attempt to adjust the brakes while the engine is running. Always
disengage PTO (Blade Engage Lever), move shift lever into neutral position,
stop engine and remove key to prevent unintended starting.
If the tractor does not come to a complete stop when the clutch-brake pedal is
completely depressed, or if the tractor’s rear wheels can roll with the parking brake
applied, the brake is in need of adjustment. Contact the nearest Parts & Repair
Service Center to have your brakes serviced.
To locate the nearest Parts & Repair Service Center or to schedule service,
contact 1-888-331-4569.
Changing the Transmission Drive Belt
NOTE: Several components must be removed and special tools (i.e. air/impact
wrench) in order to change the tractor’s drive belt. Contact the nearest Parts &
Repair Service Center to have your transmission drive belt serviced.
To locate the nearest Parts & Repair Service Center or to schedule service, call
1-888-331-4569.
Muffler
WARNING
Temperature of muffler and nearby engine areas may exceed 150˚ F (65˚C).
Avoid contact with these areas.
• Inspect muffler periodically, and replace if necessary. Replacement parts
for the muffler must be the same and installed in the same position as the
original parts.
Carburetor Adjustment
• The carburetor on this engine is not adjustable.
Battery
California Proposition 65 WARNING! Battery posts, terminals, and related
accessories contain lead and lead compounds, chemicals known to the State of
California to cause cancer and reproductive harm. Wash hands after handling.
CAUTION
If removing the battery, disconnect the NEGATIVE (Black) wire from its
terminal first, followed by the POSITIVE (Red) wire. When re-installing
the battery, always connect the POSITIVE (Red) wire to its terminal first,
followed by the NEGATIVE (Black) wire.
The battery is sealed and is maintenance-free. Acid levels cannot be checked.
• Always keep the battery cables and terminals clean and free of
corrosive build-up.
• After cleaning the battery and terminals, apply a light coat of
petroleum jelly or grease to both terminals.
• Always keep the rubber boot positioned over the positive terminal to
prevent shorting.
Removing the Battery
1. Locate the battery on the left side of the riding mower.
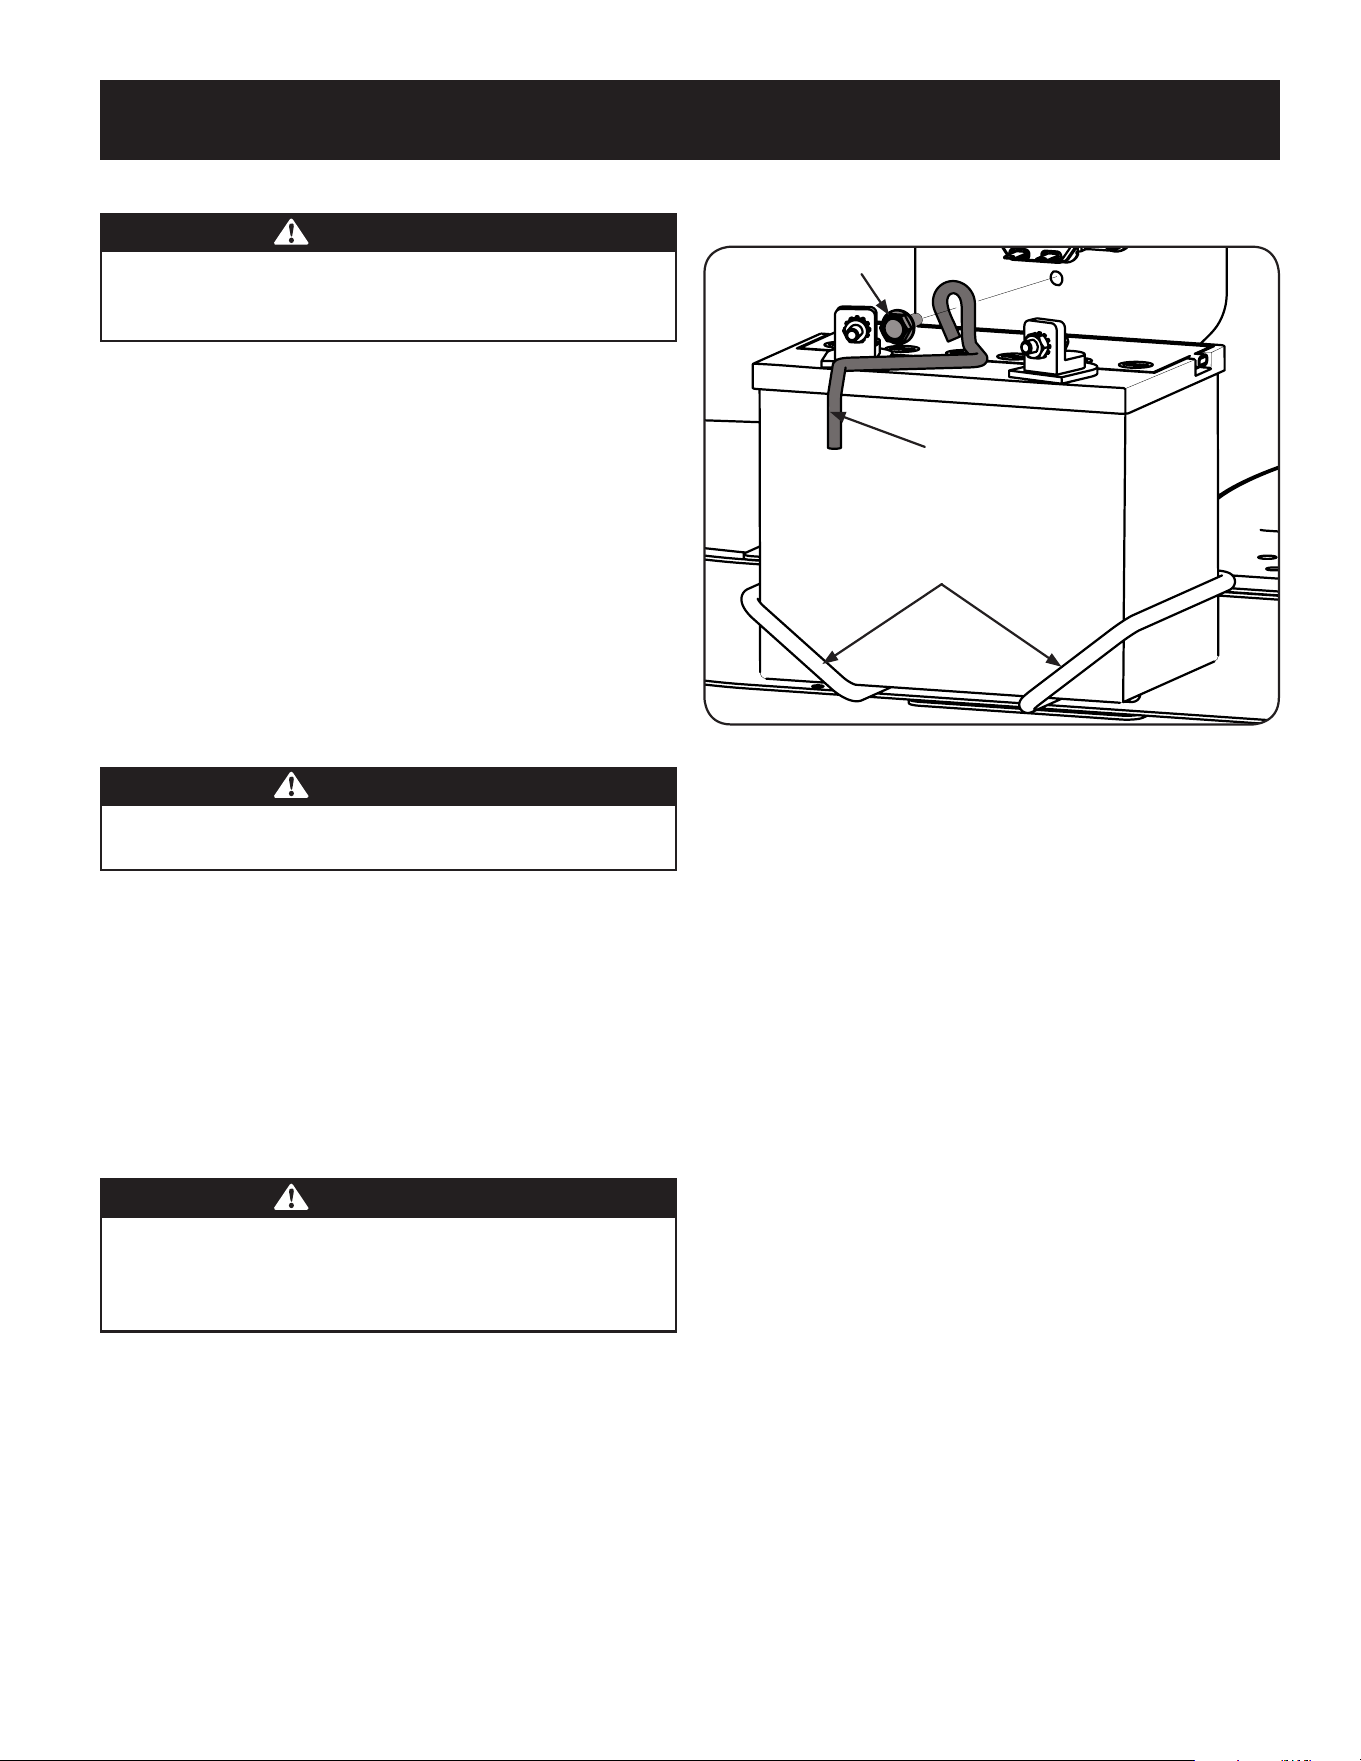
2. Remove the hex washer screw securing the battery hold-down rod to the
frame. See “Figure 24”.
Hex Washer Screw
Battery Hold-Down Rod
Battery Tray
Figure 24
3. With the battery hold-down rod removed, lift the battery out of the battery
tray.
4. To re-install the battery, place it back in the battery tray and secure in place
with the battery hold-down rod and hex washer screw. See “Figure 24”.
IMPORTANT: If removing the battery for any reason, disconnect the NEGATIVE
(Black) wire from its terminal first, followed by the POSITIVE (Red) wire. When
re-installing the battery, always connect the POSITIVE (Red) wire to its terminal
first, followed by the NEGATIVE (Black) wire. Be certain that the wires are connected
to the correct terminals; reversing them could change the polarity and result in
damage to your engine’s alternating system.
Cleaning Battery
Clean the battery by removing it from the tractor and washing with a baking soda
and water solution. If necessary, scrape the battery terminals with a wire brush to
remove deposits. Coat terminals and exposed wiring with grease or petroleum jelly
to prevent corrosion.
Loading ...
Loading ...
Loading ...