Loading ...
Loading ...
Loading ...
29
SERVICE AND MAINTENANCE
1. It is easiest to change the deck belt by first removing the cutting deck as
instructed earlier in this section. Skip this step if deciding to change the deck
belt with the mowing deck still installed on the unit. Otherwise, remove the
cutting deck now.
2. If changing the deck belt with the cutting deck still installed on the unit,
lower the cutting deck to the lowest cutting position.
3. Remove the deck belt from around the unit’s PTO drive pulley as shown in
“Figure 15”. Simply roll one side of the belt off of the pulley and then work
it off the pulley by continuing around the pulley until the belt is off of the
pulley.
4. Pull the belt towards the front of the unit, pulling it through and out of the
belt keeper bracket, shown in “Figure 15”.
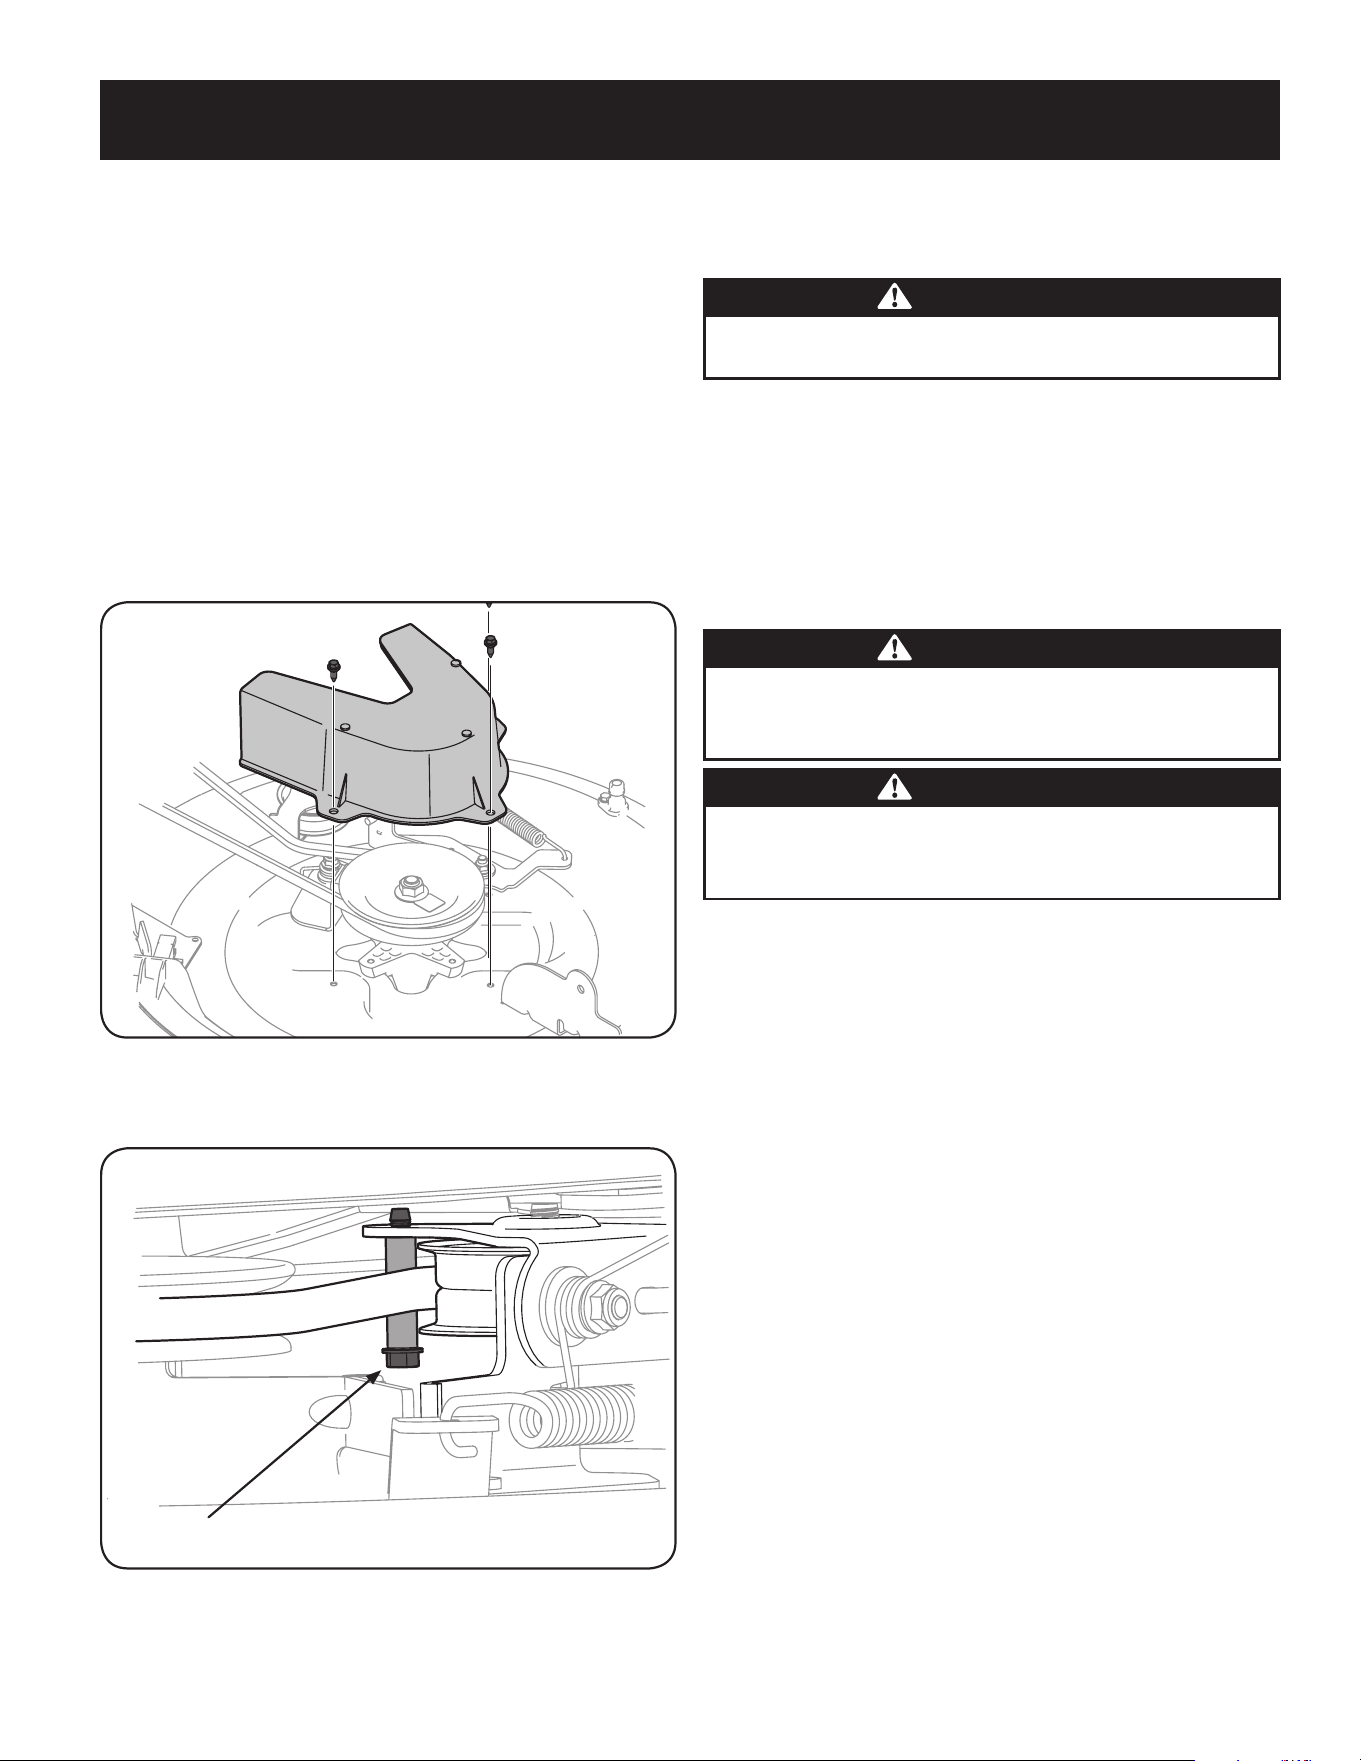
5. Remove the deck belt cover by removing the three hex bolts that secure it.
See “Figure 19”.
Figure 19
6. Remove the belt keeping spacer by removing the hex bolt that secures it. See
“Figure 20”.
Belt Keeper Hex bolt
Figure 20
7. Change the belt, then reinstall the all the components removed in the
reverse order beginning with the idler pulley, and lastly the belt cover.
8. Feed the deck belt through the belt keeper bracket and work it around and
onto the PTO drive pulley as shown in “Figure 15”.
Tires
WARNING
Never exceed the maximum inflation pressure shown on the sidewall of tire.
The recommended operating tire pressure is:
• Approximately 10 psi for the rear tires
• Approximately 14 psi for the front tires
IMPORTANT: Refer to the tire sidewall for exact tire manufacturer’s recommended
or maximum psi. Do not overinflate. Uneven tire pressure could cause the cutting
deck to mow unevenly.
Cutting Blade
WARNING
Shut the engine off and remove ignition key before removing the cutting
blade for sharpening or replacement. Protect your hands by using heavy
gloves when grasping the blade.
WARNING
Periodically inspect the blade and/or spindle for cracks or damage,
especially after you’ve struck a foreign object. Do not operate the machine
until damaged components are replaced.
To remove the blade, proceed as follows.
NOTE: It may be easier to change the blade by first removing the deck from
beneath the tractor, (refer to Cutting Deck Removal earlier in this section)
then gently flip the deck over to expose its underside. It is possible to change
the blade, however, with the deck still attached to the tractor. If attempting
to change the blade with the deck still installed on the tractor, first move the
deck lift lever to its highest cutting position.
1. Remove the mulch plug, deck chute or bagging chute, if equipped, exposing
the deck chute opening.
2. Using a block of wood or 2 x 4, insert it into the deck opening and rotate the
blade around until it wedges the wood between the deck opening and the
cutting blade, as shown in “Figure 21”.
3. Remove the hex flange nut that secures the blade to the spindle assembly,
and remove the blade. See the Inset of “Figure 21”.
NOTE: The deck spindle has a normal thread. To loosen, rotate the flange lock
nut counterclockwise.
Loading ...
Loading ...
Loading ...