User Manual
Setup
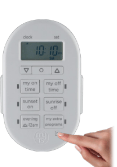
If no numbers are visible on-screen, plug timer into an outlet and let timer charge for 1 hour. Once charged, press the reset ( ) button in the lower right corner using a toothpick or pencil.
Note: If no buttons are pressed for 10 seconds during the intial set up of the timer or when setting additional programs, timer will go back to Clock Mode. To re-enter programming mode, press and hold Set (  ) button for 3 seconds.
Upon reset, clock should be blinking. Use up ( ) and down (
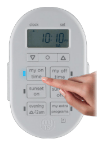
 ) arrows to set current time (take note of AM or PM time) and press Set ().
“YEAR” will flash on screen. Press Set () and it will show “2017.” Use arrows ( ) to change year if needed and press Set (
 ).
).
“MON” will flash on screen. Press Set ( ) and it will show “01.” Use arrows () to select current month and press Set ( ).
"DAY” will flash on screen. Press Set () and it will show “01.” Use arrows () to select current day and press Set ().
“ZONE” will flash on screen. Press Set () and it will show “NOR”, followed by “CENT,” “SOU,” “HI” and “ALAS.” Use arrows () to select correct region (zone) and press Set ( ). See figure below.
“DST” (Daylight Saving Time) will flash on screen. Press Set () and it will show “ON” on the left of the screen. Press Set ( ) again to leave DST on or use arrows to change to “OFF” before pressing Set ().

Note: Choose DST ON if your local area observes Daylight Saving
Time. The timer will automatically adjust backwards and forwards an hour. Choose DST OFF if your local area does not observe Daylight Saving Time.

Programming options
Note: If the LED next to any button is illuminated, that indicates that the program is active. To deactivate, press the button again.
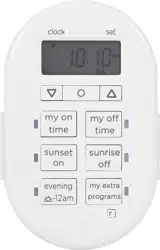
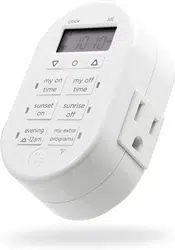
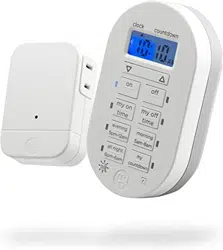
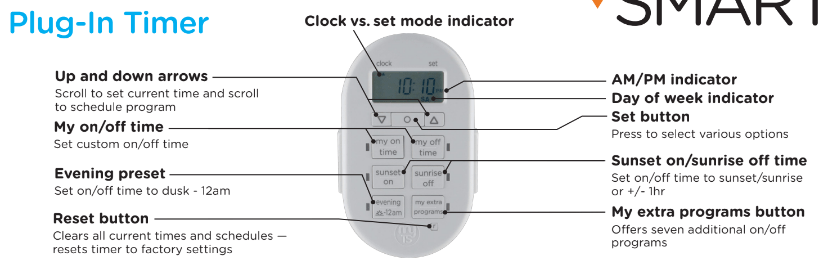
I. Choose your custom on/off times
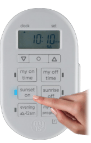
My On Time:
Press “my on time” button and the clock will begin blinking. Set desired on time and press Set ( ). Days of the week will then flash on screen. Use arrows () to select the correct day(s) and press Set ( ).
My Off Time: Press “my off time” button and the clock will begin blinking. Select desired off time and press Set (). Days of the week will then flash on screen. Use arrows () to select the correct day options and press Set ( ).
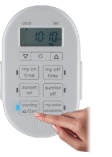
Sunset On: Press “sunset on” button and the sunset time will flash on the screen. Use arrows () to adjust time (time can be adjusted up to 1 hour in either direction) and press Set ( ). Days of the week will then flash on screen. Use arrows () to select the correct day options and press Set ( ).
Sunrise Off: Press “sunrise off” button and the sunrise time will flash on the screen. Use arrows () to adjust time (time can be adjusted up to hour in either direction) and press Set ( ). Days of the week will then flash on screen. Use arrows () to select the correct day options and press Set ( ).
II. Preset schedules
Evening Preset: This option will turn the light on at sunset and off at am. When the “evening ( -12am)” button is pressed, the sunset time will flash on the screen. Use arrows ( ) to adjust time (time can be adjusted up to 1 hour in either direction) and press Set ( ). Days of the week will then flash on screen. Use arrows () to select the correct day options and press Set ( ).
III. Extra programs
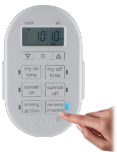
This option offers 7 additional on/off programs. When the “my extra programs” button is pressed “1 ON” will flash on screen but no time will be displayed, only “--:--.” Press Set ( ) to select program “1 on” and the “--:--” will flash on screen. Use arrows () to select time and press Set ( ). Days of the week will then flash on screen. Use arrows () to select the desired days of the week and press Set ( ). Program 1 On (“1 ON”) is now set. To go to the next program, use the arrows () and press SET ( ) on the next program you want to set. Repeat these steps for Program 1 Off (“1 OFF”), Program 2 On (“2 ON”), Program 2 Off (“2 OFF”), etc.
To skip through without setting, simply stop pressing buttons and the display will revert to clock mode after 10 seconds. You can also use the arrows () to scroll through the options without setting a time. After Program 7 Off (“7 OFF”), the menu will start over with Program 1 On (“1 ON”). The LED indicator light will remain on if any of the additional programs are set.
To delete one of the extra programs: Use arrows () to scroll time back to between 11:59pm and 12:00am. The display will show “--:--” to confirm the program has been deleted. No additional steps are needed. The display will revert back to clock mode after 10 seconds.
IV. Days of the week options order
Days of the week options will display in the following order when using the arrow unless you are using the settings in “my extra programs.” In this case, they will begin with the last On time that was set.
FCC Statement
This device complies with Part 15 of the FCC and Industry Canada license-exempt RSS standard(s). Operation is subject to the following two conditions: (1 this device may not cause harmful interference, and (2) this device must accept any interference received, including interference that may cause undesired operation.
FCC NOTE: The manufacturer is not responsible for any radio or TV interference caused by unauthorized modifications to this equipment. Such modifications could void the user’s authority to operate the equipment.
NOTE: This equipment has been tested and found to comply with the limits for a Class B digital device, pursuant to
Part 15 of the FCC Rules. These limits are designed to provide reasonable protection against harmful interference in a residential installation. This equipment generates, uses and can radiate radio frequency energy and, if not installed and used in accordance with the instructions may cause harmful interference to radio communications. However, there is no guarantee that interference will not occur in a particular installation. If this equipment does cause harmful interference to radio or television reception, which can be determined by turning the equipment off and on, the user is encouraged to try to correct the interference by one or more of the following measures:
- Reorient or relocate the receiving antenna.
- Increase the separation between the equipment and receiver.
- Connect the equipment into an outlet on a circuit different from that to which the receiver is connected.
- Consult the dealer or an experienced radio/TV technician for help. CAN ICES-3(B)/NMB-3(B)