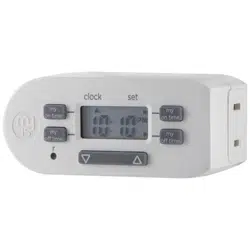
If no numbers are visible on-screen, plug timer into an outlet and let timer charge for 1 hour. Once charged, press the reset ( ) button in the lower right corner using a toothpick or pencil.
2. Set the time
Use the up ( ) and down ( ) arrows to set current time, taking note of AM or PM. Note: When daylight saving time occurs use the up ( ) and down ( ) arrows to adjust the time by 1 hour
Programming
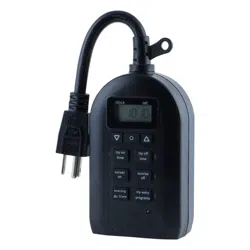
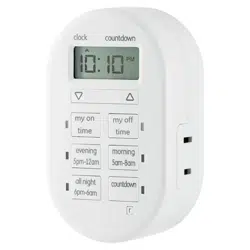
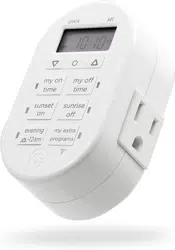
1. Choose your custom “my on time”
Press the “my on time” button (the default time will be flashing), then use the up ( ) and down ( ) arrows to set the on time. (If you set the “my on time” earlier than the current time, it will not turn on until the next day at the time scheduled). Once you reach the desired “my on time,” wait 5 seconds, press the “my on time” button again or press the “my off time” button to begin setting the off time.
2. Choose your custom “my off time”
Press the “my off time” button (the default time will be flashing), then use the up ( ) and down ( ) arrows to set off time.
Once you reach the desired “my off time,” wait 5 seconds, press the “my off time” button again or press the other “my on time” button to begin setting the next on time. Repeat Steps 1 and 2 to program second set of “my on” and “my off” times.
Note: When a “my on” or “my off” time is set, the active program indicator arrow will appear on the screen beside the corresponding program number. Programs may run individually or simultaneously.
EASY INSTALLATION
Shut off power at fuse box or circuit breaker before installation.
Remove wall plate and existing single pole switch, if applicable.
Strip building wire to 3/8”.
Connect wires using the provided twist-on connectors (Use with copper wire only). BLACK lead to circuit’s (HOT) line conductor; RED lead to circuit’s Load conductor; GREEN conductor to ground. See Figure 1
Tuck the wires into the box leaving enough room for the timer, then mount the timer securely into the box using screws provided. Carefully screw the provided wall plate into place or you may use any Décora style wall plate with this timer.
Restore power at fuse box or circuit breaker.
*Once power is restored it will take about 1 minute to fully charge. The timer will not function until it is fully charged. When charged, the 5 minute light will flash.
*The load may be powered on when power is restored from the circuit breaker. Power will automatically turn off once unit is charged (1 minute)
OPERATION
For timed switching, simply press the 5 min., 15 min., 30 min., 1 hour, 2 hour or 4 hour pad on the face of the timer. The blue LED will blink to let you know the last time used. You may either select a new time or press the big button, and it will turn on for the last time used. Timer will blink every 20 seconds to show the last time used. If you hold the big button down for 5 seconds it will turn on and stay on until hit again.
To turn lights on with no end time push and hold big button for 3 seconds. Lights will stay on until big button is pressed to turn off lights.
TROUBLESHOOTING
Issues:
Solution:
The timer lights never flash.
Check wiring, the ground wire must be connected to earth ground.
The device or light which the timer controls turns ON when the breaker was 1st turned on
This is normal the device or light will turn OFF after 1 minute
The timer freezes and does not respond to button presses
This happens if you cycle the load to many times in a short period. Wait 1 minute and the timer will be ready for use
 ) button in the lower right corner using a toothpick or pencil.
  ) and down (
 ) arrows to set current time, taking note of AM or PM. Note: When daylight saving time occurs use the up (