Loading ...
Loading ...
Loading ...
12 13USING THE GAS ELEVATED COOKERUSING THE GAS ELEVATED COOKER
USING THE GAS ELEVATED COOKERUSING THE GAS ELEVATED COOKER
Gas oven conventional baking
The heat comes from the bottom oven burner. The
temperature at the centre of the oven is the same
temperature set on the control knob. When oven is used
on this mode, shelf position is important, (refer to ‘Oven
Guide’). As hot air naturally rises, the upper half of the
oven will be approximately 10°C higher and the lower half
approximately 10°C cooler than the set temperature.
For best results from your gas oven use dark coloured
trays and baking dishes on a single shelf. Refer to ‘General
Hints and Tips’ section for more information.
For best baking results preheat oven for 30 minutes.
Gas oven fan forced baking
Fan Forced baking generally requires lower temperatures
than conventional baking. Most recipe books, unless
stated, are for conventional oven temperatures. It is
recommended when using the fan forced mode to reduce
the oven temperature by 10°C.
In a fan forced gas oven the heat comes from the bottom
burner. Hot air is distributed by an electrically operated
fan located behind the rear wall of the compartment,
providing an even temperature on all shelf levels. This
means batches of the same food can be baked using
multiple shelf positions simultaneously.
Fan Forced operation can be used for single shelf baking
with equal success.
For best baking results preheat oven for 30 minutes.
Cookware
For best baking results with gas ovens, dark coloured
trays and baking dishes are recommended.
Gas oven burner flame
From a cold start the oven burner flame will be
higher on the left hand-side. After reaching the set
temperature, the flame will become even. This does not
affect cooking results.
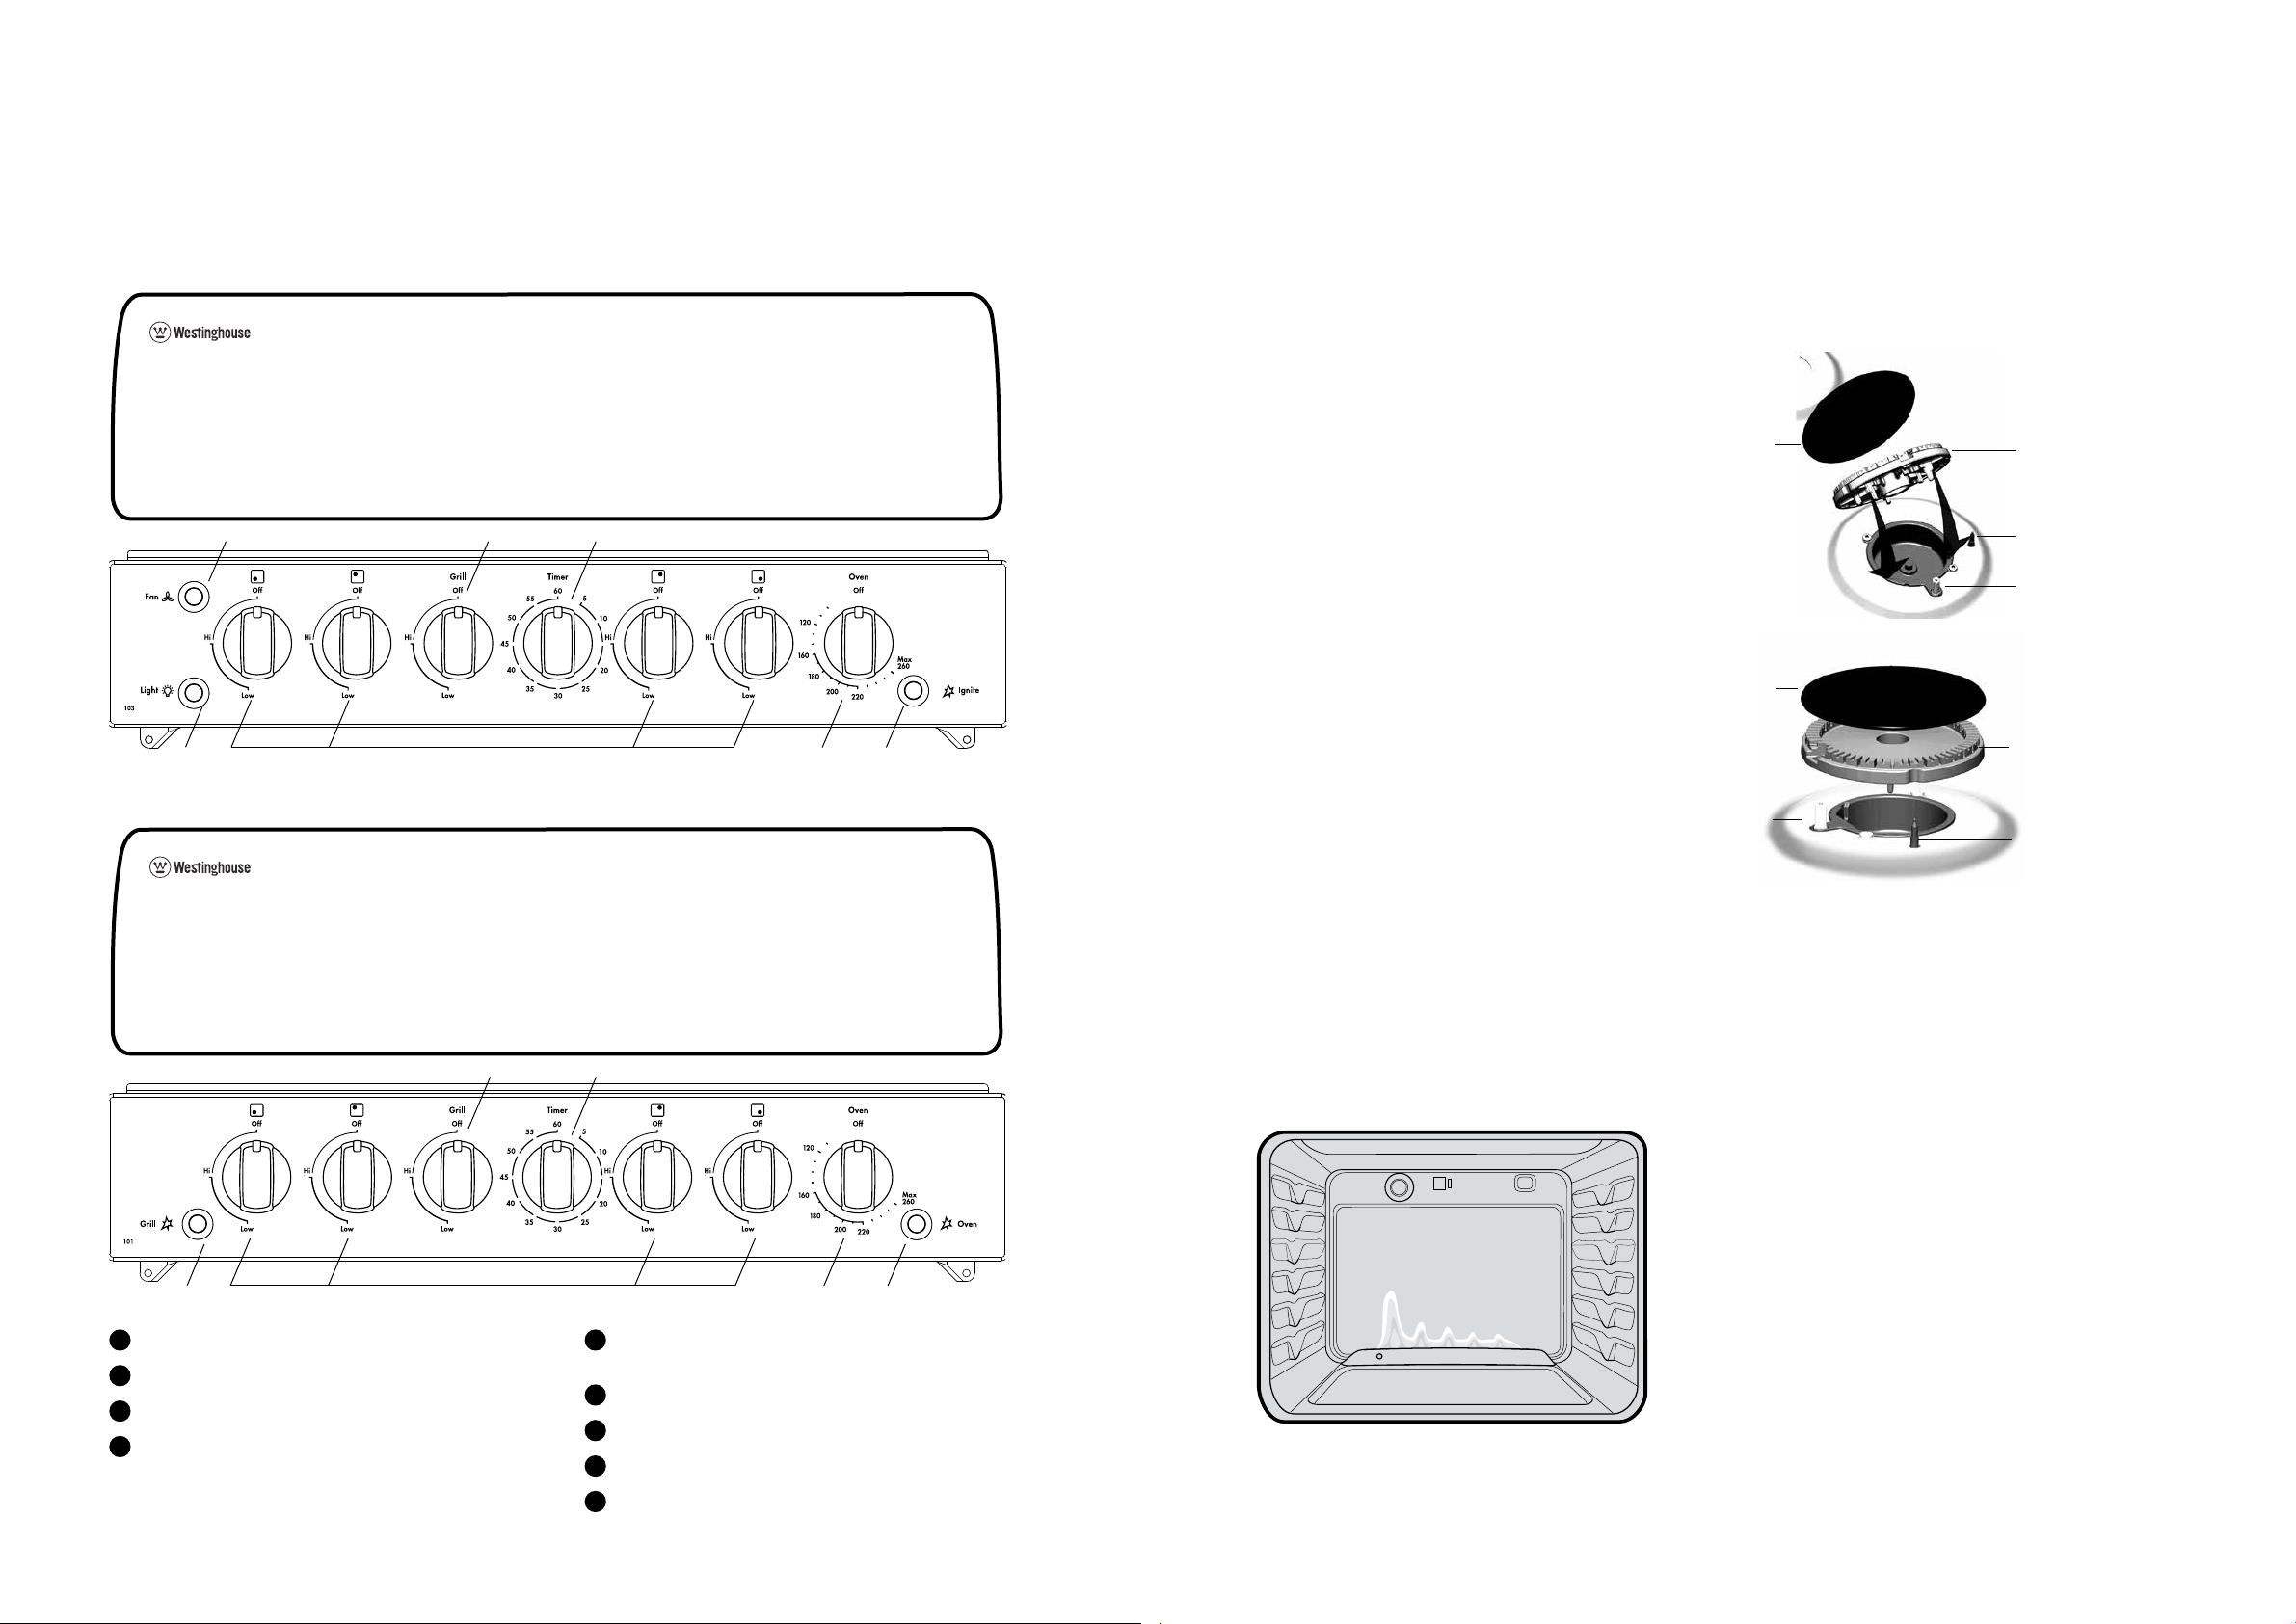
Gas hotplate
Ensure burner caps, crowns and trivets are properly
assembled.
Burner cap and burner crown must be clean and located
correctly for the burner to light.
Burner
Crown
Burner
Cap
Spark Plug
Flame Sensor
(Thermocouple)
Burner
Cap
Burner
Crown
Spark
Plug
Flame Sensor
(Thermocouple)
LIGHTING GAS HOTPLATE, GRILL AND OVEN
Electronic ignition with flame safeguard
This hob is fitted with mains powered electronic ignition.
When the appliance has been connected and the power
is on, depressing ignite button will release sparks to all
burners.
To light a burner, depress the corresponding knob fully
and while continuing to depress knob for approximately
5 seconds, turn anticlockwise to ‘HI’ position. The flame
sensor must warm-up in order for the flame to stay alight.
The knob may be released once the flame is established,
and turned further anticlockwise to reduce the flame height
as desired.
• Before releasing the knob, ensure the knob is fully
depressed.
• If the flame goes out when the knob is released,
simply repeat the ignition procedure again.
Hotplate Ignition – (Manual)
To light a burner, depress the corresponding knob fully
and while continuing to depress the knob approximately
5 seconds, turn anti-clockwise to ‘HI’ position. At the
same time, hold hand-ignitor next to the burner and ignite
(hand-ignitors not supplied). The flame sensor must warm
up in order for the flame to stay alight
1
Burner Control Knob – sets burner temperature.
2
Grill Control Knob – sets grilling temperature.
3
Oven Control Knob – sets oven temperature.
4
Timer 60 Minute – sets reminder time.
When timer returns to zero, timer gives a short ring.
NOTE: for any time below 15 minutes, turn knob past
15 minutes, then back to required time setting.
Gas oven features and Descriptions
Fan Forced Oven Model WDG103WA
Conventional oven model WDG101WA
5
Oven Piezo Ignitor – ignites oven burner when
appropriate control knobs are set.
6
Grill Piezo Ignitor – ignites grill burner.
7
Light Switch (where fitted) – turns oven light on/off.
8
Fan Switch (where fitted) – turns fan on/off.
9
Electronic Ignition Switch – ignites hotplate burners,
grill burner and oven burner.
42
42
8
9317
5316
Loading ...
Loading ...
Loading ...