Loading ...
Loading ...
Loading ...
18 19TROUBLE SHOOTINGCLEANING THE ELEVATED COOKER
TROUBLE SHOOTINGCLEANING THE ELEVATED COOKER
PROBLEM CAUSES WHAT TO DO
Uneven cooking
Incorrect shelf position
Select shelf that puts food in centre
of oven
Oven tray too large Try other trays or dishes
Trays not in centre Put trays in centre
Air flow in oven uneven Rotate food during cooking
Grill tray affecting thermostat
Remove grill tray from oven on
bake modes
Baked products too brown
on top
Oven not preheated Preheat the oven
Baking tins too large for recipe Use correct size tins
Baking tins not evenly spaced
Stagger baking tins at least 3cm
between tins and the oven walls
Products not evenly sized or spaced
on trays
Make into same size and shape and
spread evenly over trays
Baked products too brown
on bottom
Baking tins too large Use correct size tins
Baking tins are dark metal or glass
Change to shiny, light tins or lower the
temperature by 10°C
Food is positioned too low in oven Cook one shelf higher
Oven door opened too frequently
during baking
Don’t open the oven door until at least
half the cooking time has passed
Baking temperature too high Lower the temperature
Grill tray affecting thermostat
Remove grill tray from oven on
bake modes
Cakes have a cracked
thick crust
Baking temperature too high Lower the temperature
Food is positioned too low in oven Cook one shelf higher
Cake batter over mixed
Mix just long enough to combine the
ingredients
Baking tin too deep
Check size of tin and use
recommended size
Baking tins dark Change to shiny light tins
Baked products are pale,
flat and undercooked
Baking temperature too low Raise the temperature
Food is positioned too low in oven Cook one shelf higher
Baking time too short Increase cooking time
Incorrect baking tin size Use correct size tin
Cakes fallen in centre
Baking temperature too low Raise the temperature
Baking time too short Increase cooking time
Proportions of ingredients incorrect
for recipe
Check recipe
Opening door too early during baking
Do not open door until the last quarter
of cooking time
Roast meat and potatoes not
brown in fan oven
Poor hot air circulation
Elevate food onto a rack to allow
air circulation
Grill tray affecting thermostat
Remove grill tray from oven on
bake modes
Juices running out of meat
Do not pierce meat with fork, turn
with tongs
Grilled meats overcooked on
outside and raw in the centre
Grill at lower insert position
Grilled chops and steaks curling Cut into fat every 2cm (¾")
Excess grill smoke Build-up of fats in grill Clean grill
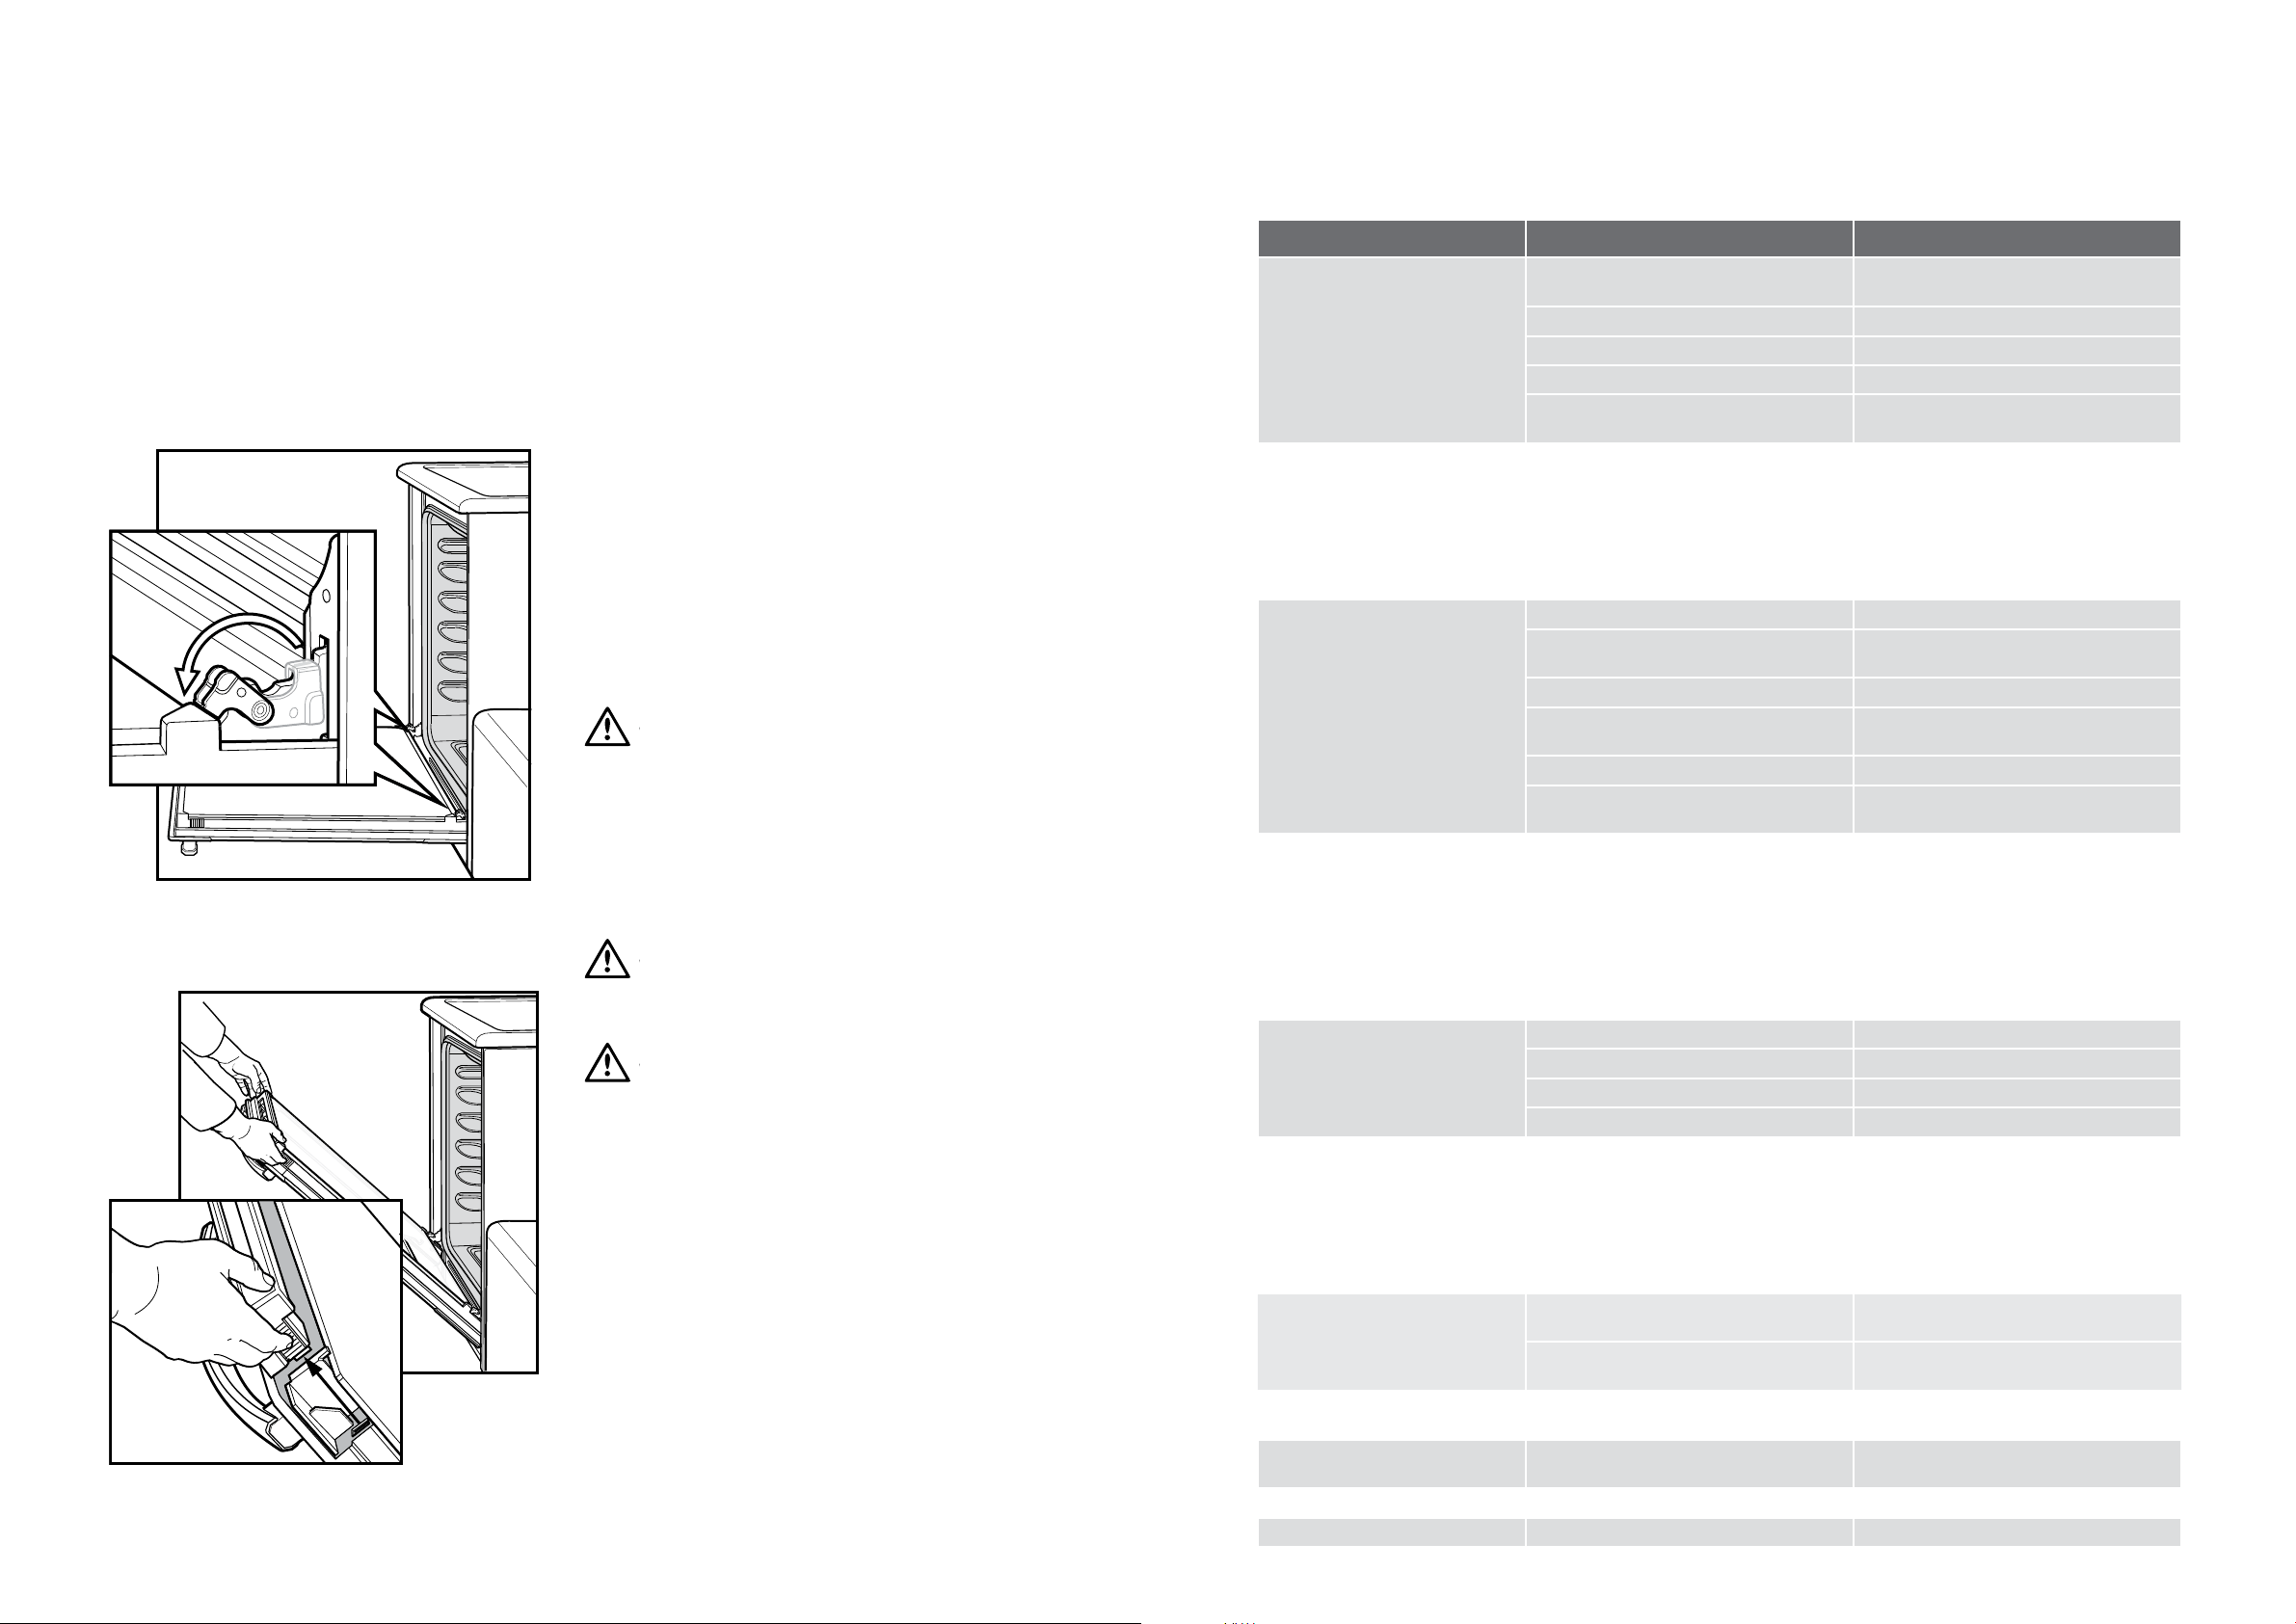
• Using both hands, gently remove the inner glass by
sliding out and lifting away from the door.
• Hand wash only with a soft cloth and warm soapy
water. When dry, polish with a soft cloth and ensure
the glass is dry before re-assembly.
• Wipe inner and outer glass gently with detergent and
warm water.
• Wipe clean and dry thoroughly.
Re-Assembling the oven door inner glass
• Position the inner glass back onto the door.
• The Electric elevated has a heat reflective coating
on the inner glass. When positioning the glass back
onto the door, the black dot on the glass should be
in the top left or bottom right corner when viewed
from the front.
• Replace the top trim ensuring the clips snap back
into position.
• Fully open the door, rotate the stirrups back to their
original position and close the door.
WARNING
WARNING
DO NOT use the oven without the inner door glass fitted.
DO NOT use harsh abrasive cleaners or sharp metal
scrapers to clean glass since they can scratch the surface,
which may result in shattering of the glass.
DO NOT place glass in dishwasher.
SAFETY WARNINGS ABOUT CLEANING
WARNING
WARNING
ALWAYS make sure that the cooker is turned off
before cleaning.
WARNING
CAUTION
ALWAYS clean cooker immediately after use.
DO NOT use steam cleaners. These may cause
moisture build-up, especially in the glass door.
DO NOT use caustic based cleaners or harsh abrasives.
These will damage your oven.
Cleaning the Oven Door
This product has a removable inner glass door for ease of
cleaning.
To remove the inner door glass for cleaning
• Open the door fully to access the hinges then rotate
the ‘stirrups’ on both hinges fully towards the door.
• Slowly close the door until it stops against the
‘stirrups’.
• To then remove the top trim, press the ribbed release
clips at each end and lift top trim away from the door.
Loading ...
Loading ...
Loading ...