Loading ...
Loading ...
Loading ...
8 9
USING THE ELECTRIC ELEVATED COOKERINSTALLING YOUR OVEN ACCESSORIES
INSTALLING YOUR OVEN ACCESSORIES
Fitting oven shelves
1. Ensure shelf orientation is correct (refer to diagram).
2. Slide oven shelves onto oven supports (side runners)
at an angle until raised back of shelf is past the stop
on oven supports (side runners).
3. Lower front of shelf and push in until stop is reached.
4. To remove oven shelves, withdraw to the stop and
raise the front of shelf to clear the stop.
NOTE: the orientation of the
side and rear features
Fitting the grill dish supports
• Insert the ends of the supports into the holes and
swing downwards.
Fitting the grill dish
Ensure rear of the dish is engaged with the side support
before sliding backwards. To remove simply pull forwards
and upwards.
Engagement of
rear of dish
Assembling the grill dish handle
Assemble grill tray handle as shown
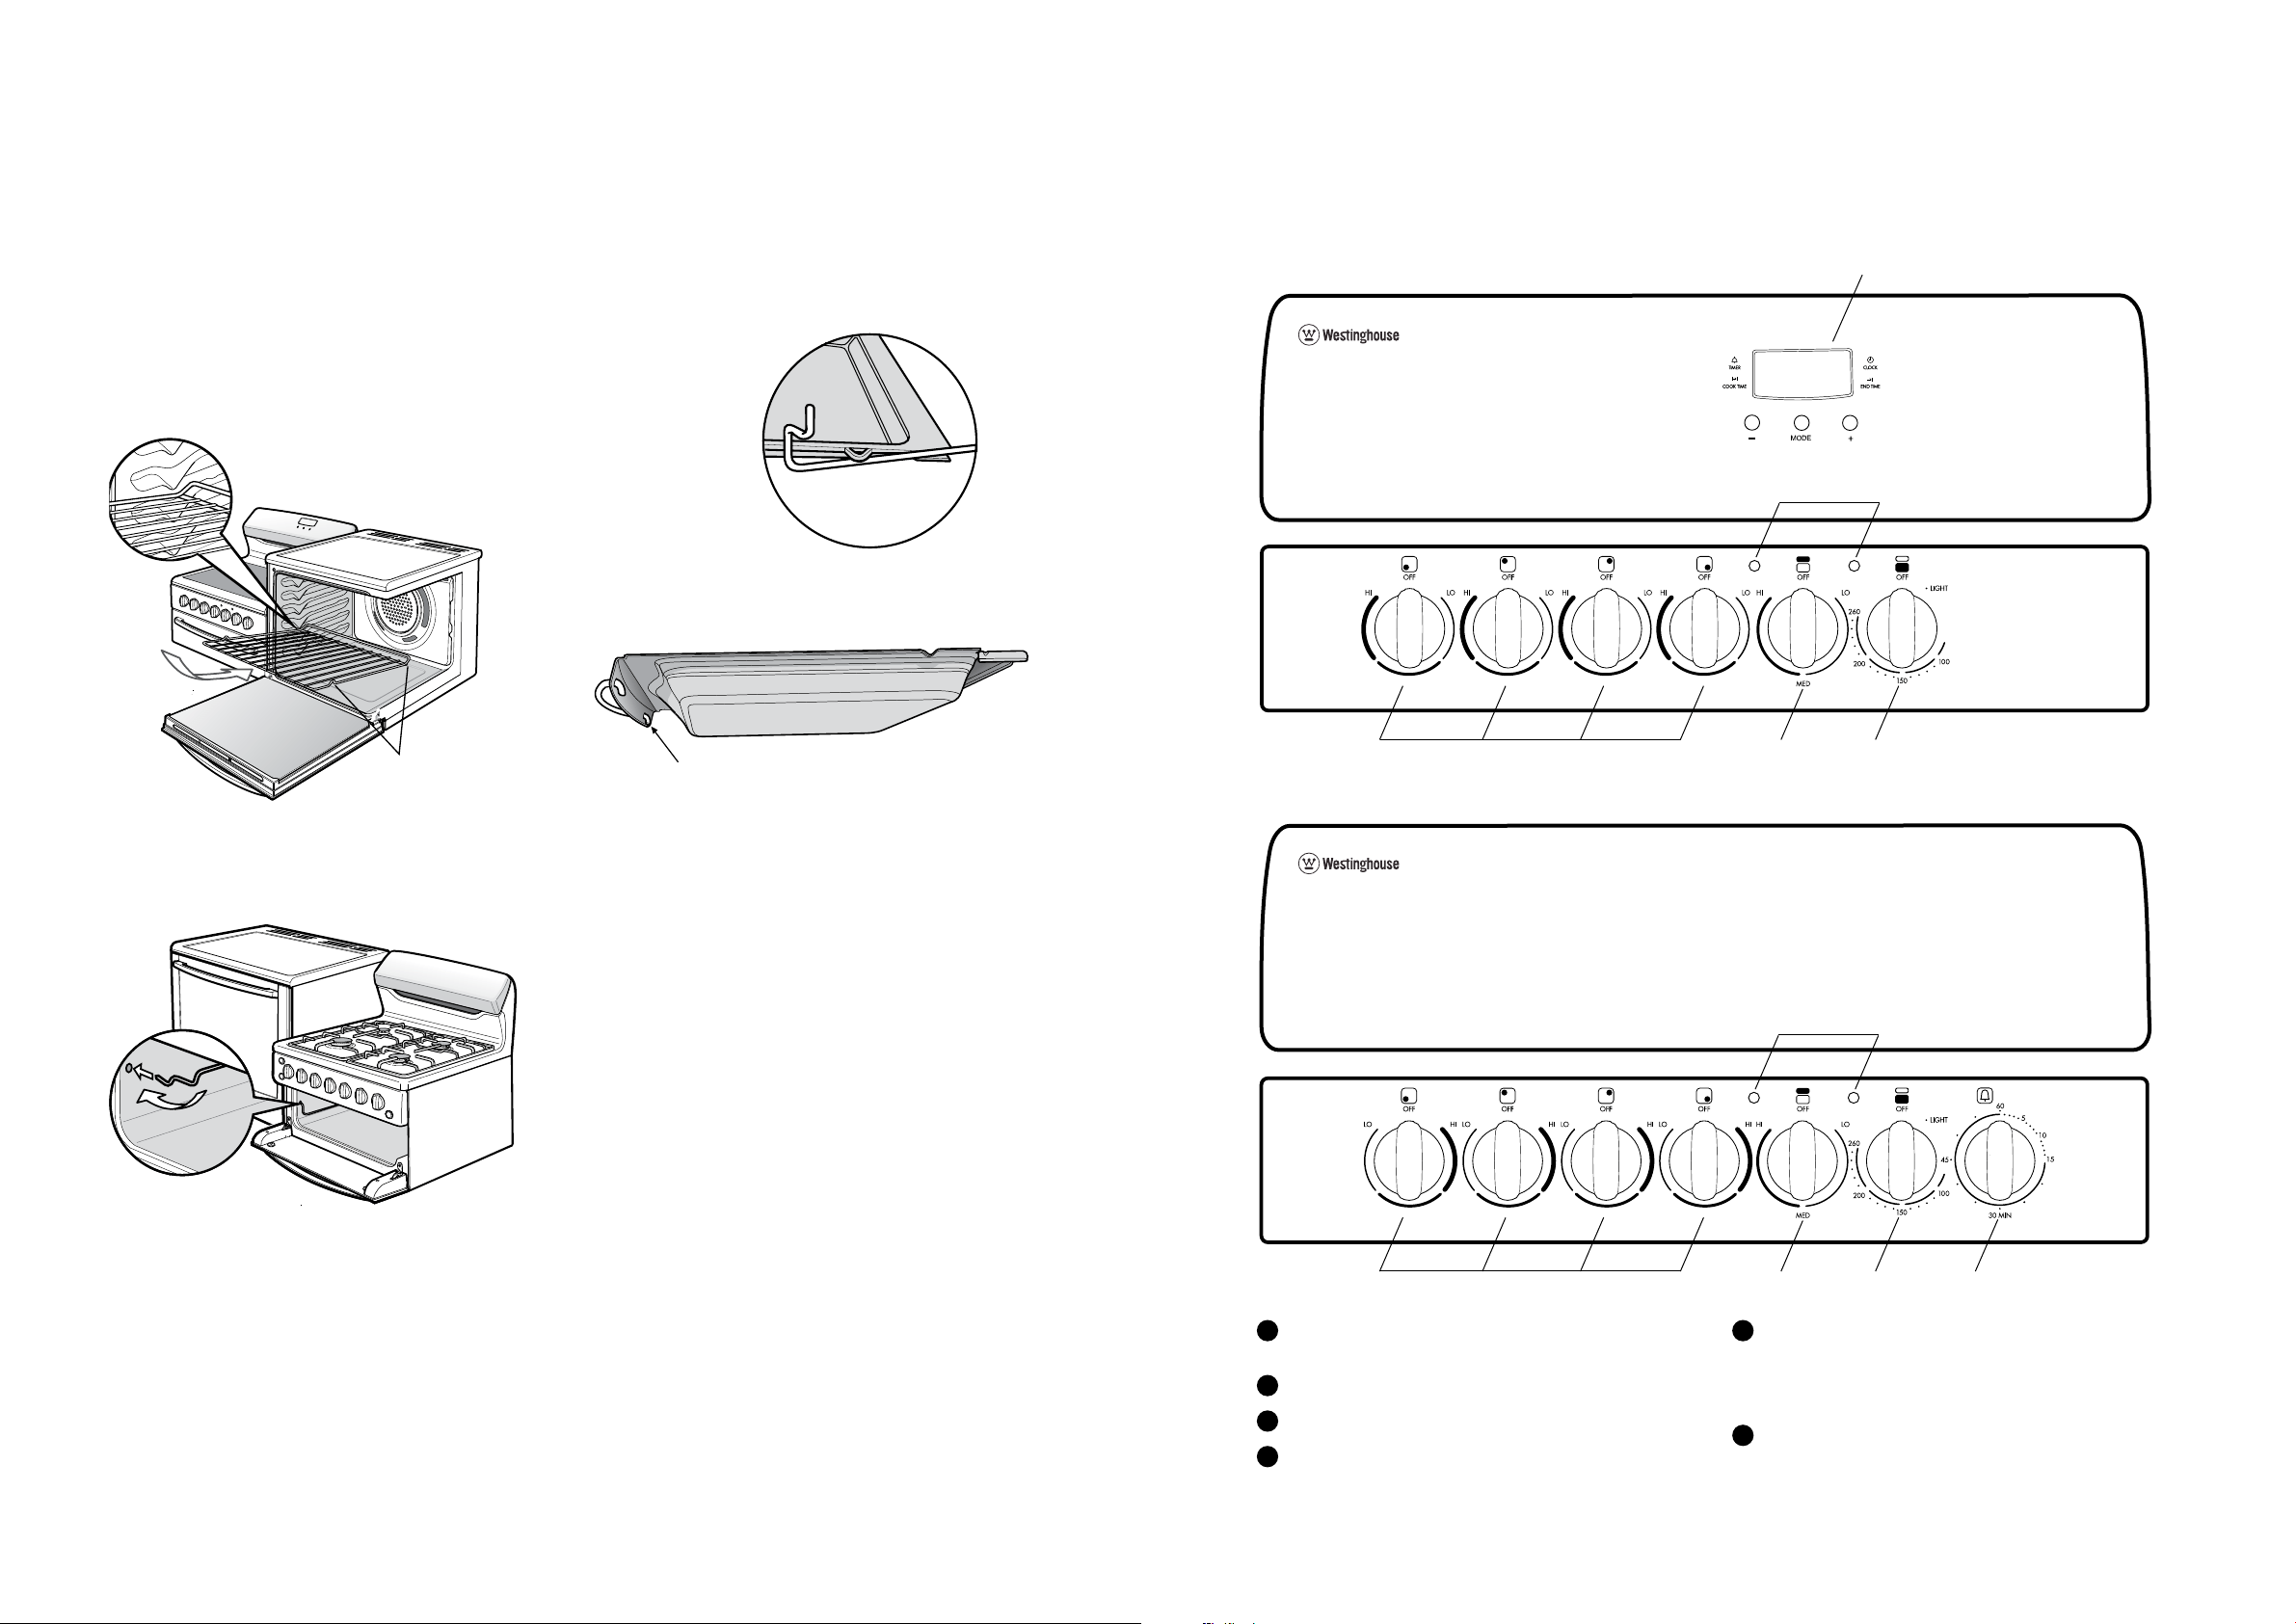
USING THE ELECTRIC ELEVATED COOKER
1
Radiant/Solid/Ceramic Hotplate Control Knob
– sets hotplate temperature.
2
Grill Control Knob – sets grilling temperature.
3
Oven Control Knob – sets oven temperature.
4
Grill/Oven Indicator Light – comes on when grill/oven
temperature knob is operated. Oven indicator light
cycles on and off when temperature is reached.
5
Timer 60 Minute – (where fitted) sets reminder time.
– When timer returns to zero, timer gives a short ring.
NOTE: For any time below 15 minutes, turn knob past 15
minutes, then back to required time setting.
6
Programmable Clock - (where fiited) sets baking/
grilling reminder times – sets automatic cooking
duration and stop time.
NOTE: Clock time must be set before operating oven.
Electric oven features and descriptions
Ceramic hotplates fan force oven model WDE147WA
Solid hotplate fan forced oven model WDE135WA
6
WDE147WA
WDG103WA
WDE135WA
WDG101WA
5321
321
WDE147WA
WDG103WA
WDE135WA
WDG101WA
4
4
Loading ...
Loading ...
Loading ...