Loading ...
Loading ...
Loading ...
6 7OPERATING FOR THE FIRST TIME
OPERATING FOR THE FIRST TIME
Installation and Service Warning
WARNING
WARNING
• Only an authorised person must install and
service this appliance (Certificate of Compliance
to be retained).
• In order to avoid a hazard, the installation instructions
MUST be followed.
• In order to avoid the appliance tipping, the anti-tilt
plate MUST be installed.
• Appliances requiring connection to 230 – 240V MUST
be earthed.
• An authorised person should inspect this appliance
every 5 years.
• If the electrical supply cord is damaged, a qualified
person MUST replace the cord to avoid a hazard or
void your warranty.
WARNING
WARNING
Surrounding kitchen cabinets MUST WITHSTAND 85°C.
TIPS & INFORMATION
Setting the time
1. If you have purchased a model fitted with a 3 button
programmable timer, you must set the time of day
before you can operate your appliance.
• After the appliance has been electrically connected
‘12.00’ will be displayed and the ‘clock indicator’ will
flash.
• To set the time of day, press the – or + buttons. 5
seconds after the last change, the ‘clock’ indicator
will disappear, confirming the time has been set.
NOTE: The clock has a 24-hour display.
END
+
MODE
2. New appliances can have an odour during first
operation. It is recommended to ‘run in’ the oven
before you cook Run the oven at 180°C for 30
minutes and ensure that the room is well ventilated.
3.
For products with a separate grill compartment, run
grill on maximum for 15 minutes with grill door open.
4.
If your appliance is fitted with solid hotplates, turn
heat setting to high for 3 minutes to fully harden the
hotplate coating.
TIPS & INFORMATION
Before operating first time
1. Read all the Warning and Safety information.
2.
Remove all internal boxes and bags from oven.
3.
Clean out the oven interior with detergent and warm
water and polish with a soft cloth. DO NOT close
oven door until the oven is completely dry.
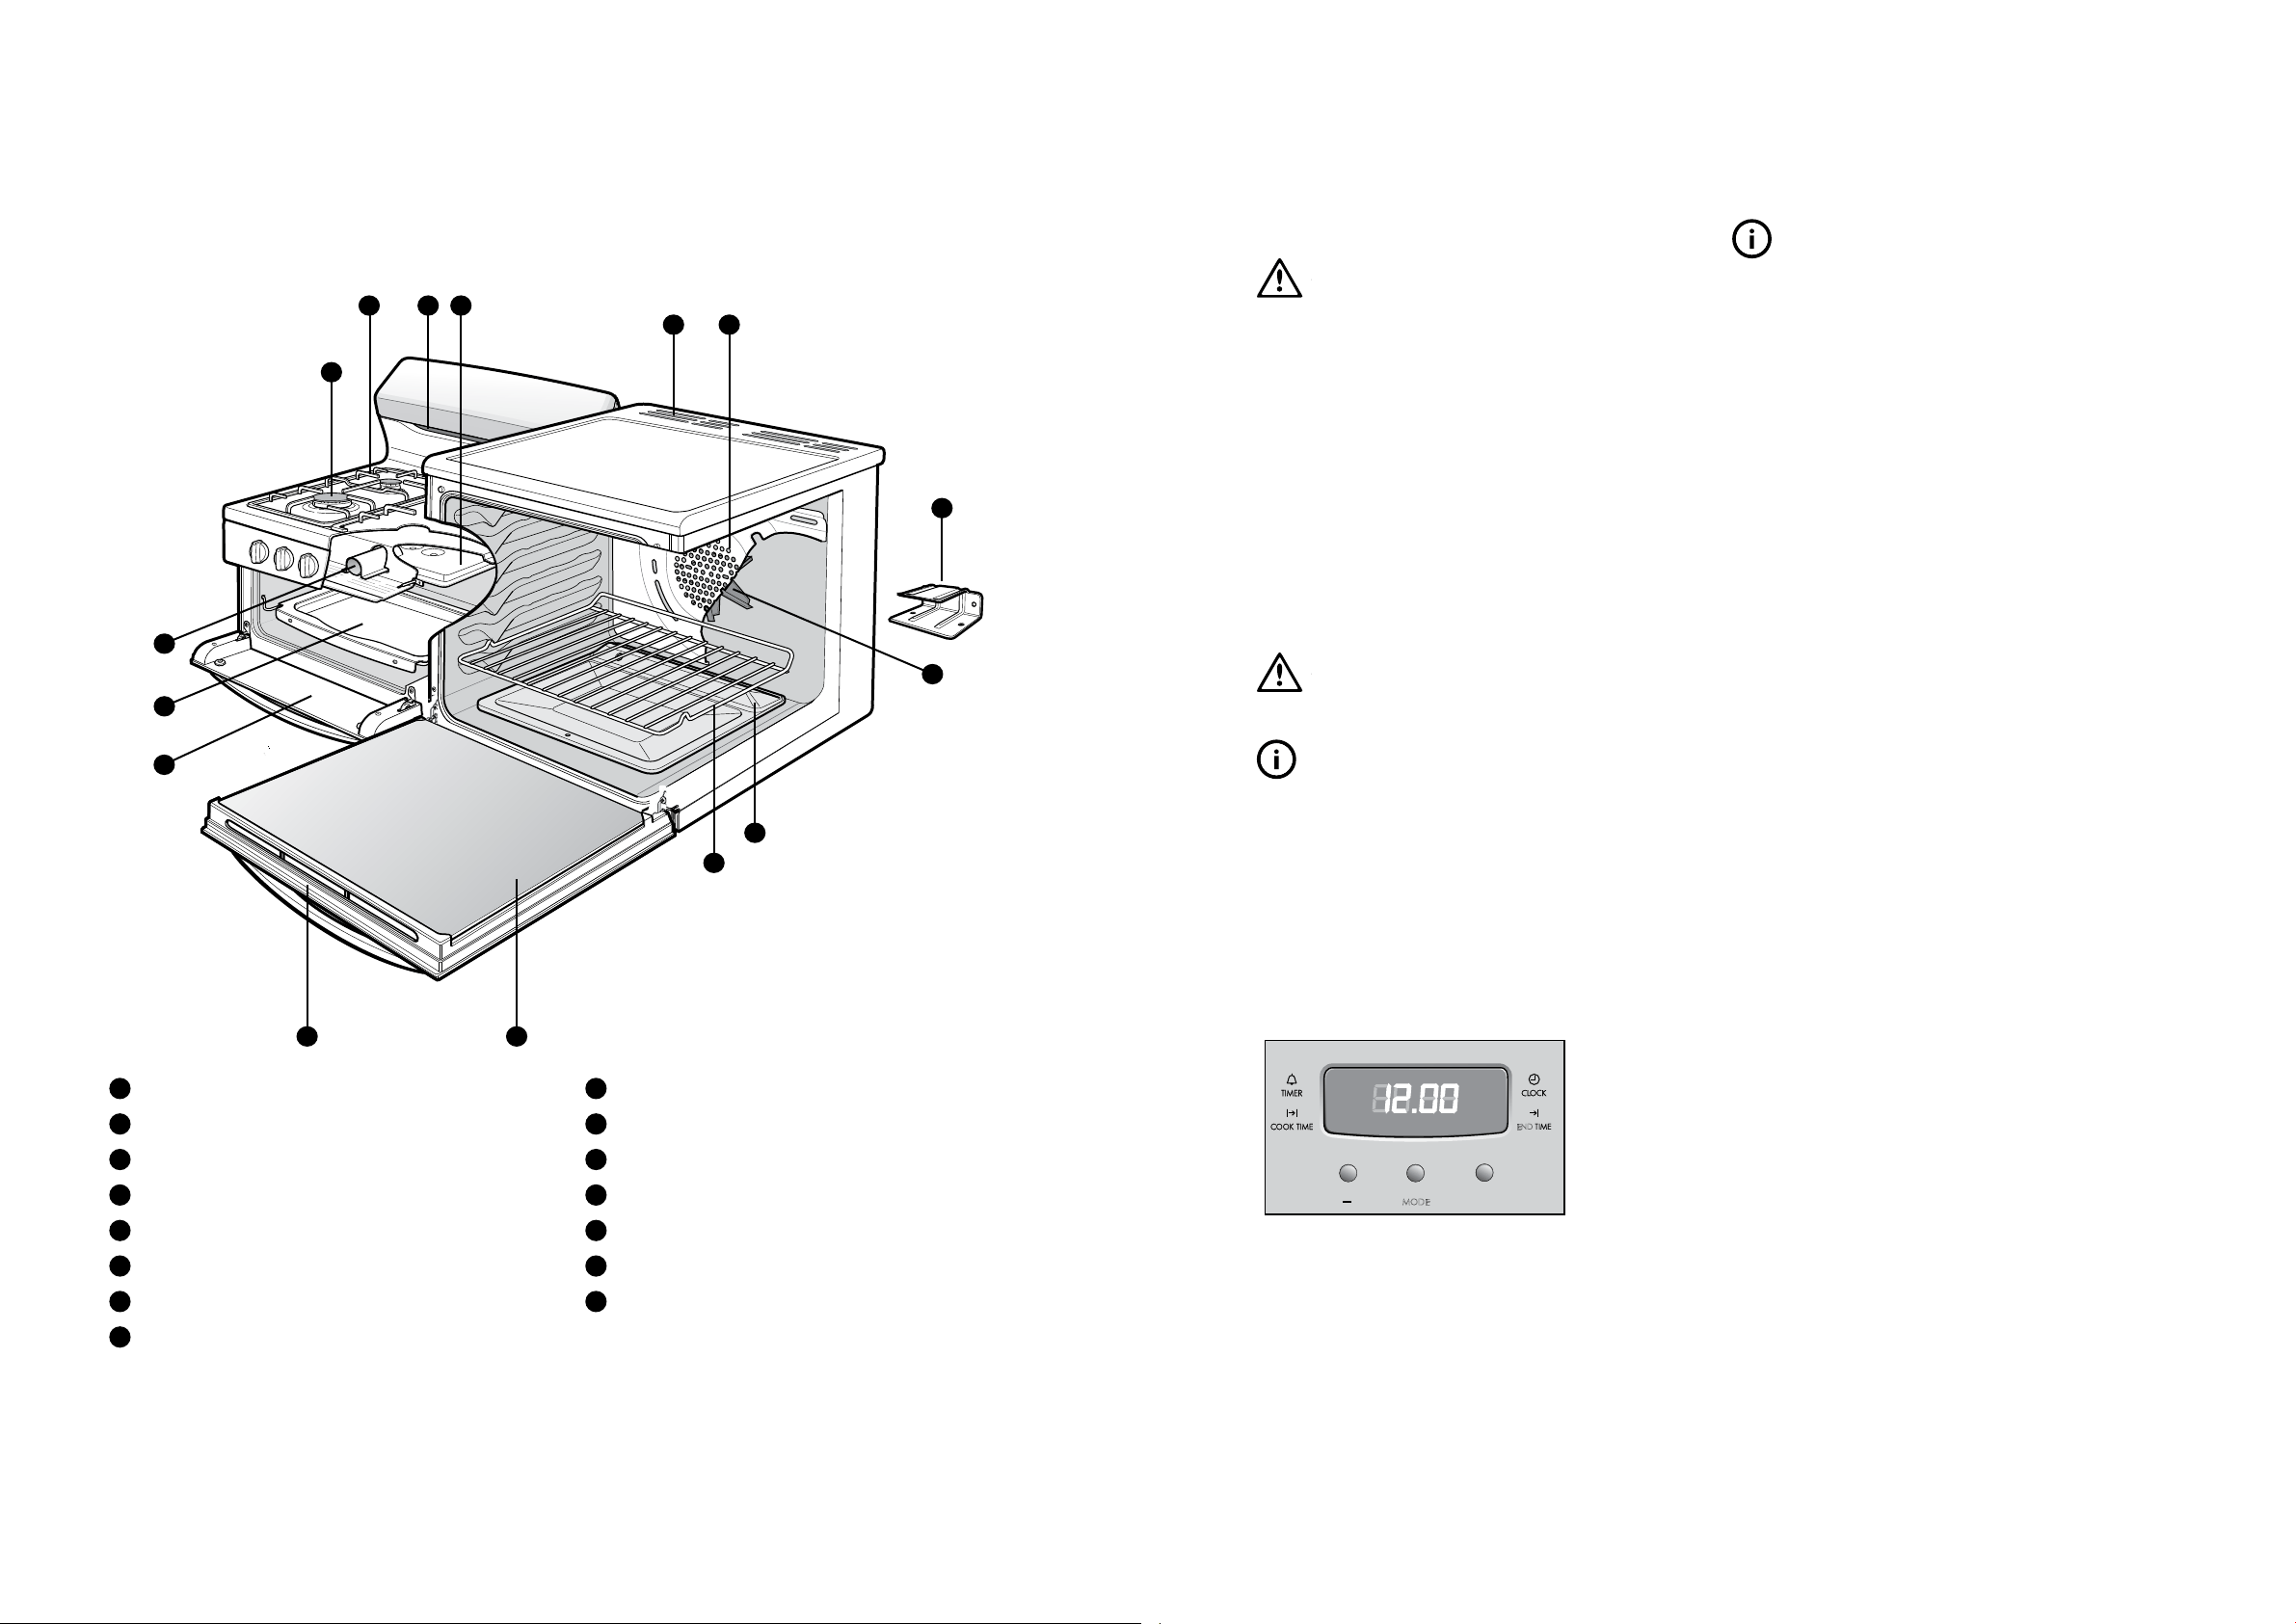
GENERAL APPLIANCE DESCRIPTION – GAS ELEVATED
(R.H VARIANT SHOWN)
1
Grill Door
2
Removable Grill Dish
3
Grill Burner Reflector
4
Removable Hotplate Burner
5
Removable Trivet
6
Grill Vent
7
Grill Burner
8
Oven Vent
9
Fan Cover
10
Anti-tilt Plate
11
Oven Fan
12
Oven Burner Cover
13
Removable Shelf
14
Removable Inner Glass
15
Oven Door
4
5 6
8 9
10
14
13
12
11
2
3
1
7
15
PRODUCT DESCRIPTION
Loading ...
Loading ...
Loading ...