Loading ...
Loading ...
Loading ...
42
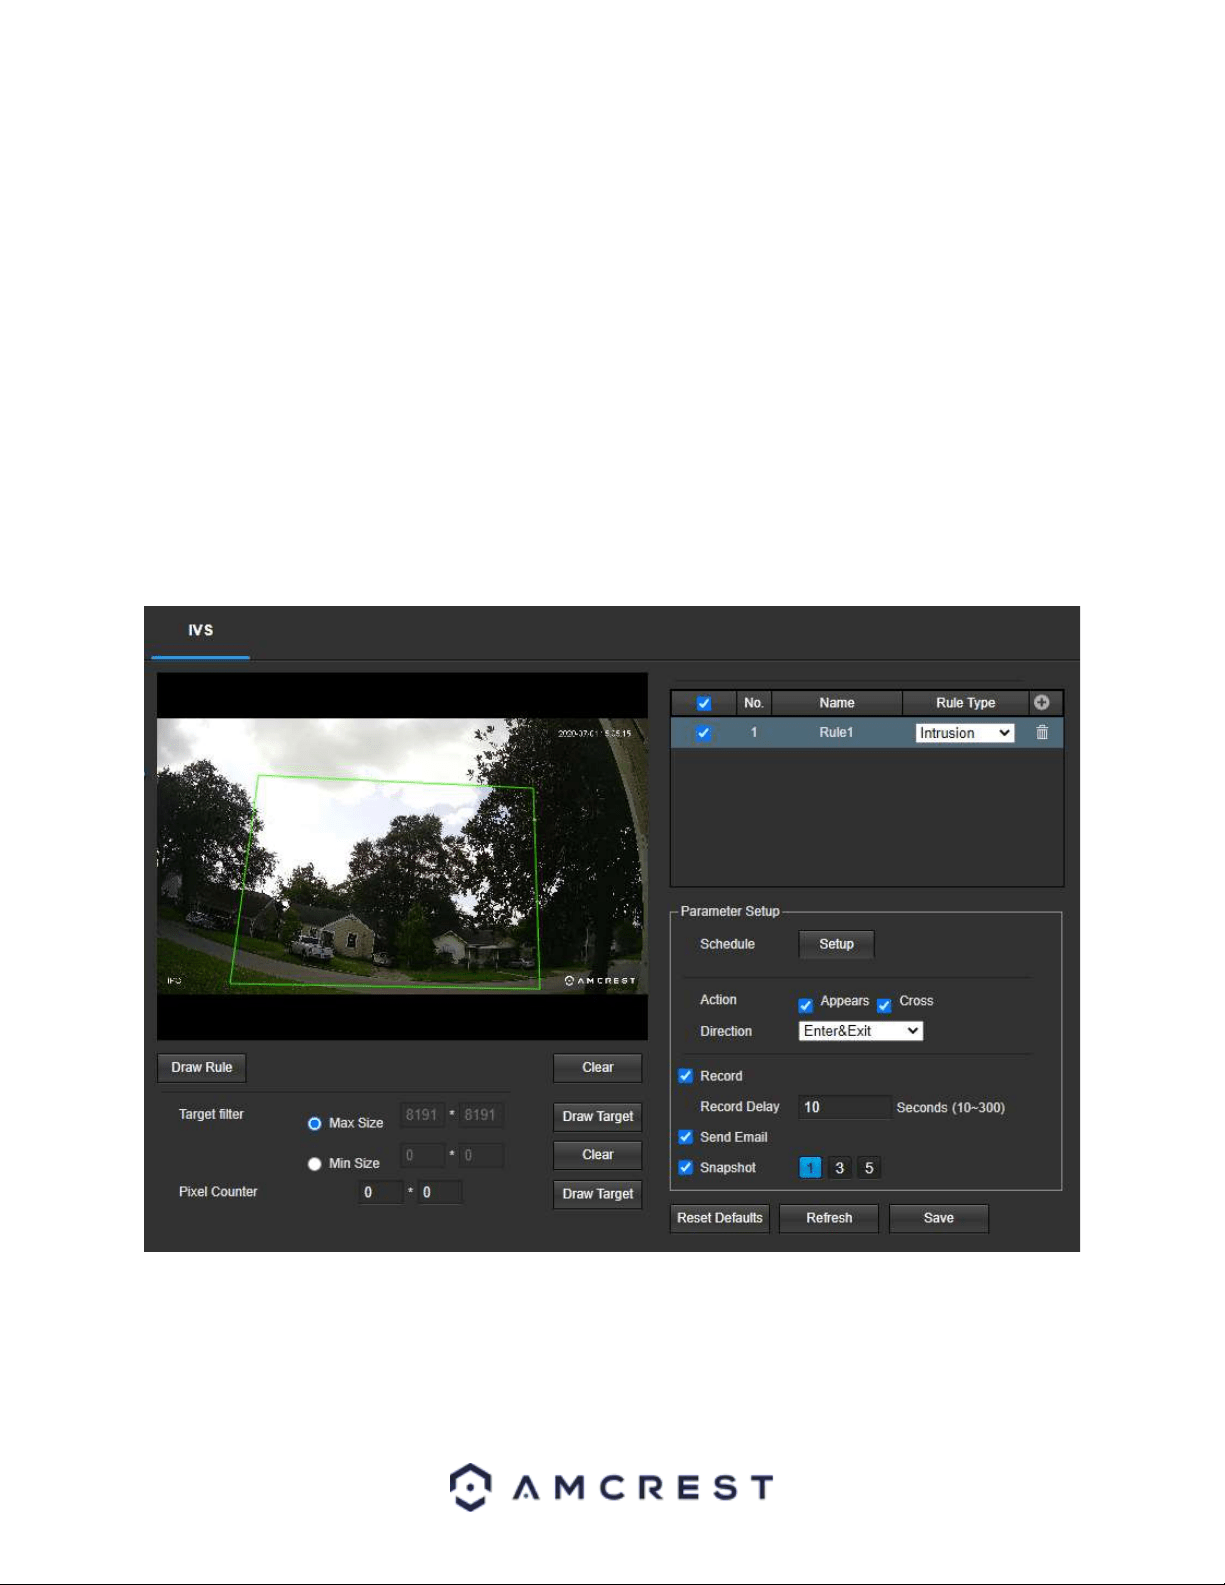
Setting an Intrusion Area
1. Select Intrusion from the Rule Type menu. Set a name for the rule by double clicking the mouse over the Name
of the rule.
2. Click on Setup to set a schedule, set your periods (if any) and click Save to continue.
3. In the Action menu, choose whether the rule will be triggered if an object appears or crosses the set region.
Both options can be enabled at the same time if needed.
3. In the Direction menu, choose if the rule will be triggered if the object enters only, exits only, or enters & exits a
set region.
4. Enable the Record checkbox to record the event.
5. Check the Send Email and Snapshot checkboxes if you would like a snapshot of the event emailed to you. A valid
Email address must be established in the camera prior to enabling this setting. For more information on setting
up email alerts, please refer to section, “SMTP (Email)”.
6. Click the Draw Rule option and right click on the live monitoring screen. Use the mouse to draw your initial line.
Once the initial line is set, right click the mouse again to continue drawing the region. Repeat the process and
left click the mouse to complete the region. Right click on the live monitoring screen when finished to set the
rule.
To reset to default settings, click the Reset Defaults button. To refresh the page, click the Refresh button. To save
the settings, click the Save button.
Loading ...
Loading ...
Loading ...