Loading ...
Loading ...
Loading ...
39
2
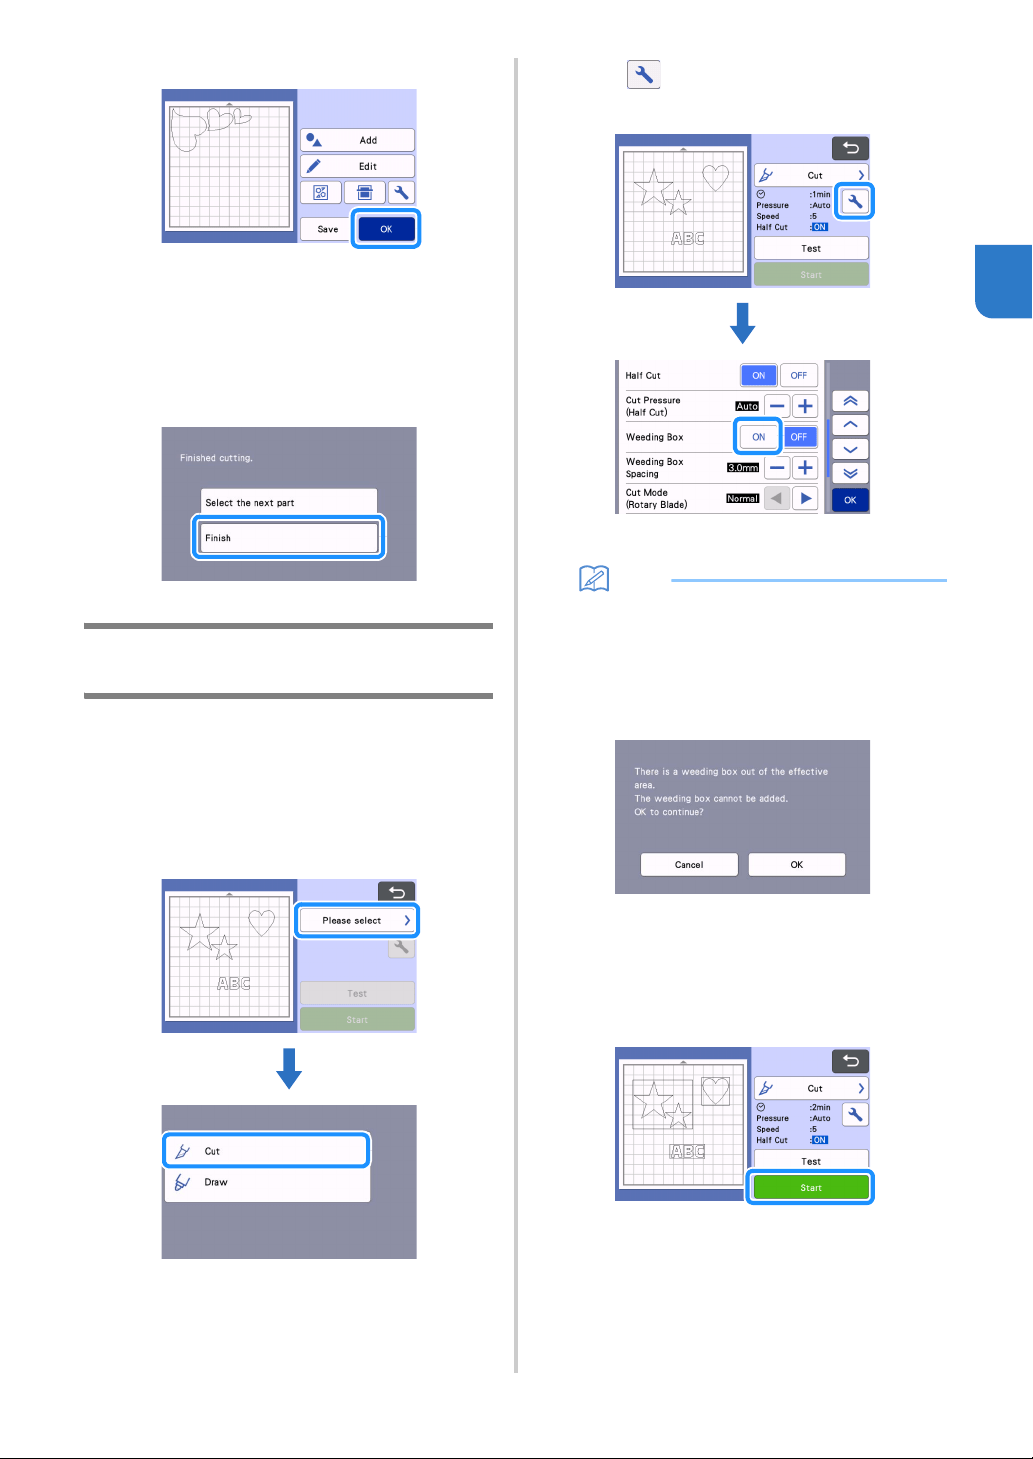
e Touch the “OK” key.
f Follow the procedures described in “Loading
the Mat” (page 28) and “Cutting” (page 28) to
load the material to be cut.
When cutting is finished, a message appears.
g After all pattern pieces have been cut out,
touch the “Finish” key.
Tutorial 3 - Adding a Weeding Box to a
Pattern
In this tutorial, we will be adding a weeding box to
cut a pattern to make it easier to do “weeding” work
to remove only the unnecessary parts after cutting
materials with backing paper or backing film.
a After editing the pattern, select “Cut” in the
preview screen.
b Touch , and then set “Weeding Box” to
“ON” to add weeding boxes.
A weeding box is added around each pattern.
Memo
• If patterns are close to each other, the weeding
box is added as if the patterns are one group,
even if they are not grouped.
• A weeding box is not added to test patterns.
• If the weeding box is outside of the cutting area,
the following message appears and the
weeding box is not added.
Touch the “Cancel” key, and then either reduce
the setting for “Weeding Box Spacing” or return
to the editing screen and adjust the
arrangement of the patterns.
c Touch the “Start” key to start cutting.
After cutting is finished, “Weeding Box” is set
back to “OFF”.
Loading ...
Loading ...
Loading ...