Loading ...
Loading ...
Loading ...
42
2 Press the WHT BAL button B to
highlight the white balance value.
3 Select A ( A) or B ( B) using the
manual lever.
4 Press the MENU button.
5 Press the V/v/B/b/SET buttons to select
(CAMERA SET) t [WB SET].
6 Frame a white object such as a piece of
paper that fills the screen under the
same lighting conditions as your
subject.
7 Press the SET button.
The adjusted value is stored in A or
B. The stored color temperature
appears for about 3 seconds.
z Tip
• [WB SET] is assigned to the ASSIGN1/WB
SET button. The adjusted value is stored by
pressing the ASSIGN1/WB SET button when
the shooting screen is displayed, instead of
performing step 4 to 7.
b Note
• When a white balance adjustment value has not
been obtained successfully, A or B
starts flashing slowly. Adjust the subject
appropriately and set the shutter speed to auto or
around 1/60 (60i models)/1/50 (50i models),
then try adjusting the white balance again.
To restore automatic adjustment
Press the WHT BAL button B.
b Note
• When you turn the FULL AUTO button C on,
all other manual adjustments (iris, gain, and
shutter speed) are also released.
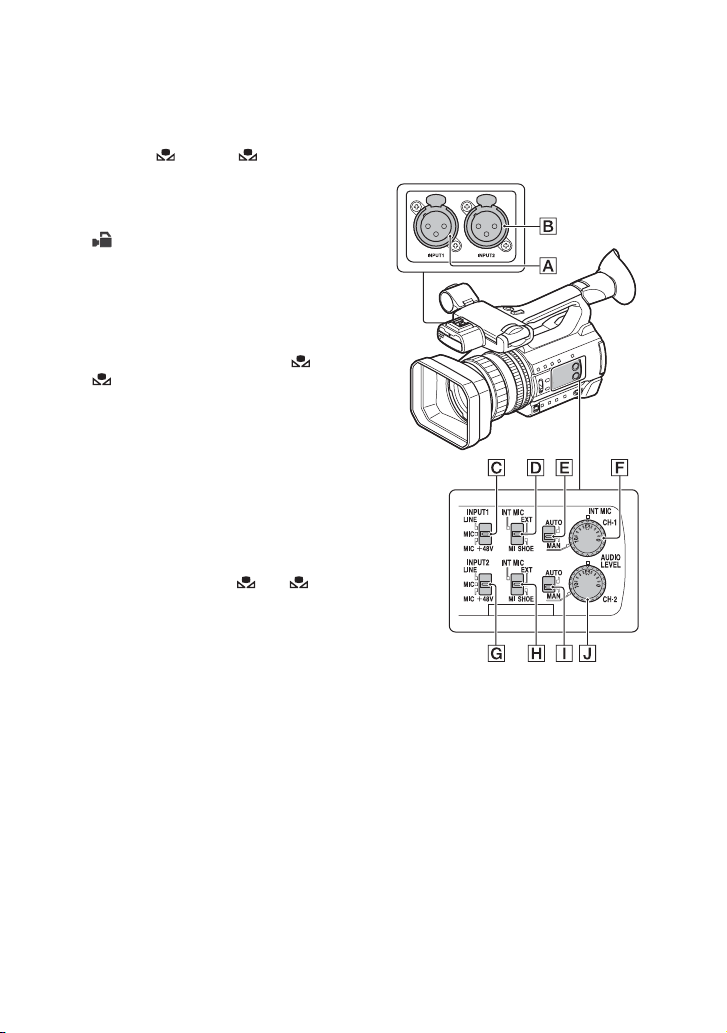
Audio setup
The jacks, switches and dials shown below
allow you to set the sound that is recorded.
See page 5 for details about connecting a
microphone.
External audio input and selection
A: INPUT1 jack
B: INPUT2 jack
C: INPUT1 (LINE/MIC/MIC+48V)
switch
G: INPUT2 (LINE/MIC/MIC+48V)
switch
Audio source switches
D: CH-1 (INT MIC/EXT/MI SHOE)
switch
H: CH-2 (INT MIC/EXT/MI SHOE)
switch
Adjusting the color tone
(Continued)
Loading ...
Loading ...
Loading ...