Documents: Go to download!
User Manual
- User Manual - (English, French)
- ID Card - (English)
- Controls and home screen quick reference
- Preset energy-saving schedules
- Operation
- Frequently asked questions
- Troubleshooting
Table of contents
USER MANUAL Programmable Thermostat
Controls and home screen quick reference
Once your Wi-Fi thermostat is installed, it will display the home screen. Portions of this display will change depending on how you are viewing it.
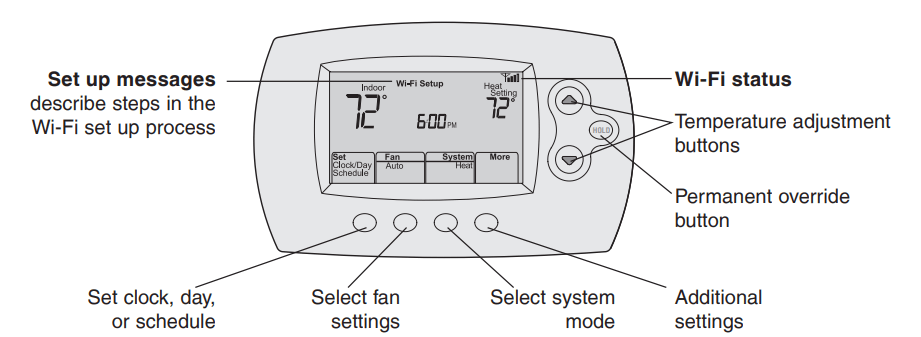
The screen lights when you press any button. It stays lit for 8 seconds after you complete changes.
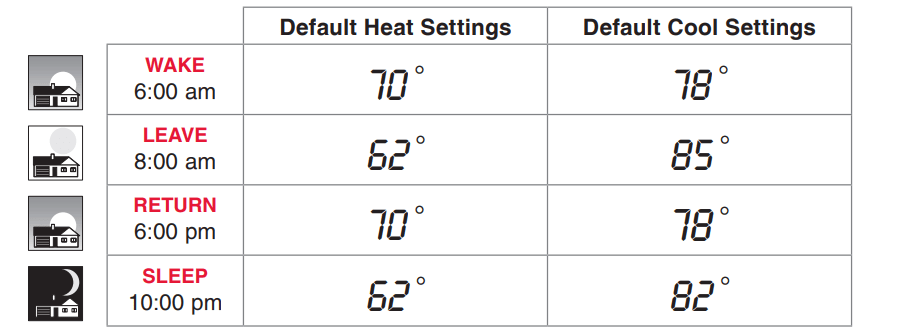
Preset energy-saving schedules
This thermostat is pre-set with energy-saving program settings for four time periods. Using the default settings can reduce your heating/cooling expenses if used as directed. Savings may vary depending on geographic region and usage. To change the settings, see pages 39–41.
Operation
Setting the time and day
Note: If the Set Clock/Day/Schedule option is not displayed, press Done. Note: If the display flashes Set Clock, the thermostat will follow your settings for the Monday “Wake” time period until you reset the time and day | 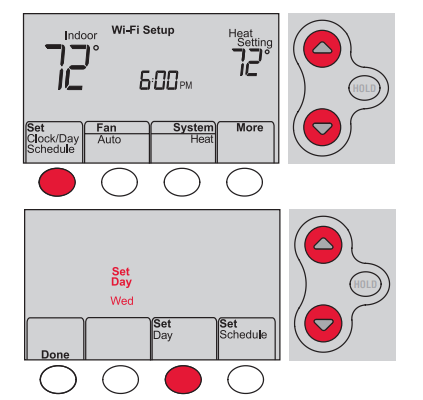 |
Setting the fan
Press Fan to select On or Auto (toggle to re-select). Auto: Fan runs only when the heating or cooling system is on. Auto is the most commonly used setting. On: Fan is always on. Note: Options may vary depending on your heating/cooling equipment. | 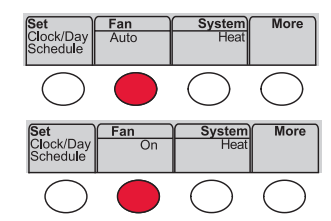 |
Selecting system mode
Press System to select: Heat: Controls only the heating system. Cool: Controls only the cooling system. Off: Heating/cooling systems are off. Auto: Selects heating or cooling depending on the indoor temperature. Em Heat (heat pumps with aux. heat): Controls auxiliary/emergency heat. Compressor is off. | 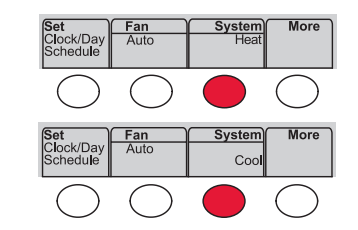 Note: Depending on how your thermostat was installed, you may not see all system settings. |
Adjusting program schedules
Note: Make sure the thermostat is set to the system mode you want to program (Heat or Cool). | 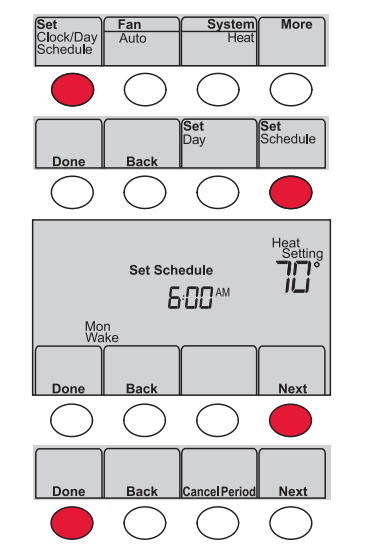 |
Overriding schedules temporarily
Press The new temperature will be maintained only until the next programmed time period begins. To cancel the temporary setting at any time, press Cancel. The program schedule will resume. | 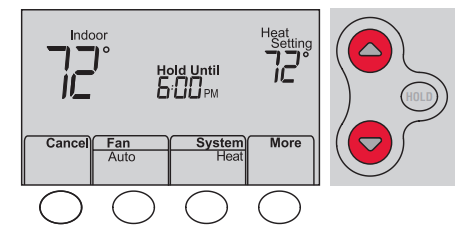 |
Overriding schedules permanently
| 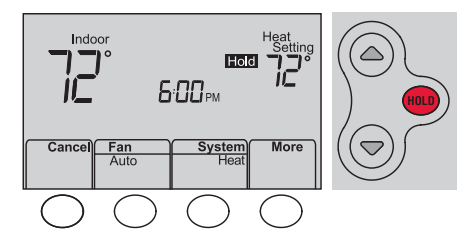 |
Unregistering thermostat
| If you remove the thermostat from your Total Connect Comfort website account (for example, you’re moving and leaving the thermostat behind), the thermostat will display Register at Total Connect until it is re-registered. | 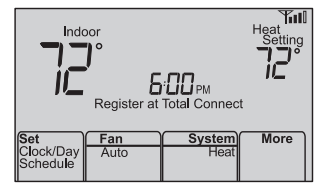 |
Disconnecting Wi-Fi
Replacing your router If you disconnect the thermostat from your Wi-Fi network:
The screen will display Wi-Fi Setup. Re-connect to a Wi-Fi network by following the steps on page 26. | 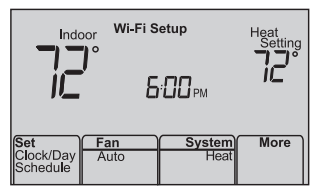 |
Turning Wi-Fi off
If you do not plan to control the thermostat remotely, you can remove the Wi-Fi Setup message from the screen:
- Enter system setup (see page 48).
- Change setting 38 to 0 (see page 54). Wi-Fi Setup will be removed from the screen. If you want to connect to the Wi-Fi network later, change setting 38 back to 1.
Software updates
Honeywell periodically issues updates to the software for this thermostat. The updates occur automatically through your Wi-Fi connection. All your settings are saved, so you will not need to make any changes after the update occurs. While the update is taking place, your thermostat screen flashes Updating and shows the percentage of the update that has occurred. When the update is complete, your home screen will appear as usual. Note: If you are not connected to Wi-Fi, you will not get automatic updates. | 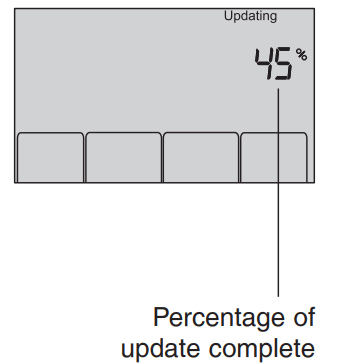 |
Smart Response Technology
This feature allows the thermostat to “learn” how long the heating/cooling system takes to reach programmed temperature settings, so the temperature is reached at the time you set. For example: Set the Wake time to 6:00 am, and the temperature to 70°. The heat will come on before 6:00 am, so the temperature is 70° by 6:00 am. Note: System setting function 13 controls Smart Response Technology. See “Smart Response Technology” on page 52. | 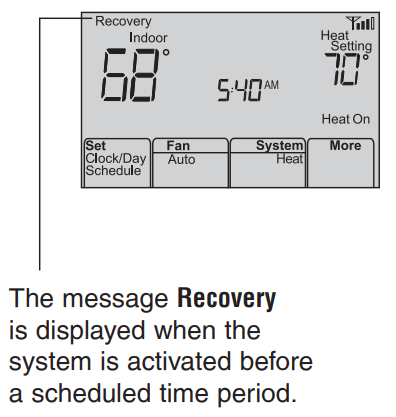 |
Compressor protection
| This feature forces the compressor to wait a few minutes before restarting, to prevent equipment damage. | 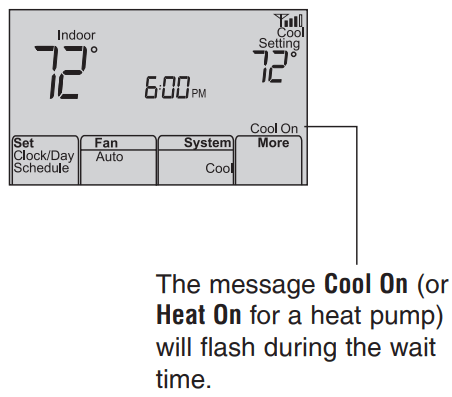 |
Auto changeover
This feature is used in climates where both air conditioning and heating are used on the same day. When the system is set to Auto, the thermostat automatically selects heating or cooling depending on the indoor temperature Heat and cool settings must be at least 3 degrees apart. The thermostat will automatically adjust settings to maintain this 3-degree separation. Note: System setting function 12 controls Auto changeover. See “Manual/Auto Changeover” on page 51. | 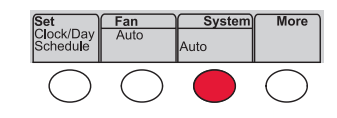 |
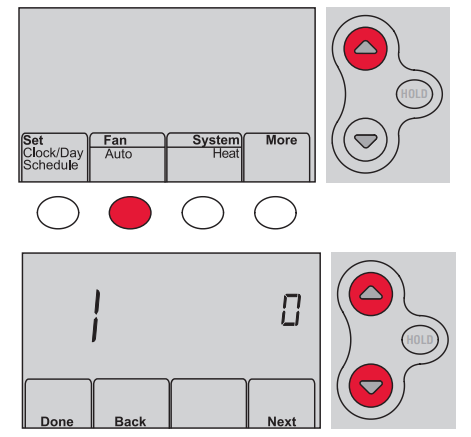
Setting functions and options
You can change options for a number of system functions. Available functions depend on the type of system you have. The functions, along with available options are described on pages 50–54.
This thermostat is pre-set for a single-stage heating/cooling system. Setting function 1 for a heat pump will adjust the default settings.
Setting functions and options
|  |
Frequently asked questions
Q: Will my thermostat still work if I lose my Wi-Fi connection?
A: Yes, the thermostat will operate your heating and/or cooling system with or without Wi-Fi.
Q: How do I find the password to my router?
A: Contact the manufacturer of the router or check the router documentation.
Q: Why am I not seeing my Wi-Fi setup page?
A: You are probably connected only to your router, not to your thermostat. Try connecting to the thermostat again.
Q: Why isn’t my thermostat connecting to my Wi-Fi router even though it is very close to the thermostat?
A: Verify that the password entered for the Wi-Fi router is correct.
Q: Where can I find my MAC ID and MAC CRC codes?
A: The MAC ID and MAC CRC numbers are included on a card packed with the thermostat or on the back of the thermostat (visible when removed from wallplate). Each thermostat has a unique MAC ID and MAC CRC.
Q: My thermostat is unable to register to the Total Connect Comfort website.
A: Verify that the thermostat is correctly enrolled on your home Wi-Fi network. The message center will display Wi-Fi Setup or Register at Total Connect. You might also see the Wi-Fi Signal strength icon. Verify that the Wi-Fi router has a good internet connection. On your computer, verify that you can open the site at mytotalconnectcomfort.com
If you cannot open the site, switch off the internet modem for a few seconds, then power it back on.
Q: I registered on the Total Connect Comfort website but was unable to login using my new account.
A: Check your email and ensure that you received an activation email. Follow the instructions to activate your account and then login to the website.
Q: I have signed up on the Total Connect Comfort website and have not received a confirmation email.
A: Check for the email in your Junk or Deleted folder.
Q: Is there a way to extend the signal strength?
A: Most standard routers can be set up to be a repeater. You can also purchase and install a Wi-Fi repeater.
Troubleshooting
Lost Signal
If the no-Wi-Fi indicator displays in place of the Wi-Fi strength indicator in the upper right hand corner of the home screen: • Check another device to be sure Wi-Fi is working in your home; if not, call your Internet Service Provider. • Move the router. • Restart the thermostat: remove it from the wallplate, wait 10 seconds, and snap it back onto the wallplate. Return to Step 1 of Connecting to your Wi-Fi network. | 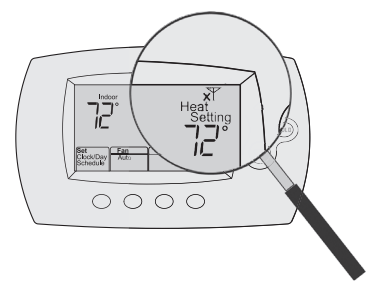 |
Error Codes
| For certain problems, the thermostat screen will display a code that identifies the trouble. Initially, error codes are displayed alone in the time area of the screen; after a few minutes, the home screen is displayed and the code alternates with the time. | 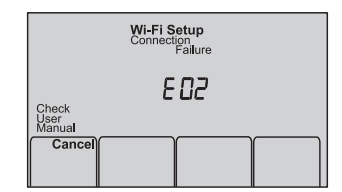 |
| Error Code | Action |
| E01: During Wi-Fi Setup, the router lost power. | • Ensure your router has power. • If trying to connect to a hidden or manually added network, confirm the router has power and is working. |
| E02: Invalid Wi-Fi password. This code displays for 30 seconds, then the thermostat will re-enter Wi-Fi Setup mode. | • Re-enter password for your home Wi-Fi network. • Repeat setup process and confirm your password for your home Wi-Fi network. |
| E42: Router is not issuing an IP address to the thermostat. | • Wait for 30 minutes, connection can take several minutes. • If still no connection, remove thermostat from wallplate for 10 seconds, then reconnect it (see page 26). • Verify your router is correctly setup to automatically give IP addresses. 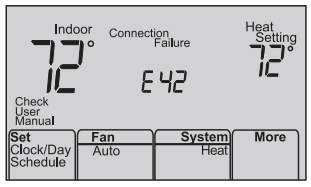 |
| E43: No internet connection. Thermostat cannot communicate to Total Connect Comfort. | • Make sure the Internet cable is plugged in. • Reboot the router. |
| E99: General error | Remove thermostat from wallplate for 10 seconds, then reconnect it (see page 26). |
If you have difficulty with your thermostat, please try the following suggestions. Most problems can be corrected quickly and easily.
| Display is blank | • Check circuit breaker and reset if necessary. • Make sure power switch at heating and cooling system is on. • Make sure furnace door is closed securely. • Make sure C wire is connected (see page 13). |
| Cannot change system setting to Cool | • Check Function 1: System Type to make sure it is set to match your heating and cooling equipment (see page 50). |
| Fan does not turn on when heat is required | • Check Function 3: Heating Fan Control to make sure it is set to match your heating equipment (see page 51). |
| Cool On or Heat On is flashing on the screen | • Compressor protection feature is engaged. Wait 5 minutes for the system to restart safely, without damage to the compressor. |
| Heat pump issues cool air in heat mode, or warm air in cool mode | • Check Function 2: Heat Pump Changeover Valve to make sure it is properly configured for your system (see page 50). |
| Heating or cooling system does not respond | • Press System to set system to Heat. Make sure the temperature is set higher than the Inside temperature. • Press System to set system to Cool. Make sure the temperature is set lower than the Inside temperature. • Check circuit breaker and reset if necessary. • Make sure power switch at heating & cooling system is on. • Make sure furnace door is closed securely. • Wait 5 minutes for the system to respond. |
| Heating system is running in cool mode | • Check Function 1: System Type to make sure it is set to match your heating and cooling equipment (see page 50). |
| Heating and cooling equipment are running at the same time | • Check Function 1: System Type to make sure it is set to match your heating and cooling equipment (see page 50). • Grasp and pull thermostat away from wallplate. Check to make sure bare wires are not touching each other. • Check thermostat wiring is correct. |
See other models: H6062A1000/U HZ789 TP50WK HUL430B TP70WKN
 or
or  to set clock.