Loading ...
Loading ...
Loading ...
11
1
Connect Internet
INTRODUCTION
PRE-INSTALL NETWORKWIRING ACCESS CONTROL
INSTALL
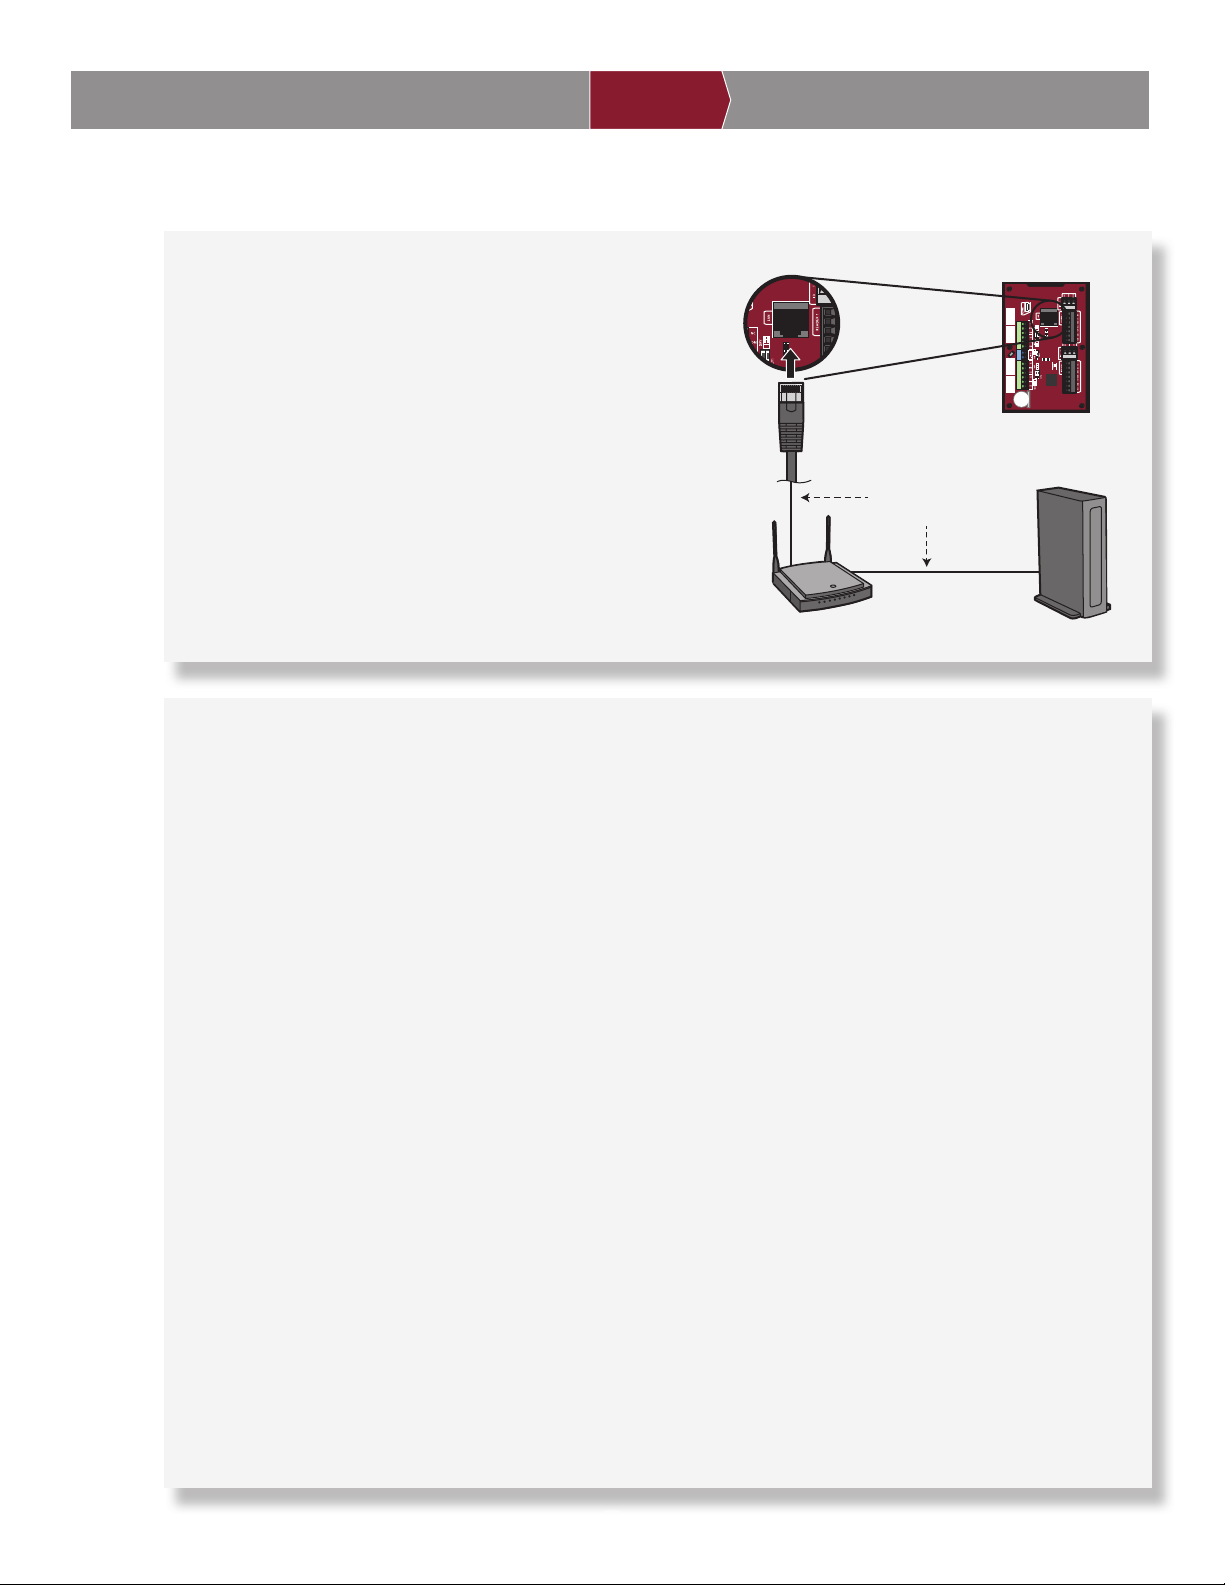
Connect with LAN
The Local Area Network (LAN) port is a 10/100 Ethernet interface
with an RJ45 jack for connecting the CAP2D to a hub, switch, or
router in order to gain connectivity to the Internet. Use a straight,
(i.e., non-crossover) Cat5, Cat5e, or Cat6 cable to connect to a
local hub, switch or router. This type of cable is referred to as an
Ethernet cable in this manual.
1. Connect an Ethernet cable from the hub, switch, or router to
the LAN port on the Control Board. When connected properly,
the Router, Switch, or Hub Ethernet Green or Amber LED will
light/fl icker. If the LED light is not lit, check the connections on
the controller and the Ethernet hub.
2. The default connection is DHCP, no additional confi guration is
required. If a fi xed IP address is required for your setup, use
the USB cable provided to connect the controller to a PC.
LAN/PoE
Connection
Modem
Router/Switch
LAN/PoE Cable
(325 feet [99.1 m] maximum)
11
Static IP (Optional)
LiftMaster recommends the CAP2D be used in Dynamic IP (DHCP) mode, but it can be set to Static IP if required.
Note: Requires Windows Vista and newer.
1. Connect the CAP2D to your laptop using the included
USB connector. Connect power to the CAP2D using
either a router/switch capable of providing Power
Over Ethernet (POE) or the included power supply.
If using the included power supply, move the POE
jumper.
2. Install USB drivers
a. Navigate to “Computer”
b. Right click on “LiftMaster CAP2D Resources”
c. Click on the “Driver” folder
d. Click on the “LiftMasterCAP2DDriverSupport”
e. Allow the setup program to use administrative
privileges
f. Click “Next”
d. Accept any warning dialogs
h. Click Finish
i. After Installation, a message will display asking
you to reboot the PC. You may select “Reboot
Later”.
j. Remove the USB Cable from the PC and wait for
the PC to acknowledge removal.
3. Set static IP address:
a. Next Reinsert the USB cable into the PC and wait
for the PC to acknowledge the device.
b. Open your browser and enter the address
http://192.168.207.1 to access the Administrator
Interface.
c. The login page displays:
d. The login is “cli”.
e. The password is “new5cli”.
f. Click on the Networking tab.
g. Click IP Confi guration.
h. Click the “Deactivate DHCP” button.
i. Fill in the fi elds according to the IT staff.
j. Click Set Static Parameters. Changes have been
saved.
4. How to return to DHCP Confi guration
a. Open your browser and enter the address
http://192.168.207.1
b. The login page displays:
c. The login is “cli”
d. The password is “new5cli”.
e. Click Networking tab.
f. Click IP Address Confi guration. Click the “Activate
DHCP” button.
5. To verify connectivity:
a. Open myQ
®
Business™
b. Add the CAP2D to a facility and confi rm status is
“Online”
Loading ...
Loading ...
Loading ...