
Loading ...
Loading ...
Loading ...
12
English
Instructions for Cutting Crown Molding Laying Flat and Using
the Compound Features
1. Lay the molding with broad back surface down flat on saw table (Fig.T).
2. The settings below are for all Standard (U.S.) crown molding with 52° and 38°angles.
BEVEl sETTing TYPE OF CUT
33.8°
lEFT siDE, insiDE CORnER:
1. Top of molding against fence
2. Miter table set right 31.62°
3. Save left end of cut
33.8°
RighT siDE, insiDE CORnER:
1. Bottom of molding against fence
2. Miter table set left 31.62°
3. Save left end of cut
33.8°
lEFT siDE, OUTsiDE CORnER:
1. Bottom of molding against fence
2. Miter table set left 31.62°
3. Save right end of cut
33.8°
RighT siDE, OUTsiDE CORnER:
1. Top of molding against fence
2. Miter table set right 31.62°
3. Save right end of cut
nOTE: When setting bevel and miter angles for all compound miters, remember that the angles
presented for crown moldings are very precise and difficult to set exactly. Since they can easily
shift slightly and very few rooms have exactly square corners, all settings should be tested on
scrapmolding.
Fig. T
11
47
Fig. U
11
47
PRETESTING WITH SCRAP MATERIAL IS EXTREMELY IMPORTANT!
Alternative Method for Cutting Crown Molding
Place the molding at an angle between the fence
11
and the saw table
47
, with the top side of
the molding on the table and the bottom side of the molding on the fence as shown in FigureU.
The advantage to cutting crown molding using this method is that no bevel cut is required.
Minute changes in the miter angle can be made without affecting the bevel angle. This way,
when corners other than 90º are encountered, the saw can be quickly and easily adjusted
forthem.
Instructions for Cutting Crown Molding Angled Between the
Fence and Base of the Saw for All Cuts
This saw can cut up to 9/16” (14 mm) x 3–5/8” (92 mm) crown moldingnested.
1. Angle the molding so the bottom of the molding (part which goes against the wall when
installed) is against the fence
11
and the top of the molding is resting on the saw table
47
,
as shown in FigureT.
2. The angled “flats” on the back of the molding must rest squarely on the fence and sawtable.
INSIDE CORNER OUTSIDE CORNER
Left side
Miter right at 45°
Save right side of cut
Miter left at 45°
Save right side of cut
Right side
Miter left at 45°
Save left side of cut
Miter right at 45°
Save left side of cut
Special Cuts
NEVER MAKE ANY CUT UNLESS THE MATERIAL IS SECURED ON THE TABLE AND AGAINST
THEFENCE.
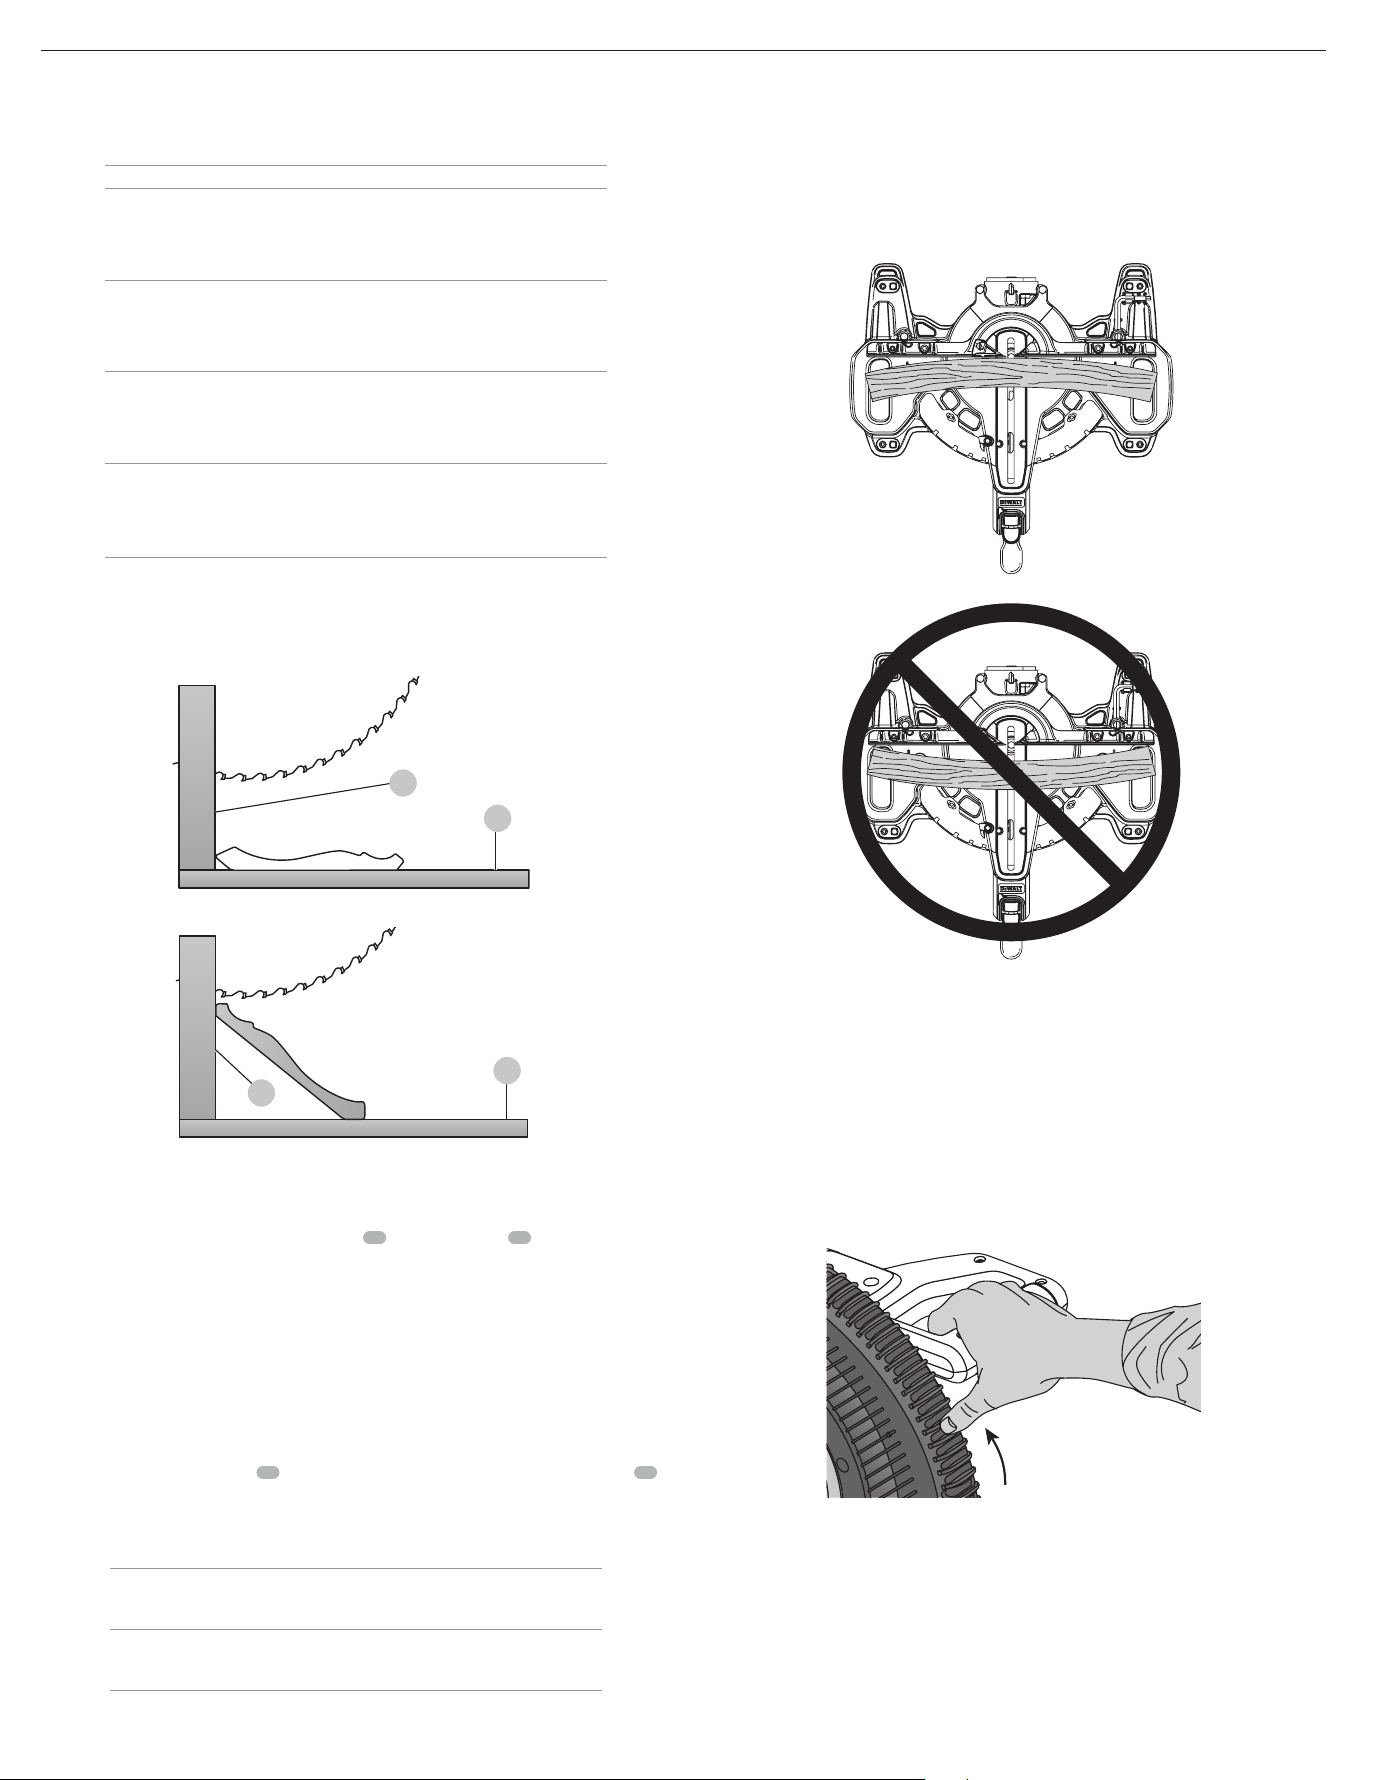
Bowed Material (Fig. U, V)
When cutting bowed material always position it as shown in FigureU and never like that
shown in FigureV. Positioning the material incorrectly will cause it to pinch the blade near the
completion of thecut.
Fig. U
Fig. V
Cutting Round Material
Rounded material should be clamped or held firmly to the fence to keep it from rolling.
This is extremely important when making anglecuts.
Cutting Large Material (Fig. W)
Occasionally you will encounter a piece of wood a little too large to fit beneath the lower guard.
To clear the guard over the wood, with the saw off and your right hand on the operating handle,
place your right thumb outside of the upper portion of the guard and roll the guard up just
enough to clear the wood, as shown in FigureW. Release the guard prior to starting the motor.
The guard mechanism will function properly during the cut. Only do this when necessary. NEVER
TIE, TAPE, OR OTHERWISE HOLD THE GUARD OPEN WHEN OPERATING THISSAW.
Fig. W
MAINTENANCE
WARNING: To reduce the risk of serious personal injury, turn tool off and remove the
battery pack before transporting, making any adjustments or removing/installing
attachments or accessories. An accidental start-up can causeinjury.
WARNING: To reduce the risk of serious personal injury, DO NOT touch the sharp
points on the blade with fingers or hands while performing anymaintenance.
DO NOT use lubricants or cleaners (particularly spray or aerosol) in the vicinity of the plastic
guard. The polycarbonate material used in the guard is subject to attack by certainchemicals.
• All bearings are sealed. They are lubricated for life and need no furthermaintenance.
Loading ...
Loading ...
Loading ...