Loading ...
Loading ...
Loading ...
Throttle
54 Servicing Your Honda
Throttle
Refer to Safety Precautions on page 25.
Inspection
Check freeplay (1).
Freeplay: 1/8 – 3/16 in (3 – 5 mm)
If necessary, adjust to the specified range.
Upper Adjustment
Minor adjustments are generally made with the
upper adjuster.
1. Pull the dust cover (2) back.
2. Loosen the upper lock nut (3).
3. Turn the upper adjuster (4).
Turning the adjuster in direction (–) will
decrease freeplay and turning it in direction (+)
will increase freeplay.
4. Tighten the lock nut to the specified torque:
3.0 lbf·ft (4 N·m, 0.4 kgf·m)
Return the dust cover to its normal position.
5. After adjustment, check for smooth rotation of
the throttle grip from fully closed to fully open
in all steering positions.
If the adjuster is threaded out near its limit or
the correct freeplay cannot be reached, turn the
adjuster all the way in and back out one turn.
Tighten the lock nut to the specified torque:
3.0 lbf·ft (4 N·m, 0.4 kgf·m)
Install the dust cover and make the adjustment
with the lower adjuster.
Lower Adjustment
The lower adjuster is used for major freeplay
adjustment, such as after replacing the throttle
cables or removing the carburetor. It is also used if
you can not get the proper adjustment with the
upper adjuster.
1. Remove the fuel tank (page 37).
2. Loosen the lower lock nut (5).
3. Turn the lower adjuster (6) in direction (–) to
decrease freeplay, and in direction (+) to
increase freeplay.
4. Tighten the lock nut to the specified torque:
3.0 lbf·ft (4 N·m, 0.4 kgf·m)
5. Operate the throttle grip to ensure that it
functions smoothly and returns completely.
6. Install the fuel tank (page 38).
If you can’t get the freeplay within the specified
range, contact your dealer.
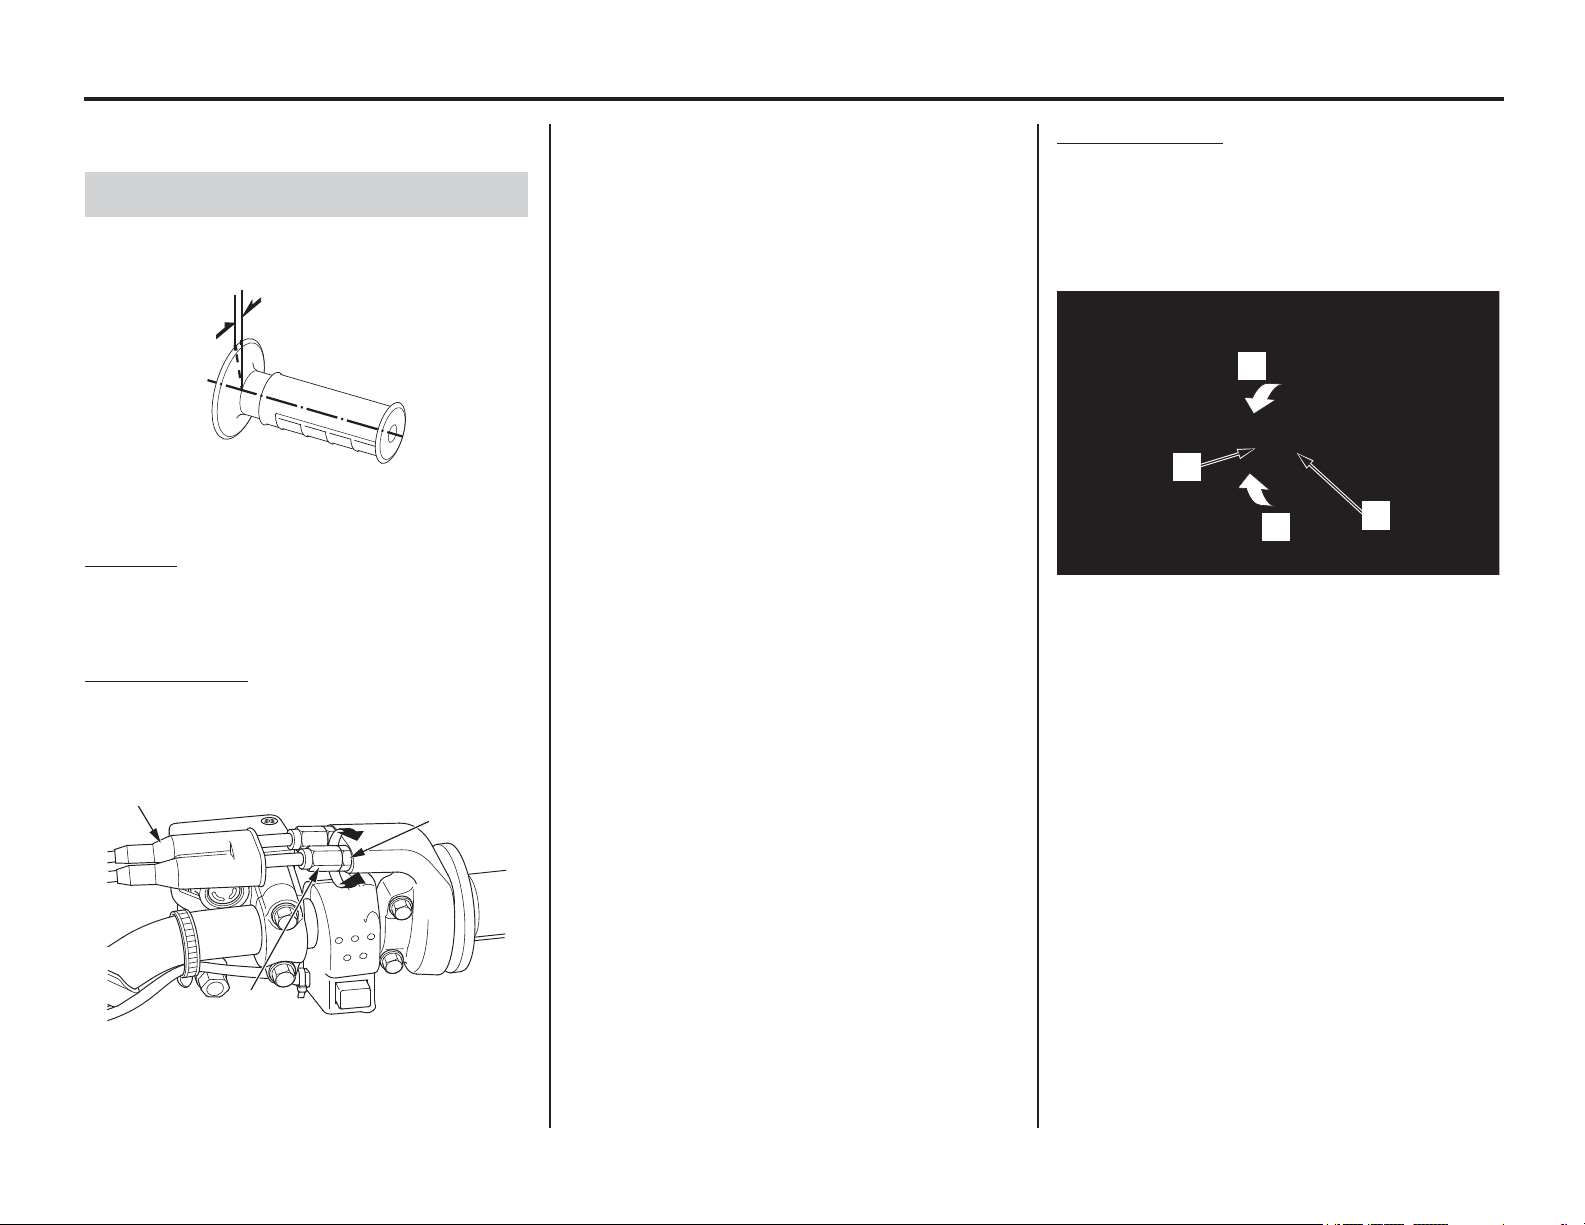
Throttle Freeplay
(1) freeplay
(2) dust cover (+) increase
(3) upper lock nut (–) decrease
(4) upper adjuster
(1)
(2)
(3)
(4)
(+)
(–)
(5) lower lock nut (+) increase
(6) lower adjuster (–) decrease
(5)
(6)
(+)
(–)
Loading ...
Loading ...
Loading ...