Loading ...
Loading ...
Loading ...
6
1. Set Up Your System
Setting up your Arlo Q camera involves a few simple steps: Get the Arlo app, and then
use the app to get an Arlo account and connect your camera to your network. Your
Arlo account lets you view videos from any Internet-connected computer or mobile
device. You can use the same Arlo app to set up and manage both Arlo Q and Arlo
Wire-Free Cameras.
Connect Your Arlo Q or Arlo Q Plus Camera
You can connect your Arlo Q camera using WiFi. You can connect your Arlo Q Plus
camera to the Internet in any of three dierent ways:
• WiFi. Connect the Arlo Q or Arlo Q Plus camera to your router using WiFi and
power the camera with the included micro USB cable and power adapter.
• Arlo Q Plus Power over Ethernet (PoE). Connect the Arlo Q Plus
camera to a PoE switch using the included PoE adapter if you want to power
and connect the camera to the Internet with a single cable.
• Arlo Q Plus Ethernet. Connect the Arlo Q Plus camera to your router with
Ethernet, but power the camera with the included micro USB cable and power
adapter.
Connect an Arlo Q or Arlo Q Plus Camera With WiFi
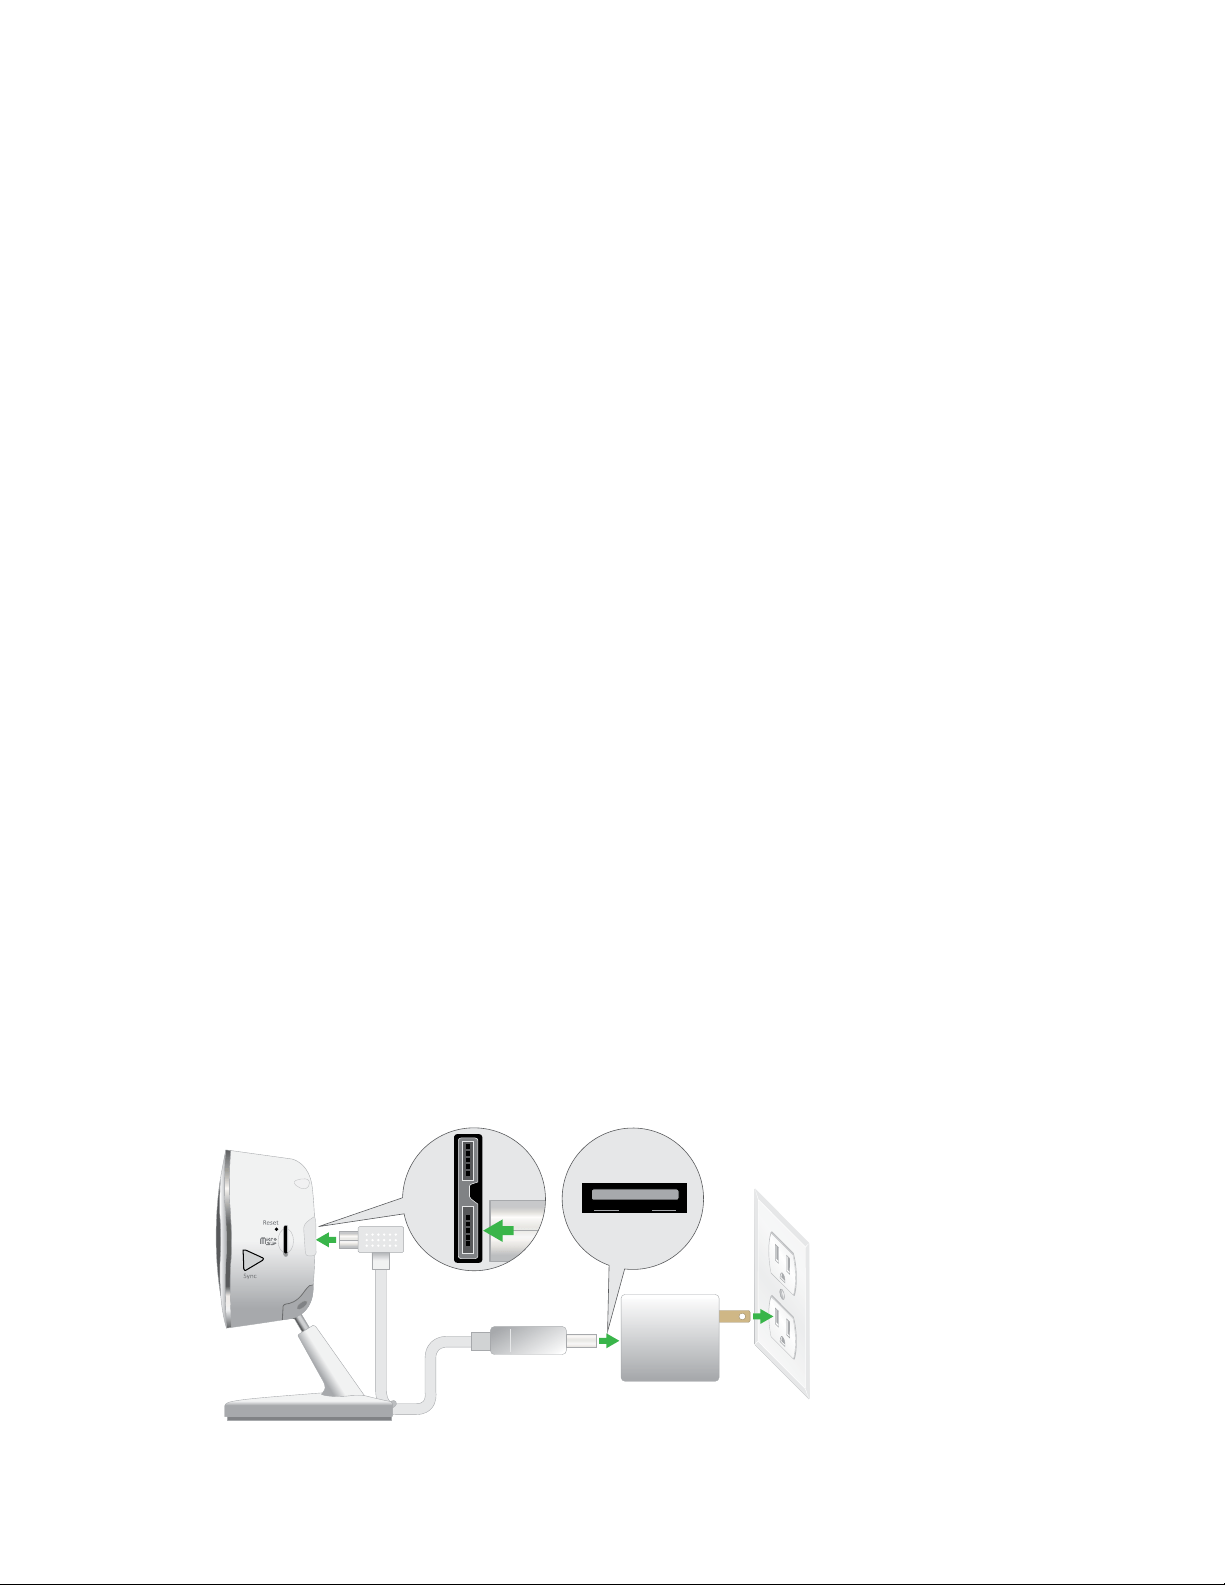
¾ To connect an Arlo Q or Arlo Q Plus camera with WiFi:
1. Connect the micro USB cable that was included with your camera to the
connector on the back of the camera.
For Arlo Q Plus, connect the micro USB cable to the larger half of the port on
the back of the camera. See the following diagram.
This example shows
an Arlo Q Plus camera
Loading ...
Loading ...
Loading ...