Loading ...
Loading ...
Loading ...
10 Before Setting Surface Controls
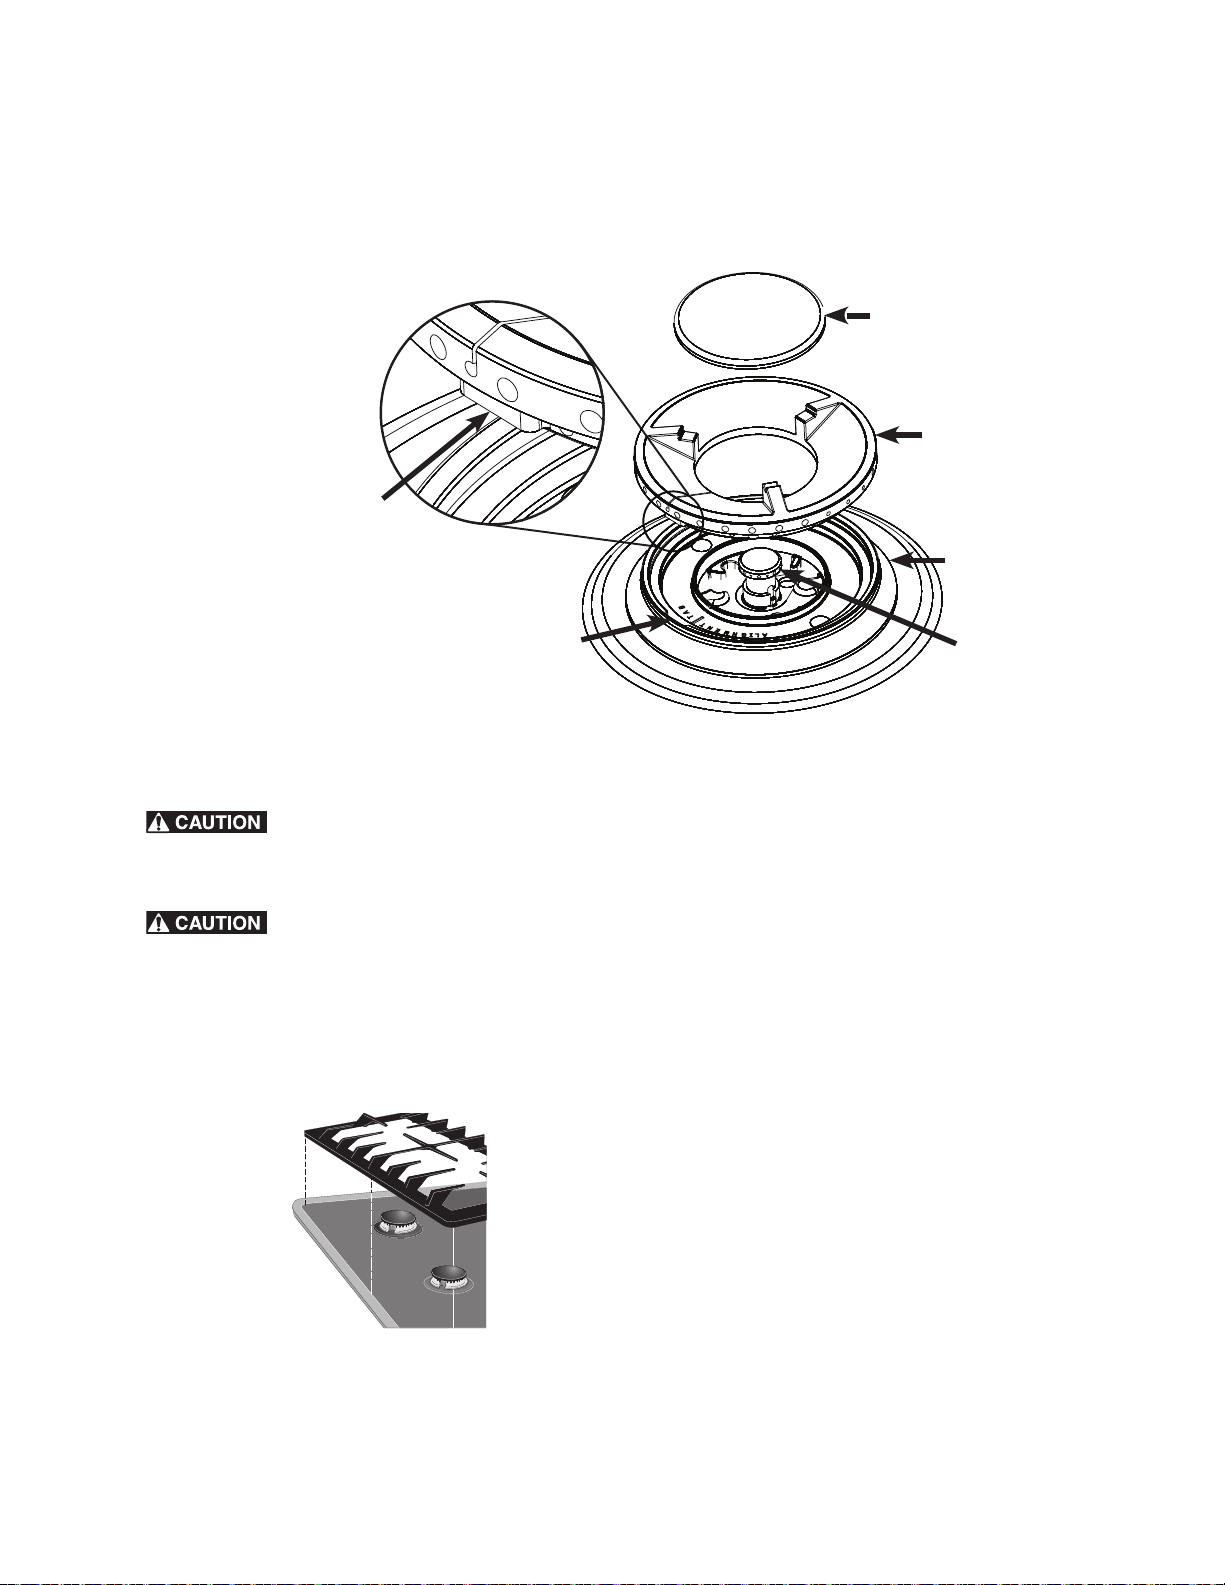
Assembling the G5 burners
IMPORTANT! For proper ignition: Burner Ring Alignment
Tab Must Align with Burner Base Alignment Tab Slot.
NOTE: When the burner ring is properly seated, it will click into
place. When the burner cap is properly set in place it should not
move out of the recessed area of the burner head.
Installing Burner Grates
Do not use surface burners without burner caps and grates
properly installed. Missing pieces or improper installation may
lead to spills, burns, or damage to your range and cookware.
Make sure the burner grates are properly placed on the cooktop
before using the surface burners. The grates are designed to
rest inside the recess on the cooktop.To install burner grates,
place grates flat-side down and align into the cooktop recess.
Grates should rest flush against each other and against the
sides of the recess (
See Figure 4).
Home Canning
Be sure to read and observe all the following points when
home canning with your appliance.
Check with the United States Department of Agriculture
(USDA) website and be sure to read all the information
they have available and follow their recommendations for
home canning procedures.
• Use only quality flat bottom canners when home canning.
Use a straight-edge to check canner bottom.
• When home canning, use only a completely flat bottom
canner with no ridges that radiate from the bottom center.
• Be sure the diameter of the canner does not exceed 1 inch
beyond the grate.
• Start with hot tap water to bring water to boil more quickly.
• Use the highest heat setting when first bringing the water to
a boil.
• Once boiling is achieved, reduce heat to lowest possible
setting to maintain that boil.
Figure 3: Make sure burner cap and ring are secure before attempting to light the burner.
Ring
Alignment Tab
Burner
Cap
Burner
Ring
Burner
Base
Simmer
Head
Burner
Alignment
Tab
Slot
Burner
Figure 4: How to properly place burner grates
Loading ...
Loading ...
Loading ...