Loading ...
Loading ...
Loading ...
Drive Chain
94 Servicing Your Honda
Drive Chain
Refer to Safety Precautions on page 25.
An endless (riveted master link) chain connects the
drive and driven sprockets. The O-ring chain uses
rubber between the side plates of the pin and roller
links to seal in the manufacturer-installed
lubricating grease and keep out moisture and dirt.
The service life of the chain depends on proper
lubrication and adjustment. Poor maintenance can
cause premature wear or damage to the drive chain
or sprockets.
Under severe usage, or when the motorcycle is
ridden in unusually dusty or muddy areas, more
frequent maintenance will be necessary.
Before servicing your drive chain, turn the engine
OFF, raise the rear wheel off the ground by placing
an optional workstand or equivalent support under
the engine and check that your transmission is in
neutral.
It is not necessary to remove or replace the drive
chain to perform the recommended service in the
Regular off-road Use Maintenance Schedule
(page 27).
1. Stop the engine and raise the rear wheel off the
ground by placing the optional workstand or
equivalent support under the engine and shift
the transmission into neutral.
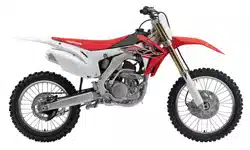
2. Check the drive chain slack (1) in the upper
drive chain run midway between the drive (2)
and driven sprockets (3). Drive chain slack
should allow the following vertical movement
by hand:
1 – 1 3/8 in (25 – 35 mm)
NOTICE
Excessive chain slack may allow the drive chain to
damage the engine cases.
If the chain is found to be slack in one segment of
its length and taut in another, this indicates that
some of the links are either worn, kinked or
binding. Kinking and binding can frequently be
eliminated by thorough cleaning and lubrication.
If the drive chain requires adjustment, procedure is
as follows:
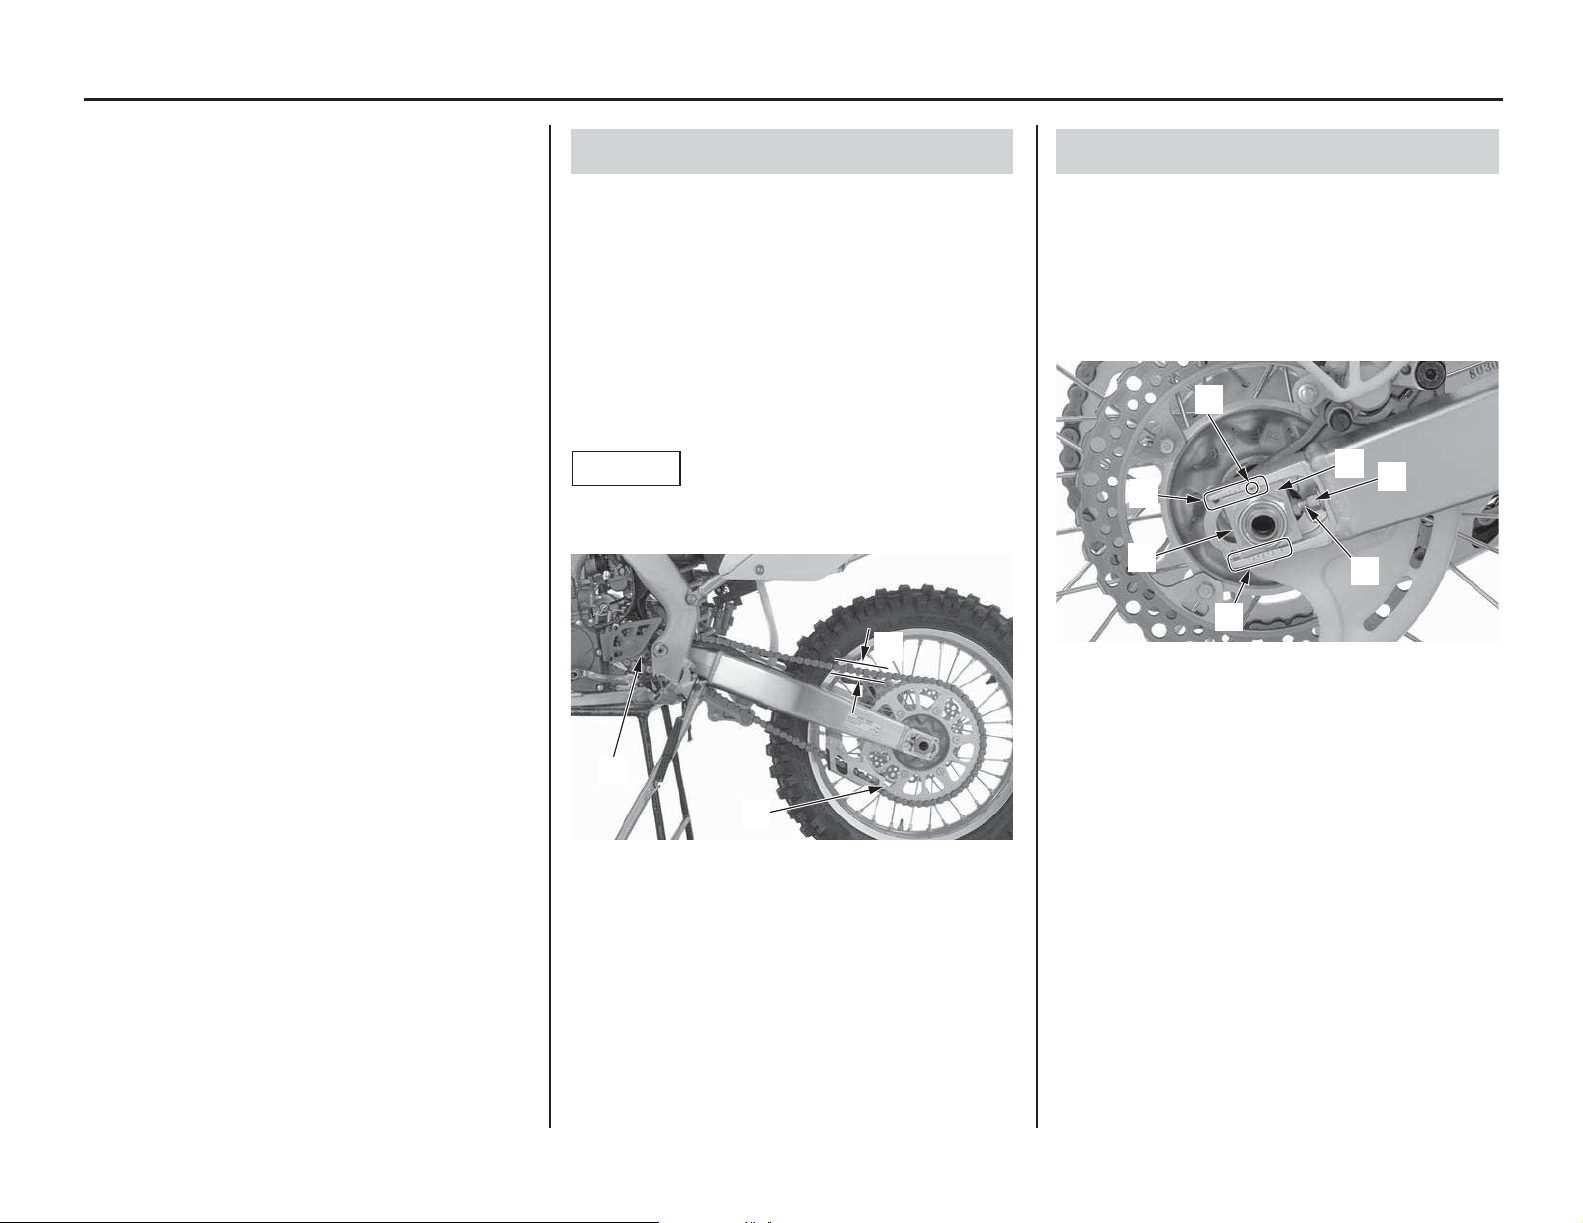
1. Loosen the rear axle nut (1).
2. Loosen the lock nuts (2) and turn the adjusting
bolts (3) counterclockwise to decrease slack or
clockwise to increase slack.
Align the index mark (4) of the axle plates (5)
with same reference marks (6) on both sides of
the swingarm.
3. Tighten the rear axle nut to the specified
torque:
94 lbf·ft (127 N·m, 13.0 kgf·m)
4. Recheck chain slack and adjust if necessary.
5. Turn the adjusting bolt counterclockwise
lightly until it touches the axle plate. Then,
tighten the lock nut to the specified torque by
holding the adjusting bolt with a wrench.
20 lbf·ft (27 N·m, 2.8 kgf·m)
Drive Chain Inspection
(1) drive chain slack (3) driven sprocket
(2) drive sprocket
(2)
(1)
(3)
Adjustment
(1) rear axle nut (4) index mark
(2) lock nut (5) axle plate
(3) adjusting bolt (6) reference marks
(4)
(6)
(6)
(3)
(2)
(5)
(1)
Loading ...
Loading ...
Loading ...