
Loading ...
Loading ...
Loading ...
Spark Plug
Servicing Your Honda 61
Spark Plug
Refer to Safety Precautions on page 25.
The recommended standard spark plug is
satisfactory for most racing conditions.
Use only the recommended type of spark plugs in
the recommended heat range.
NOTICE
Using a spark plug with an improper heat range or
incorrect reach can cause engine damage.
Using a non-resistor spark plug may cause
ignition problems.
This motorcycle uses spark plug that have an
iridium tip in center electrode and a platinum tip in
side electrode.
Be sure to observe the following when servicing
the spark plug.
• Do not clean the spark plug. If an electrode is
contaminated with accumulated objects or dirt,
replace the spark plug with a new one.
• To check the spark plug gap, use only a “wire-
type feeler gauge”. To prevent damaging the
iridium tip of the center electrode and platinum
tip of the side electrode, never use a “leaf-type
feeler gauge”.
• Do not adjust the spark plug gap. If the gap is out
of specification, replace the spark plug with a
new one.
1. Remove the seat and fuel tank (pages 36, 37).
2. Disconnect the direct ignition coil (1).
3. Clean any dirt from around the spark plug
base.
4. Remove the spark plug (2).
5. Check the electrodes for wear or deposits, the
sealing gasket (3) for damage, and the insulator
for cracks. Replace if you detect them.
6. Check the spark plug gap (4), using a wire-type
feeler gauge. If the gap is out of specifications,
replace the plug with a new one.
The recommended spark plug gap is:
0.031 – 0.035 in (0.8 – 0.9 mm)
7. To obtain accurate spark plug readings,
accelerate up to speed on a straightaway. Push
the engine stop button and disengage the clutch
by pulling the lever in.
Coast to a stop, then remove and inspect the
spark plug. The porcelain insulator around the
center electrode should appear tan or medium
gray.
If you’re using a new plug, ride for at least 10
minutes before taking a plug reading; a brand-new
plug will not color initially.
If the electrodes appear burnt, or the insulator is
white or light gray (lean) or the electrodes and
insulator are black or fouled (rich), there is a
problem elsewhere.
Check the carburetor, fuel system and ignition
timing.
8. With the plug washer attached. Thread the
spark plug in by hand to prevent cross-
threading.
9. Tighten the spark plug:
• If the old plug is good:
1/8 turn after it seats.
• If installing a new plug, tighten it twice to
prevent loosening:
a) First, tighten the plug:
NGK: 1/2 turn after it seats.
DENSO: 1 turn after it seats.
b) Then loosen the plug.
c) Next, tighten the plug again:
1/8 turn after it seats.
NOTICE
An improperly tightened spark plug can damage
the engine. If a plug is too loose, a piston may be
damaged. If a plug is too tight, the threads may be
damaged.
10. Connect the direct ignition coil. Take care to
avoid pinching any cables or wires.
11. Install the fuel tank and seat (pages 36, 38).
Spark Plug Recommendation
Standard IMR8C-9H (NGK) or
VUH24D (DENSO)
Optional IMR9C-9H (NGK) or
VUH27D (DENSO)
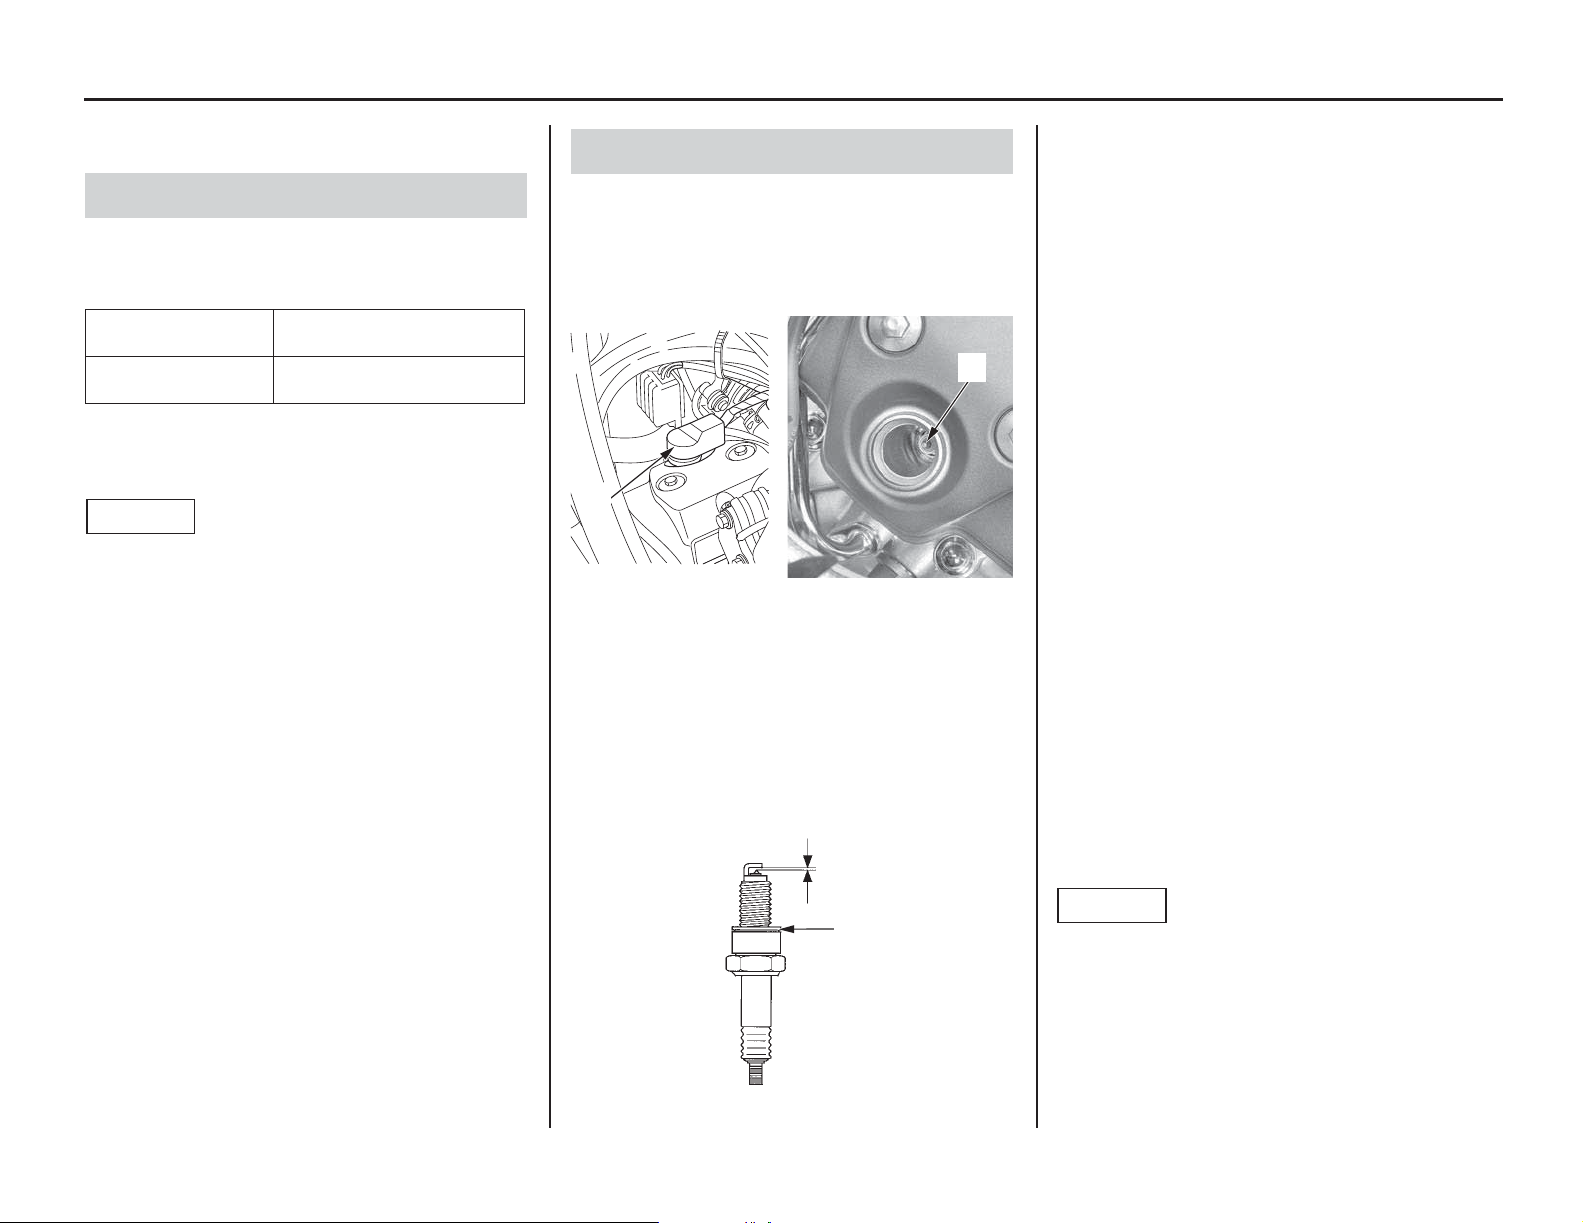
Spark Plug Inspection & Replacement
(1) direct ignition coil (2) spark plug
(3) sealing gasket (4) spark plug gap
(2)
(1)
(3)
(4)
Loading ...
Loading ...
Loading ...