Loading ...
Loading ...
Loading ...
64 English
Maintaining your appliance
Maintaining your appliance
Cleaning the cooktop seal
To clean the seal around the edges of
the glass, lay a wet cloth on it for a few
minutes, then wipe clean with a nonabrasive
cleaner.
Potential for permanent damage to the glass surface
• Sugary spillovers (such as jellies, fudge, candy, syrups) or melted plastics can
cause pitting of the surface of your cooktop. This is not covered under the
warranty. You should clean the spill while it is still hot. Take special care when
removing hot substances. Refer to the section below.
• When using a scraper, be sure it is new and the razor blade is still sharp. Do
not use a dull or nicked blade.
Cleaning sugary spills and melted plastic
1. Turn off all surface units. Remove hot pans.
2. Wearing an oven mitt, use a single-edge razor-blade scraper to move the spill
to a cool area of the cooktop. Remove the spill with paper towels.
3. Any remaining spillover should be left until the surface of the cooktop has
cooled.
4. Don’t use the surface units again until all of the residue has been completely
removed.
NOTE
If pitting or indentations in the glass surface have already occurred, the cooktop
glass will have to be replaced. In this case, service will be necessary.
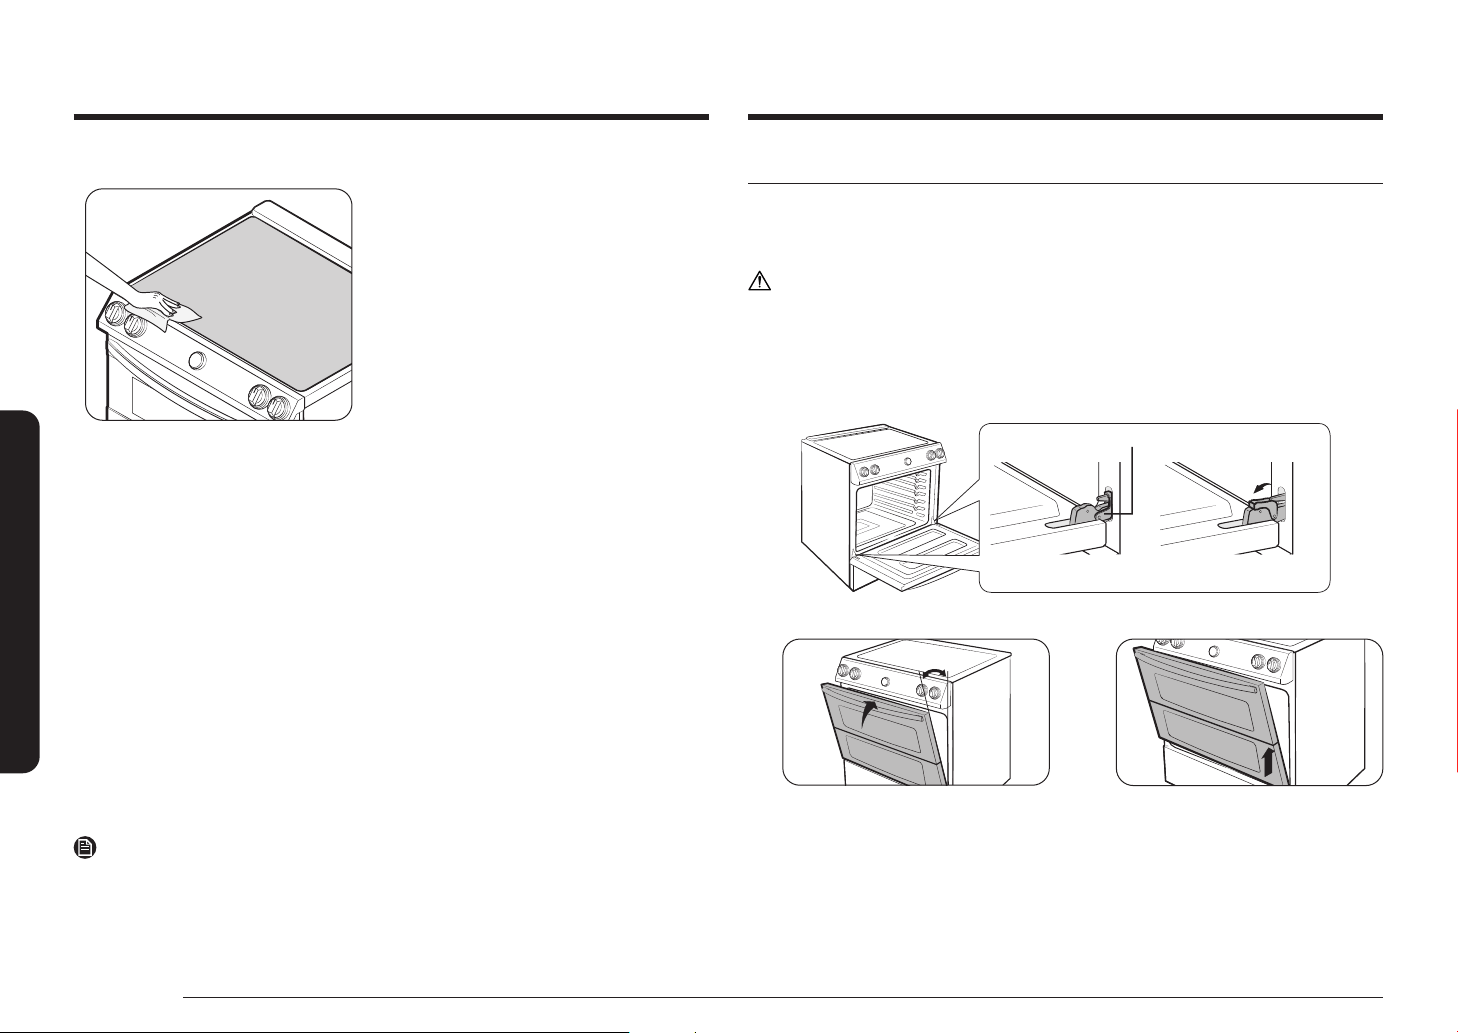
Removing and reinstalling the oven door
How to remove the door
You can remove the upper door the same way you remove the full door.
CAUTION
• The door is very heavy. Be careful when removing and lifting the door. Do not
lift the door by the handle.
• Turn the power OFF before removing the door.
1. Open the door completely.
2. Pull the hinge locks down toward the door frame to the unlocked position.
Locked positionLocked position
Unlocked positionUnlocked position
Hinge lockHinge lock
3. Firmly grasp both sides of the door at the top.
about 5 °about 5 °
Fig. 1Fig. 1
Fig. 2Fig. 2
4. Close the door to the door removal position, which is approximately 5 degrees
from vertical (Fig. 1).
5. Lift the door up and out until the hinge arm is clear of the slot (Fig. 2).
Loading ...
Loading ...
Loading ...