
Loading ...
Loading ...
Loading ...
Wall-mounting the boiler
Remove boiler from crate
4HEBOILERISHEAVY. Use caution not to drop the boiler
or cause bodily injury while lifting and handling. Verify
that the boiler is securely attached to prevent possibility
of boiler falling after installation.
After the boiler is removed from the shipping carton,
$/./4 allow the boiler to sit on its bottom. This would
cause pressure on protruding plastic, resulting in interior
damage. Either lay the boiler on its back or leave on the
styrofoam protective shipping base.
Do not drop boiler or bump jacket on floor or pallet.
Damage to boiler can result.
Cold weather handling — If boiler has been stored in a
very cold location (below 0°F) before installation, handle
with care until the plastic components come to room
temperature.
1. The ECO boiler is generally easier to handle and maneuver after
removing the shipping container.
2. Remove items 1, 2 and 4 in Figure 3. Remove trim kit and parts
from item 2.
3.
,EAVE THE BOILER RESTINGON THE STYROFOAMPROTECTIVEBASE
(item 5) and bottom cardboard cap (item 6), until ready to place
on the wall. If removing the boiler from the shipping base, rest
the boiler on its back, NOT on its bottom.
Wall-mounting requirements
DO NOT attempt to attach the wall mount bracket using
anchors or any means other than directly securing to the
wall studs (or equivalent wood structure if studs are not
on 16-inch centers).
4HE WALL MUST BEVERTICALLY PLUMB AND CAPABLEOF
CARRYINGTHE WEIGHTOFTHEBOILERANDANYATTACHED
PIPINGCOMPONENTS
.
The operating weights for wall-mountable boilers are:
ECO 70 or ECO 110: POUNDS
ECO 155: POUNDS
Failure to comply with above and the procedure given
below could result in severe personal injury, death or
substantial property damage.
1. Stud spacing: Bracket holes are spaced for studs on 16-inch centers.
For other stud spacing, provide secure, solid mounting surface on
which to attach the boiler wall-mounting bracket. The mounting
surface must not extend above the top of the boiler jacket.
2. Wood stud wall: Install bracket with lag screws (3/8” x 3”) included
in kit, only into the studs.
3. Metal stud wall: Secure bracket and spacer board to studs with
3/16-inch toggle bolts and 3/16-inch flat washers (not included
with kit).
Verify that the studs are suitable for carrying a wall-
mounted load. Some metal studs are not designed for
this purpose.
4. If the mounting wall has exposed studs, installer must provide a
backer board to mount boiler. Boiler cannot be leveled without
a backing surface.
5. Mount the boiler on the wall following these instructions. The
boiler mounting studs must engage with the wall-mount bracket.
Make sure the bracket is not just resting on the edge of the mount-
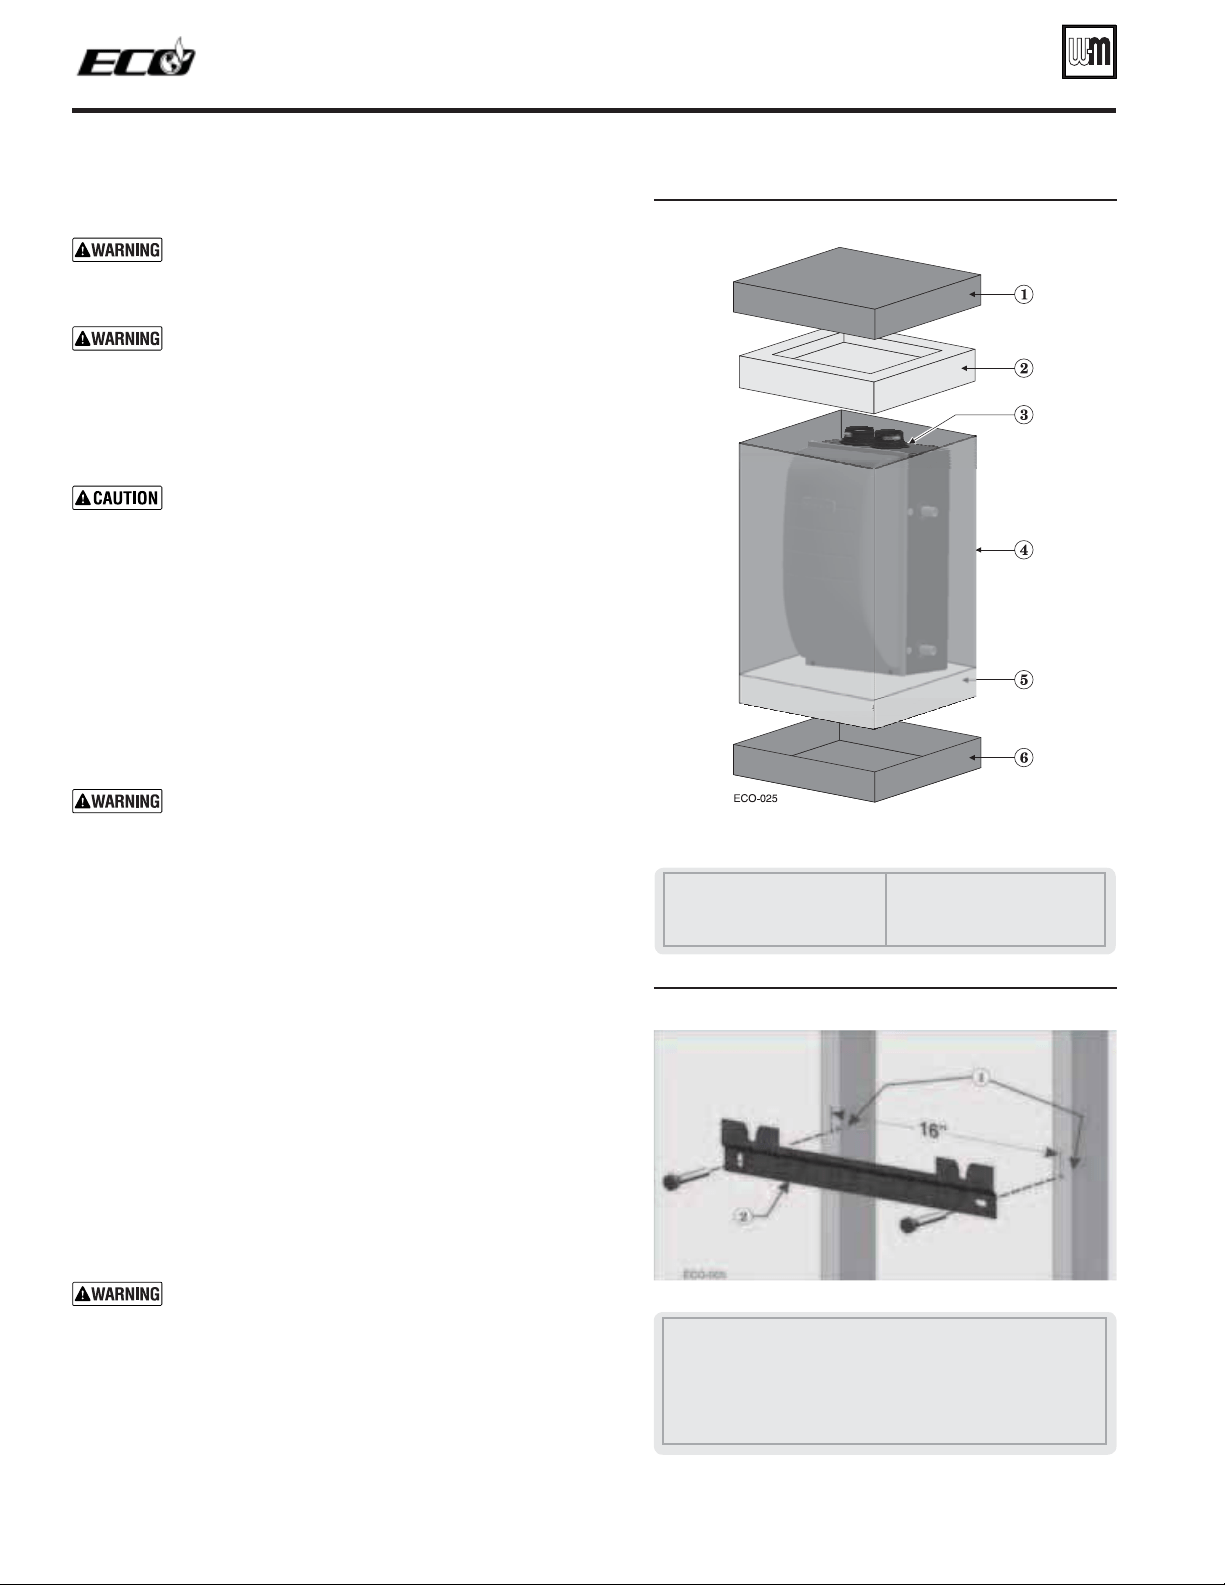
&IGURE Boiler shipping container
1 Cardboard cap, top
2 Styrofoam protective cap (in-
cludes compartment for trim
kit and parts)
3 Boiler
4 Cardboard sleeve
5 Styrofoam protective base
6 Cardboard cap, bottom
&IGURE Wall-mount bracket and studs
1 Studs — Pre-drill through the wall into the studs ¼ inch diameter x 3 inches
deep for 3/8-inch lag screws— Studs must be on 16-inch centers. If studs
are any other spacing, provide a secure, solid mounting surface on which to
attach the boiler wall-mounting bracket.
2 Wall-mount bracket
Part number 550-142-122/0513
8
TM
GAS-FIRED WATER BOILER — Boiler Manual
Loading ...
Loading ...
Loading ...