Loading ...
Loading ...
Loading ...

nuwavenow.com
33
ENGLISH
nuwavenow.com
33
cleaning & maintenance
32
CLEANING & MAINTENANCE
32
TROUBLESHOOT GUIDE
The Duet is taking a longer time to come up to
correct pressure.
1. Cooking times vary based on selected temperatures, the
current temperature of the Inner Pot, and temperature or
amount of ingredients used.
2. Make sure the Silicone Gasket in the Lid is properly in place
and ush against rim of Lid, all the way around.
3. Make sure the Pressure Cooker Lid is locked into place and
the Pressure Release Switch/Valve is in the “CLOSE” position.
When the Lid is properly locked, the “Lock” icon will appear in
the display.
You are unsure if whether or not the Duet is pressurizing
inside the Inner Pot.
“PH” with the colon (:) will be ashing, indicating it is pressurizing.
The time is counting down noticeably slower
on the Duet.
The hours may have been set, and not the minutes on the unit.
When the time is set, HH:MM will be displayed. The time will
increase/decrease 1-minute increments.
Steam is being released from Pressure Release Valve when
pressure cooking.
This is normal. When pressure cooking, some steam will
be released.
Pressure Cooking Lid is NOT removing easily from the Duet.
As an added safety feature, the Duet will only open once all
pressure has been released. Allow the Duet to Natural Release
pressure and always Quick Release afterward to make sure all
pressure/steam is released: Turn the Pressure Released Switch/
Valve to the “OPEN” position. Once all pressure/steam is released
turn the Pressure Cooker Lid counterclockwise to open and lift up
away from you.
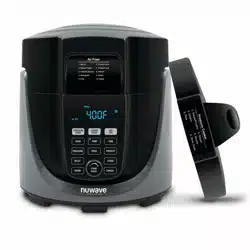
Air Fryer Lid Holder
Use Air Fryer Lid Holder for Air
Fryer Lid only to prevent from
touching hot surfaces. Place on Lid
Holder to cool down Air Fryer Lid.
1. Place bottom of Air Fryer
Lid on two lower horizontal
bars with rim resting in
between each.
2. Allow Lid to lean against the
curved bar of Lid Holder.
3. Ensure Lid is correctly in
place and secure on Holder.
Back of Lid
Inside of Lid
Air Fryer Lid Holder
Cleaning Pressure Indicator Valve
Remove the Silicone Valve Gasket underneath the Lid covering the
bottom of the Pressure Indicator Valve. When removed, the Pressure
Indicator Valve will be released. If needed, clean the Pressure
Indicator Valve and Silicone Valve Gasket before replacing.
When clean and dry, place Pressure Indicator Valve back through
its hole. Replace the Silicone Valve Gasket over the bottom of the
Pressure Indicator Valve. Ensure that the t is snug and Pressure
Indicator Valve is moving up and down freely.
Loading ...
Loading ...
Loading ...
