Loading ...
Loading ...
Loading ...
Information: The appliance should be posted in its complete original packaging in case of a customer
support service. Please keep the packaging including the polystyrene parts in full.
➔ Put the appliance onto an even, dry and appropriate work surface.
➔ Connect it to a professionally installed socket.
➔ Your appliance has a cable compartment - you can push the cable length which is not required
into the compartment on the back, should the lead be too long (picture 1/T).
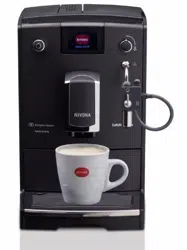
2.2. The most important control elements
Your NIVONA appliance offers you diverse possibilities to prepare speciality coffees to your individual
wishes. The most important control elements and their basic function are mostly identical for the
different coffee specialities:
• On/Off switch (picture 1/H): By pressing you turn the appliance on, by pressing once more you
turn it off again.
• Rotary - Turn -Press - Selector (short Rotary) (picture 1/B): Select your favourite beverage in the main
menu by turning the rotary. By pressing the rotary in the main menu, the beverage preparation
starts. During the preparation of the beverage, you can alter the strength and amount of your
coffee with the rotary. The changeable value ashes respectively.
• Steam-Hot water-Rotary knob (picture 1/C): When the display shows “OPEN VENT’’, place a container
underneath the steam-hot water jet / the spumatore prior to use. You open the vent for the hot
water or steam supply, by turning it clockwise up to the stop. You stop the supply, by turning it
anticlockwise up to the stop.
• Steam-Hot water Jet/Spumatore (picture 1/P): Is the tap of the spumatore upright with open steam-hot
water rotary knob (picture 1/C), foamed milk or hot water are made depending on the choice of
beverage. The milk tube is rinsed, when the tap of the spumatore is horizontal with open steam-hot
water rotary knob (picture 1/C).
• Height-adjustable spout (picture 1/E): By moving up or down, you adjust the spout to the height
of your cups or glasses. Grab the spout between thumb and index nger and move it up or down
(picture 11).
• Milk container (only designs 670 and 680): Fill the milk container with fresh, cold, low fat milk.
Close the lid of the milk container and connect the suction tube with one end to the milk container
and with the other end to the milk frother/spumatore.
2.3. Filling of water and beans
➔ Open the cover on the left side of the device (picture 1/F) and remove the water tank (picture 2).
Rinse it with cold, clear tab water.
➔ Fill the water tank above the minimal mark (0,5 l) and put it back into the appliance. Ensure that
the water tank ts properly when inserting it.
➔ Close the cover on the left side of the device again.
Warning: Always ll the water tank with clear, cold water only! Never use carbonated water or different
uids! Nonobservance will void you guarantee claims.
➔ Open the lid of the bean container (picture 1/G and 3).
➔ Fill it with untreated, roasted coffee beans only.
➔ Close the lid again. Ensure the proper t.
7
2. Set up
Loading ...
Loading ...
Loading ...