Loading ...
Loading ...
Loading ...

8. Spare parts/Accessories
Fresh water lter NIRF 700:
You can buy new fresh water lters at a well organised retailer or at our central customer service.
Cleaning tablets NIRT 701:
You can buy new cleaning tablets at a well organised retailer or at our central customer service.
Descaler NIRK 703:
You can buy descaler at a well organised retailer or at our central customer service.
Special cleaning agent for milk residue NICC 705:
You can buy special cleaning agents for your milk froth equipment at a well organised retailer or at
our central customer service.
Milk Cooler NICT 500:
The high quality stainless steel milk cooler keeps the milk cold for a long period and thus, ensures
the best milk froth results.
Milk container NIMC 1000:
The milk container made from transparent plastic shows the milk level at one glance.
Milk tube NIMA 330:
Three spare tubes for all NIVONA designs with OneTouch spumatore.
NIVONA Cooler NICO 100:
Mini refrigerator with own power supply. Cools one litre of commercially packed milk.
9. Customer service, guarantee, environment protection
Customer service
Only the highest quality standards apply for NIVONA products. If there are still questions to the
useof your appliance, please write to us. Only with your help, are we able to develop and improve
products so that they fully meet your needs.
Evaporate the appliance
If you have to send your device in case of a fault, please let it evaporate rst as follows so that no
residual water remains in the system:
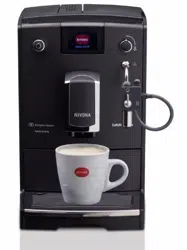
➔ Turn the appliance on with the main switch (picture 1/H).
➔ First, follow the instructions on the display.
➔ Turn the rotary in the main menu to “Care’’. Press the rotary.
➔ Turn the rotary to “EVAPORATE SYSTEM’’. Press the rotary.
The display shows “REMOVE WATER TANK’’ and “REMOVE BOWLS’’ in alteration.
➔ Remove the water tank (picture 2).
➔ Empty the drip pan and the used coffee tray (picture 1/N and 1/O) and insert both again after
cleaning them.
The display shows “TUBE ON MILK FROTHER AND IN DRIP PAN’’.
➔ Connect the tube to the milk frother with one end of the tube (picture 10).
➔ Put the other end of the tube in the drip pan at the right rear (picture 7).
➔ Place a big enough container (at least 0,5 l) centrally underneath the milk frother (picture 1/E).
The display shows “OPEN VENT’’.
➔ Turn the steam-hot water- rotary knob (picture 1/C) clockwise up to the stop.
34
8. Spare parts/Accessories / 9. Customer service, guarantee, environment protection
Loading ...
Loading ...
