Loading ...
Loading ...
Loading ...

Warning: Even if the display does not show “PLEASE CHANGE FILTER’’, the lter must be changed after
two month at latest, even with only a rare use of the appliance.
2.4.2. Operate appliance without lter
If you would like to operate the appliance without lter, the lter setting must be set on “INSERT
FILTER? NO’’. This is important because descaling has to take place more often without a lter,
depending on water hardness (the appliance is delivered with the factory setting “INSERT FILTER?
NO’’!).
➔ Turn the rotary to “NO’’ and press the rotary.
The display shows the setting water hardness.
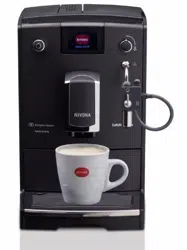
Information: For production reasons, it may occur at the initial set up that the pipes in the appliance
are still empty. The appliance shows that as follows: The display “PLEASE FILL’’/OPEN VENT’’ appears
after the appliance has been turned on with the On/Off switch (picture 1/H).
➔ Place a big enough container (at least 0,5 l) underneath the steam-hot water jet / the spumatore.
➔ Open the steam- hot water - rotary knob clockwise.
The system is now being lled. Water may emerge from the steam- hot water jet / spumatore
(picture1/P).
➔ Close the steam- hot water - rotary knob anticlockwise.
After the system is heated, the display shows “PLEASE RINSE’’.
➔ Press the rotary.
The display shows “SYSTEM RINSING’’.
When the appliance is ready for use, the display shows the main menu.
2.4.3. Set water hardness
The appliance has to be descaled sooner or later depending on the water hardness in your area.
Sothat the system can display in time when the descaling is required, you must set the appropriate
water hardness prior to the rst use.
The basic factory setting for the water hardness is LEVEL 3.
Initially, test the quality of your water with the provided test strip:
➔ Immerse the test strip into the water for a short period and shake it slightly.
➔ After approximately one minute you can read the result, by counting the red dots on the test
strip.
➔ The different levels are split and adjustable as follows:
Test strip / level of hardness = Display
1 red dot / 1–7° = LEVEL 1
2 red dots / 8–14° = LEVEL 2
3 red dots / 15–21° = LEVEL 3
4 red dots / >21° = LEVEL 4
Information: If no dot turns red, set it to level 1.
That is how you set the water hardness for your appliance:
➔ Turn the rotary to your water hardness and press the rotary afterwards to set the level of your
water hardness.
The display shows “PLEASE FILL’’/OPEN VENT’’.
➔ Place a big enough container (at least 0,5 l) underneath the steam-hot water jet / the spumatore.
9
2. Set up
Loading ...
Loading ...
Loading ...
