Loading ...
Loading ...
Loading ...
Tip: Test the setting that suits you best according to your individual sense of taste.
➔ Close the service door again, in doing so, guide the pins at the rear end of the service door into
the gaps. Then, shut the service door until it clicks.
4.7. Prepare instant coffee (i.e. decaffeinated coffee)
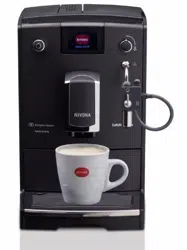
➔ Open the lid of the ground coffee chamber (picture 13).
The display shows “FILL IN COFFEE POWDER’’ in alternation with “CLOSE GROUND COFFEE
CHAMBER’’.
➔ Pour in a levelled measuring spoon of coffee powder and close the lid again. The display shows
“COFFEE POWDER IS READY’’.
➔ Place a cup or glass underneath the coffee outlet (picture 5).
➔ Turn the rotary in the main menu to the beverage of your choice.
➔ You start the preparation by pressing the rotary.
Information: If you have started the preparation by accident or to early, you can also changed the
amount in ml during the preparation.
➔ Turn the rotary to your desired setting while the “ml-display’’ is ashing.
➔ If you would like to cancel the preparation, press the rotary once again.
Information: If you have opened the ground coffee chamber by accident - or you have not pressed
the rotary after the powder was poured in - the appliance will be automatically rinsed via the outlet
(picture 1/E) approximately one minute after the lid was closed again and is then ready again.
Warning: The ground coffee chamber is not a storage container. Therefore, never ll in more than
one portion into the chamber and use fresh or vacuum=packed powder from fresh beans only. Water
soluble- instant coffee must not be used!
5. Cleaning and care
Your NIVONA appliance requests some of the below mentioned cleaning and care activities on
thedisplay (i.e. “PLEASE RINSE THE MILK FROTHER’’.
➔ When such a cleaning or care request is displayed, turn the rotary to the “hand symbol with
theraised index nger’’ in the main menu.
➔ Then, press the rotary.
You appliance starts the appropriate cleaning or care process and requests further activities on
thedisplay.
➔ Follow the instructions on the display. In case of doubt, you will nd further explanations in
thenow following points 5.1. to 5.9.
5.1. Rinse the frother
Warning: The running programme must not be interrupted!
You should rinse the milk frother after each beverage with milk, yet, at the latest when the display
requests it. For this purpose, proceed as follows:
➔ Turn the rotary to “CARE’’. Press the rotary.
➔ Turn the rotary to “RINSE MILK FROTHER’’. Press the rotary.
The display shows “TUBE ON MILK FROTHER AND IN DRIP PAN’’.
➔ Connect the provided tube to the milk frother with one end of the tube (picture 10).
➔ Put the other end of the tube in the drip pan at the right rear (picture 7).
➔ Place a big enough container (at least 0,5 l) underneath the milk frother.
25
4. Prepare coffee specialities / 5. Cleaning and care
Loading ...
Loading ...
Loading ...