User Manual Roborock Cordless Stick Vacuum Cleaner
Product Introduction
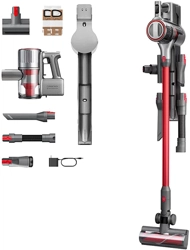
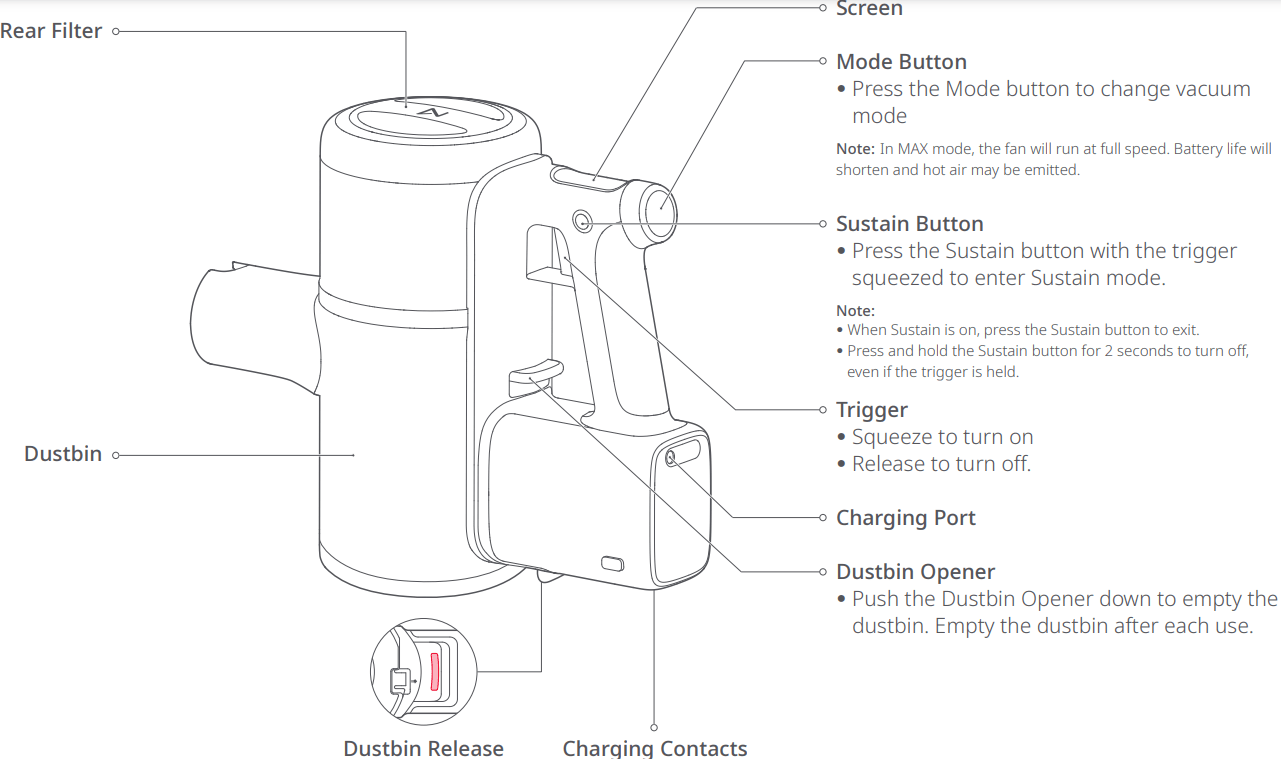
Vacuum
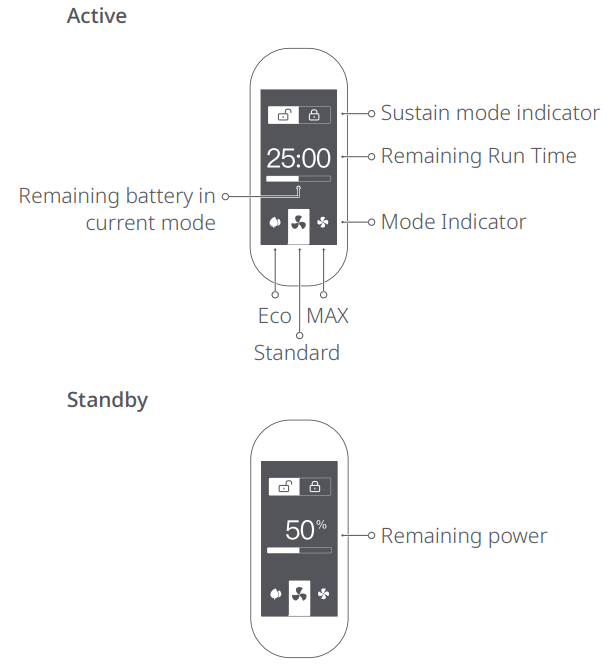
Display
This Roborock cordless vacuum is equipped with a 1.3-inch OLED display that shows relevant information in real-time.
Standby and Operating Modes
Notes:
- The remaining run time indicator will appear after several seconds of use.
- Remaining run time is for reference only and may be different to actual run time.
Charging
When the battery is charging, a charging animation will show alongside the current battery level. The screen will turn off automatically after 1 minute of inactivity.
Error
If an error occurs while the vacuum is in operation, the screen will show an error message. See Troubleshooting for details.
Language selection
Press the Mode button for 10 seconds to enter language selection. Press the Mode button to scroll through language options. Squeeze the Trigger to confirm a language and exit language selection.
Sustain Button
Press the Sustain button to enter Sustain mode. The Sustain icon will be highlighted on the screen. Squeeze the trigger while in Sustain mode to start the vacuum and enable it to run continuously. In Sustain mode, the vacuum will not stop when the trigger is released. Press the Sustain button again to disengage Sustain mode and stop vacuuming.
You can also enable the vacuum to continuously run by first pressing the trigger and pressing the Sustain button. Pressing the Sustain button for 5 seconds will activate the child lock. The vacuum will not start when the Child Lock is on.
Press the Sustain button again for 5 seconds turn the Child Lock off.
Notes:
- Squeezing the trigger while the vacuum is already running continuously in Sustain mode will have no effect.
- Pressing the Sustain button for 2 seconds in any active mode will stop the vacuum.
Trigger
Squeeze the trigger to start vacuuming. Releasing the trigger will stop the vacuum and enter it into Standby mode, unless it is in Sustain mode. The screen will turn off automatically after 30 seconds of inactivity and the vacuum will automatically turn off after 1 minute of inactivity. Squeeze the trigger to start the vacuum again.
Notes:
- Pressing the Sustain button while Sustain mode is on will switch off Sustain mode.
- The vacuum will stop running when charging.
- Insufficient power or other errors may cause the vacuum to fail. See Troubleshooting for details.
Mode Button
When the vacuum is on, press the Mode button to switch between Eco, Standard, or MAX modes. The respective icon will be highlighted on-screen.
Note: The vacuum will return to Standard mode after turning off or when charging.
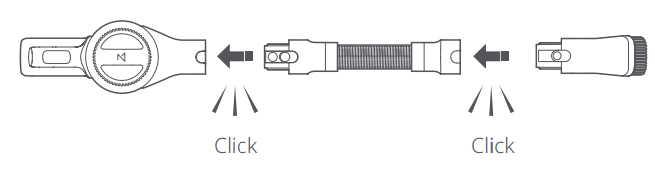
Installation
Vacuum and accessories setup
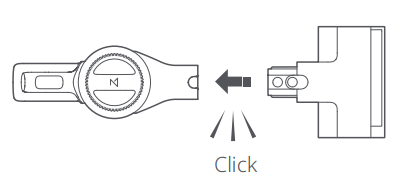
Option 1: Connect the Baton to the vacuum, then attach an accessory.
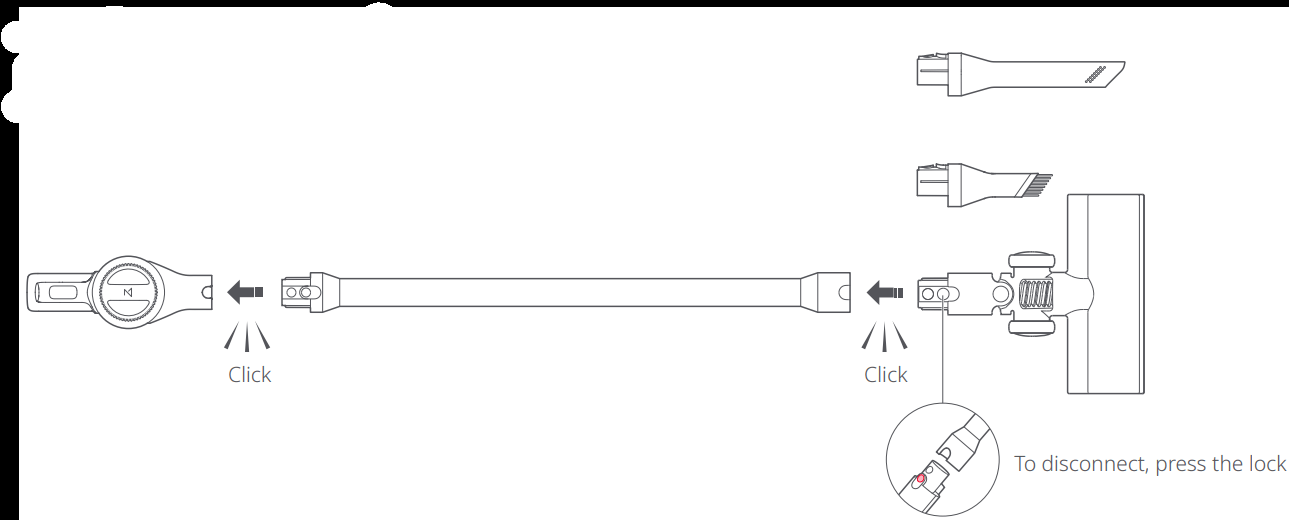
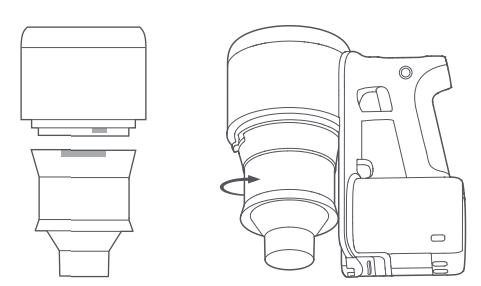
Option 2: Connect the vacuum directly to an accessory.
Option 3: Connect the flex tube to the vacuum, then attach an accessory.
Note: Motorized accessories such as the motorized mini-brush or Multi-Surface Brush cannot be used with the flex tube.
Use
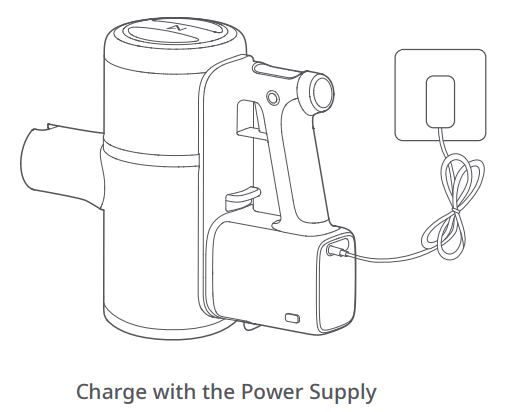
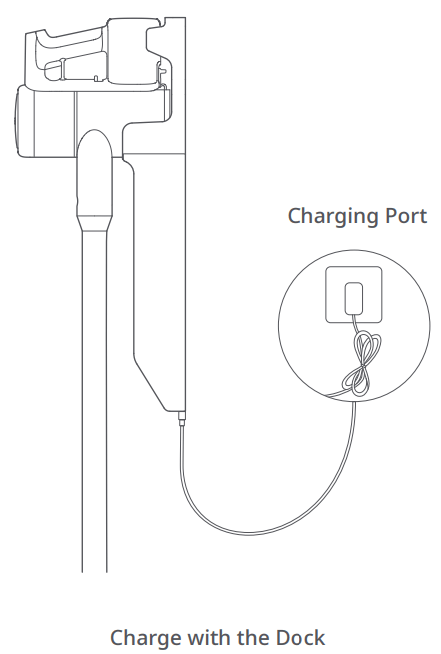
Charging
When the battery is charging, a charging animation will show alongside the current battery level. The screen will turn off automatically after 1 minute of inactivity.
Note:
- When charging, the screen image faces the user for easy viewing.
- When charging, the vacuum will enter Charging mode and stop operating.
- The battery temperature will increase after continuous use in MAX mode. As a result, recharging may take longer.
- When battery levels are very low, the vacuum screen will only light up after a period of charging.
Before using the vacuum, read the " Safety Information" in this user manual
Note: Make sure the Power Supply is firmly inserted into the power socket.
Using the vacuum
- When using the Multi-Surface Brush or motorized mini-brush on the vacuum cleaner, the surfaces of some fabrics may pill or be difficult to vacuum. If this occurs, it is recommended that you use the dusting brush or crevice tool to vacuum these surfaces.
- Before vacuuming shiny floors such as parquet or tiles, ensure there is no hard debris trapped the Multi-Surface Brush to avoid scratches. Note: The filters are installed during production. Please refer to the "Maintenance" section of this manual for details on filter assembly and cleaning.
- Before using the vacuum, ensure that the Dustbin, MultiCyclone Assembly, and filters have been properly installed.
- Do not block the exhaust outlet when vacuuming.
- Flour, construction dust, and other fine particles should only be vacuumed in small amounts.
- To avoid damage to the vacuum or the floor, do not vacuum up hard or sharp objects such as toys, pins, and paper clips.
- Be aware of your environment as you vacuum, especially around stairs and windows.
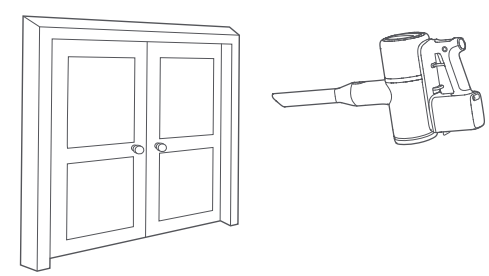
- To avoid accidental fall damage, avoid placing the vacuum on raised surfaces such as desks and shelves, or leaning it against other objects.
- The rotation of the Multi-Surface Brush may leave an unevenly polished floor. This can be resolved by wiping with a damp cloth or polishing with floor wax.
Auto Shutoff
- If any rotating parts get jammed, the vacuum will shut off automatically. Clear the jam to continue vacuuming.
- If the motor gets too hot, the vacuum will automatically shut off. Wait until the temperature returns to normal before continuing.
Keep the Brush Clear
- Electric brushes will automatically stop if jammed by dirt or long fibers during use. If this occurs, clear them before continuing.
- To avoid potential injury, detach the brush from the vacuum before removing entangled objects.
Caution: Beware of sharp objects trapped in the roller.
Brush Accessory Uses
1. Crevice Tool:
Narrow crevices, including skirting boards, corners, and stairs.
2. Dusting Brush:
Sofas, chairs, and other soft furnishings, and flat surfaces such as desks and shelves.
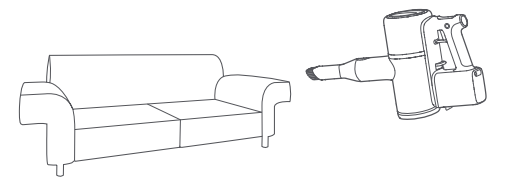
Tip: The Dusting Brush can also be used on its own to dust the vacuum and other items around the house.
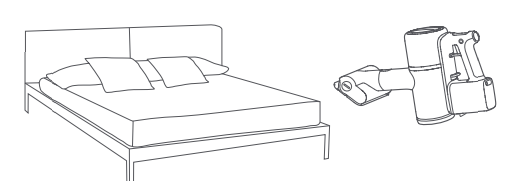
3. Motorized Mini-Brush:
Cleaning dust from beds, sofas, and soft furnishings to avoid mites.
4. Multi-surface brush:
Connect to the baton for cleaning low and medium pile carpets. It can also be used on tiles or other floor surfaces.
Carpet Boost is automatically activated when the Multi-Surface Brush is installed. When a carpet is detected, suction is automatically boosted for a deeper clean. It will return to the previous mode when a carpet is no longer detected.
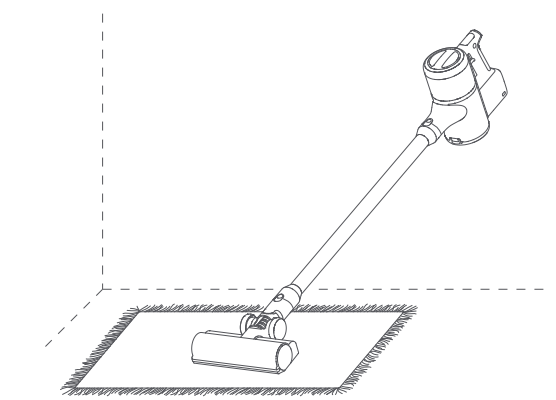
Note: Carpet Boost will not activate when vacuuming in MAX mode.
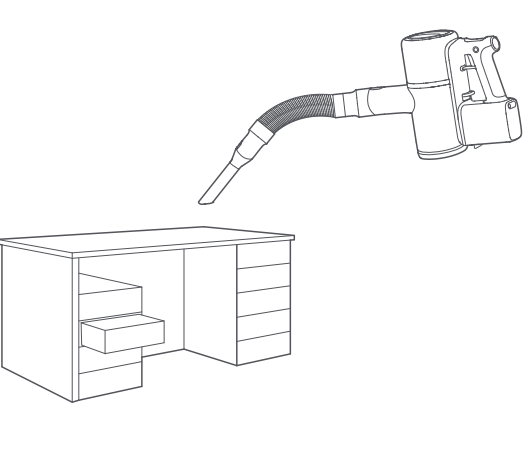
5. Flex Tube:
Connect to Dusting Brush or Crevice Tool to clean small or narrow spaces such as drawers and car interiors.
Maintenance
Product Warranty
- Only use original parts. The use of non-original parts may affect your eligibility for warranty services.
- If the filter or airflow is blocked, the vacuum will start and stop several times before shutting off. Clean the filters and the accessory before further use.
- If the vacuum is to be left unused for an extended period, fully charge it and shut it down before storing it in a cool and dry place. Do not place the vacuum in humid locations or in direct sunlight. Charge the vacuum at least once every 3 months to prevent damage to the battery
Cleaning the vacuum
Use a soft dry cloth to wipe the vacuum.
Cleaning the dustbin
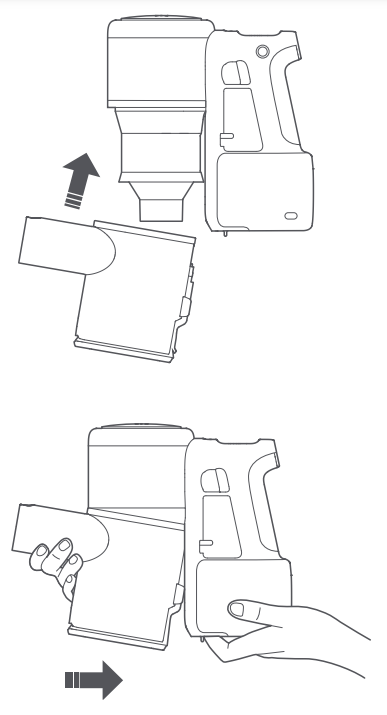
1. When the dustbin is full, suction will be reduced. Empty it before continuing with vacuuming. Before cleaning the dustbin, disconnect the vacuum from mains power and keep it inactive.
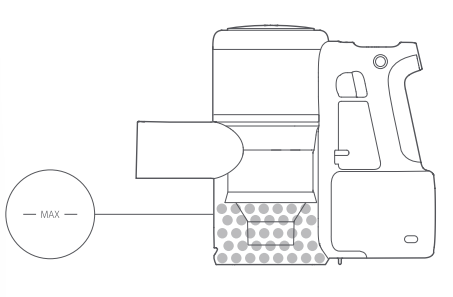
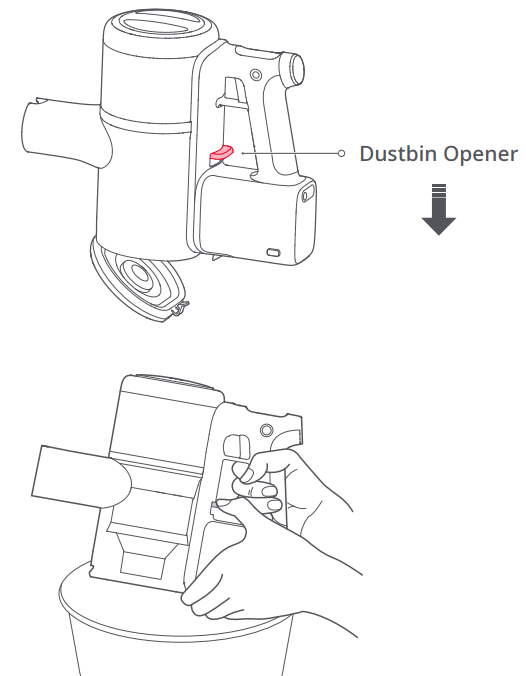
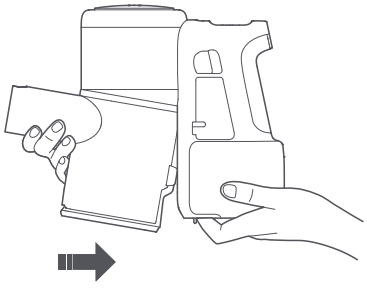
2. To empty the dustbin, push the Dustbin Opener on the front of the handle in the direction of the arrow to open it, then empty it into a bin. The dustbin should be emptied at least once a week.
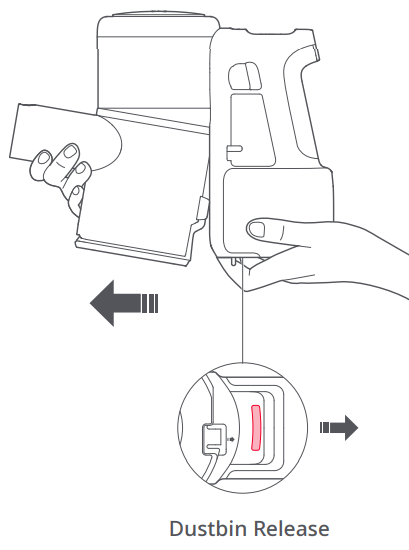
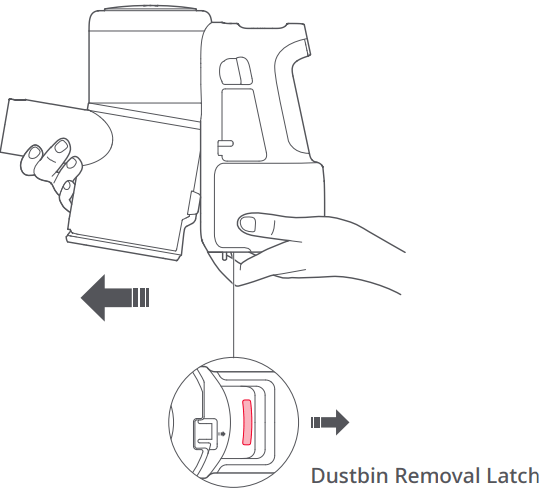
3. Push the Dustbin Release next to the dustbin after emptying it to remove the dustbin for cleaning.
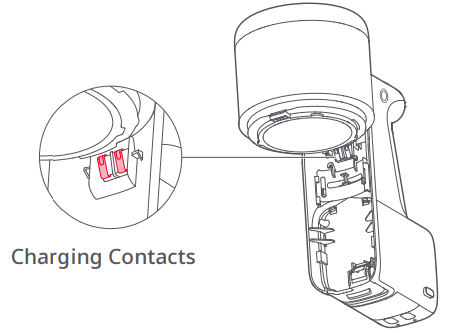
4. The dustbin should be rinsed with water at least once a month. Charging contacts should also be wiped with a soft, dry cloth once a month.
Note: Do not clean the dustbin with detergents, polishes, or air fresheners. Do not put the dustbin in a dishwasher or any similar appliance
5. When the dustbin is thoroughly dry, reinstall it as shown.
Dustbin Installation
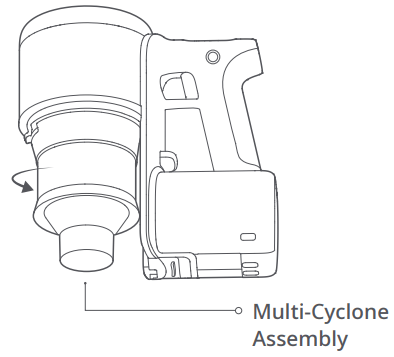
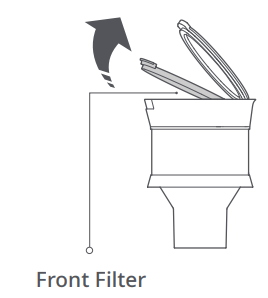
Cleaning the Front Filter and Multi-Cyclone Assembly
* Front Filter and Multi-Cyclone Assembly should be cleaned at least once a month
Notes:
- Disconnect the vacuum from power before cleaning it, and avoid squeezing the Trigger during cleaning.
- Inspect and clean the Front Filter according to the manual regularly to ensure optimum vacuum performance.
- If cleaning fine dust or operating in MAX mode, the Front Filter may require more frequent washing.
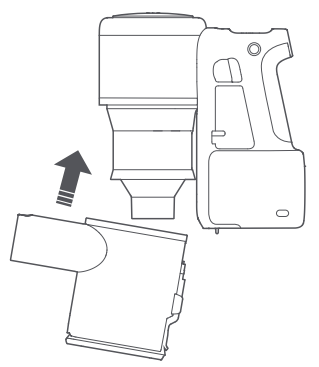
1. Remove the Dustbin as shown.
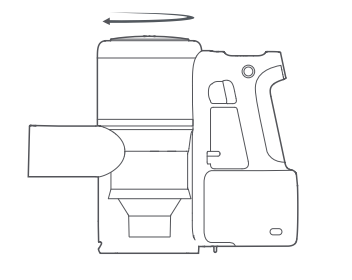
2. Rotate Multi-Cyclone Assembly counterclockwise as shown.
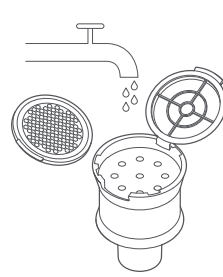
3. Open the front filter cover and remove the filter from the cyclone assembly
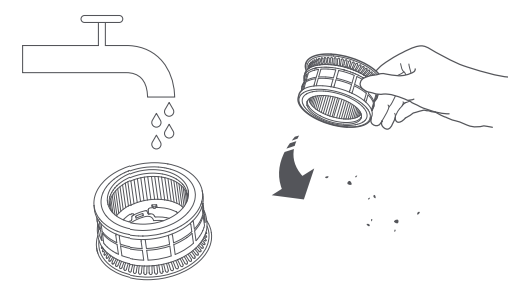
4. Rinse the filter and cyclone assembly with cold water until clean, Shake off excess water.
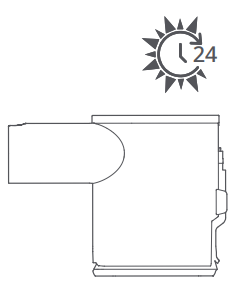
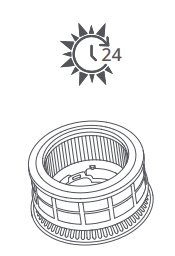
5. Leave 24 hours for the Front Filter and Multi-Cyclone Assembly to dry thoroughly.
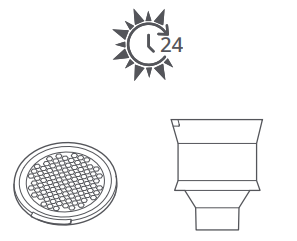
Caution: Do not clean the filter in a dishwasher, washing machine, tumble dryer, oven, microwave, with hot air, or near a fire.
6. After drying, re-assemble the Front Filter and Multi-Cyclone Assembly
Front Filter and Multi-Cyclone Assembly Installation
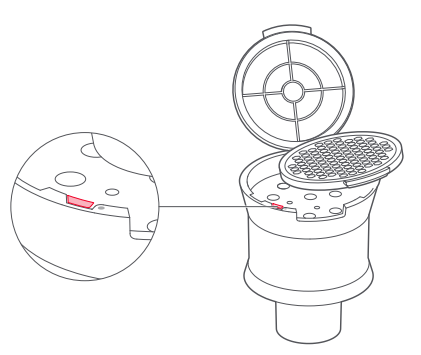
1. Position the Front Filter, as shown.

2. Install the Front Filter from the right of the Multi-Cyclone Assembly and gently push it to the left to disengage the "No Filter Protection Lock". Once the lock is nested into its slot, press down on the filter to secure it in place.
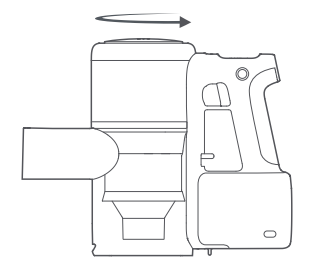
3. Close the front filter cover, align the cyclone assembly with the vacuum as shown, and rotate clockwise to reinstall.
4. Tilt the dustbin and slot it back onto the vacuum.
5. Gently push the dustbin in the direction shown until you hear a click signaling that it is secured.
Cleaning Rear Filter
* Washing the Rear Filter every two months is recommended
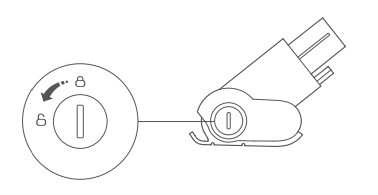
1. Remove the Rear Filter by turning it counterclockwise then pulling it off.
2. Rinse the Rear Filter inside with water, rotating it while rinsing to clean between all gaps. Lightly tap the filter against the sink after rinsing to dislodge any remaining dirty water.
3. Repeat this process 4-5 times or until the filter is clean.
4. Allow 24 hours for the filter to dry thoroughly.
5. When dry, reinstall the filter by aligning it with the unlock mark, slotting it into the vacuum, then turning clockwise to lock it in place.
Cleaning the Rollers
Follow these instructions when inspecting and cleaning the Rollers to ensure optimum performance. Inspection and cleaning should be performed regularly. Before removing the roller, remove the accessory from the vacuum to avoid accidental damage.
Note: The Motorized Mini-Brush roller must be removed and cleaned separately. As there are electrical components and bearings in the Motorized Mini-Brush and Multi-Surface Brush rollers, do not wash them with water.
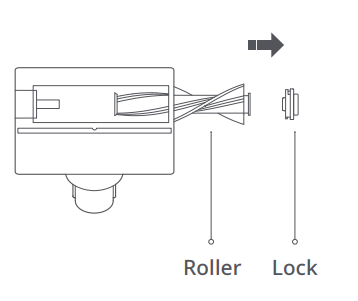
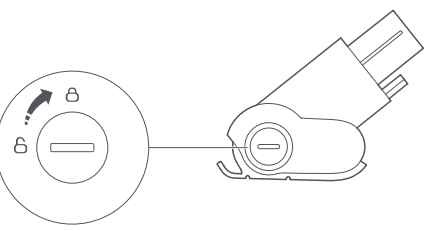
Cleaning the Motorized Mini-Brush
1. Hold the brush so that the locking mechanism faces you. Turn the lock counterclockwise and remove it.
2. After removing the locking mechanism, remove the roller.
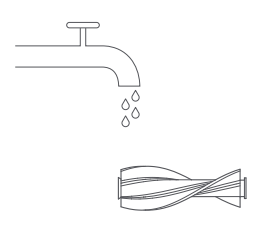
3. Clean and wash the roller.
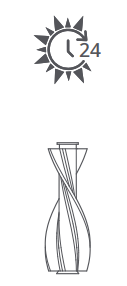
4. Place the roller vertically and leave it to dry for at least 24 hours.
5. When the roller is thoroughly dry, reinstall it.
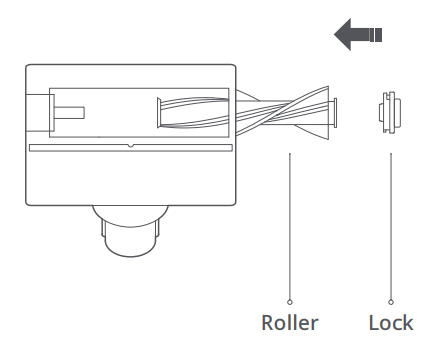
6. Hold the brush so the locking mechanism faces you. Place the roller in position, then turn the lock clockwise to lock it in place.
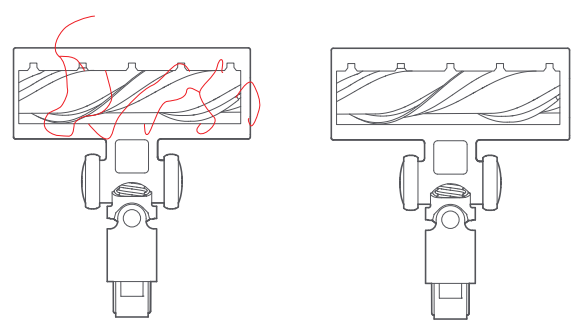
Cleaning the Multi-Surface Brush
- Turn the brush head over with the bottom facing you. Look for debris, including hair and fibers on the head or in the bearings.
- Remove all debris. Use scissors if necessary.
Troubleshooting
Error messages displayed onscreen
If the vacuum is not operating properly, the screen will display an error message. Check the screen and then read the table below to resolve any issues.
| Error Severity |
Screen |
Solution |
|

|
Low battery. Recharge before use. |
Low battery. Recharge before use. |
| Abnormal temperature. Wait for normal battery temp. |
Place vacuum in a cool place. Wait for normal battery temp. |
| Abnormal temperature. Wait for normal battery temp before recharging. |
Disconnect vacuum from power and place it in a cool place. Wait for normal battery temp before recharging. |
| Check accessory. The accessory may be jammed. |
Check if the accessory is jammed. See Maintenance and Warranty for details. |
| Airflow blocked. The accessory or the filters may be clogged. |
Check for blockages in the accessory or the filters, and empty the dustbin if it is full. |
|

|
Internal error. Contact customer support. Error code 0X |
Contact customer support and provide the error code |
| Charging error. Contact customer support. Error Code 0X |
| Fan error. Contact customer support. Error code 0X |
Other errors
| Error |
Solution |
| The Screen is not switching on |
- Possible insufficient power. Try again after recharging. If the product is to be left unused for a prolonged period of time, fully charge it before storing it and charge to full at least every 3 months.
- If the screen does not turn on after charging, contact customer support.
|
| Electric brush not rotating |
- The brush motor may have overheated. Let it cool before use.
- The electric brush contact point may be dirty. Wipe it with a soft, dry cloth and retry.
|
| Carpet Boost switches activates on hard floors |
- Debris may be trapped in the brush. Clear it and check that it can rotate smoothly then try again.
|
| Suction is weak |
- The Dustbin is full, and/or the filters are blocked. Empty the Dustbin and clean the filters then retry.
- The accessory may be clogged. Clean the accessory, removing any obstructions, then retry
|